


Welcome to our comprehensive review of shooting drills, where we delve into the world of firearms training to explore the most effective techniques.
Whether you’re a seasoned shooter or a beginner, these carefully selected drills are designed to elevate your proficiency, offering insights into techniques that have been honed and validated by experts in the gun industry.
In this article, we’ll introduce you to a range of carefully selected shooting drills designed to enhance your marksmanship skills and elevate your performance at the range.
As we kick off, it’s crucial that you understand that becoming proficient with firearms is a journey that requires discipline, practice, and access to the right tools—the proper drills.
Drawing upon my extensive experience in firearms training and expertise in the field, I will guide you through a detailed review of these drills, offering insights and recommendations that stem from years of hands-on experience.
Now, let’s get started…
Best Shooting Drills & Recommendations
Failure to Stop
The Failure to Stop drill, also commonly referred to as the Mozambique Drill, is a vital firearm shooting drill designed to prepare individuals for real-life self-defense scenarios. This drill not only hones marksmanship skills but also reinforces the importance of assessing the effectiveness of each shot and adjusting one’s tactics accordingly.
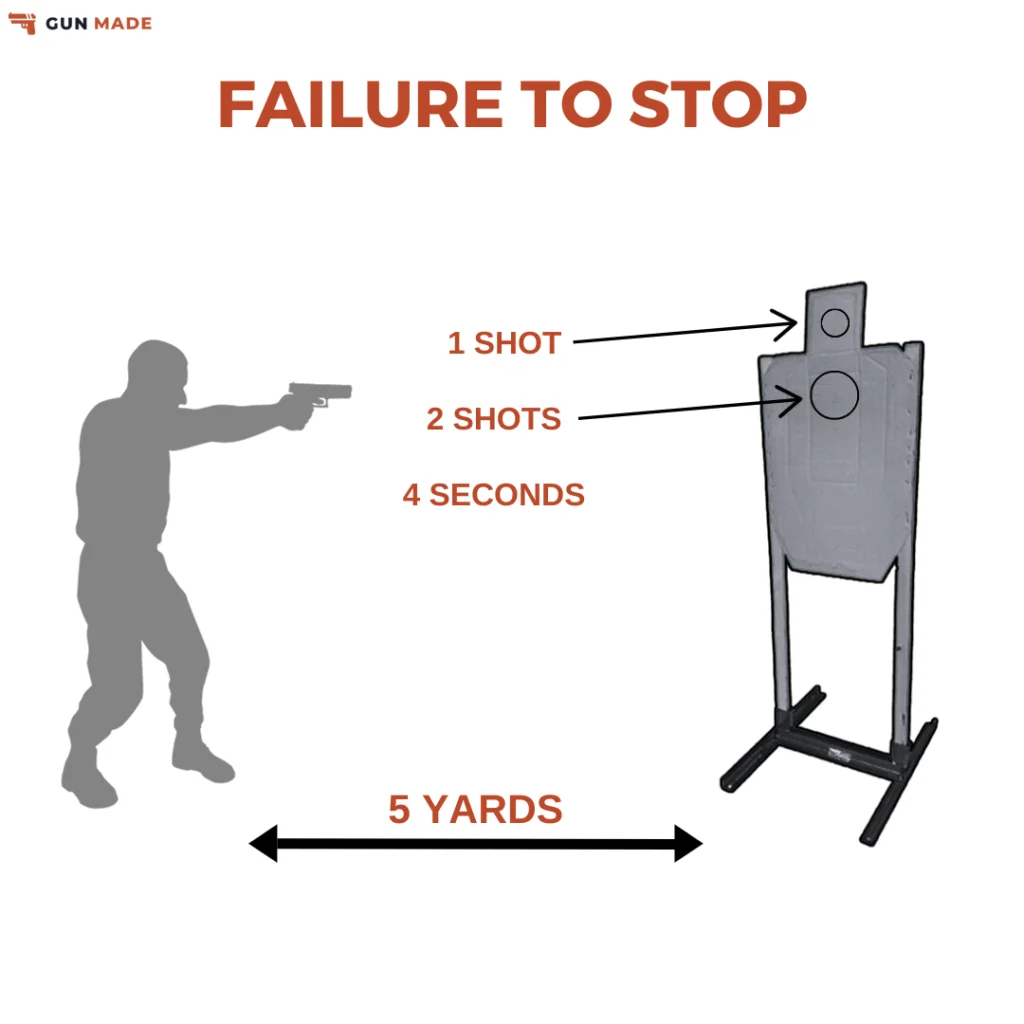
The objective of the Failure to Stop drill is to stop a threat efficiently by engaging it with a specific sequence of shots:
- Double Tap to the Chest: The shooter begins by firing two well-aimed shots to the target’s center of mass, typically the chest area. These shots are intended to incapacitate the threat by damaging vital organs and disrupting the attacker’s ability to continue their aggressive actions.
- One Shot to the Head: After delivering the double tap to the chest, the shooter transitions to a precise shot aimed at the head of the target. This shot is intended to ensure the threat is definitively stopped and is unable to pose further danger.
El Presidente
The El Presidente drill is a classic firearms training exercise that tests a shooter’s speed, accuracy, and ability to engage multiple targets efficiently. Named after an event involving a U.S. Secret Service protective detail and designed by Jeff Cooper, a renowned firearms instructor, this drill is particularly popular in practical shooting and defensive handgun training circles.
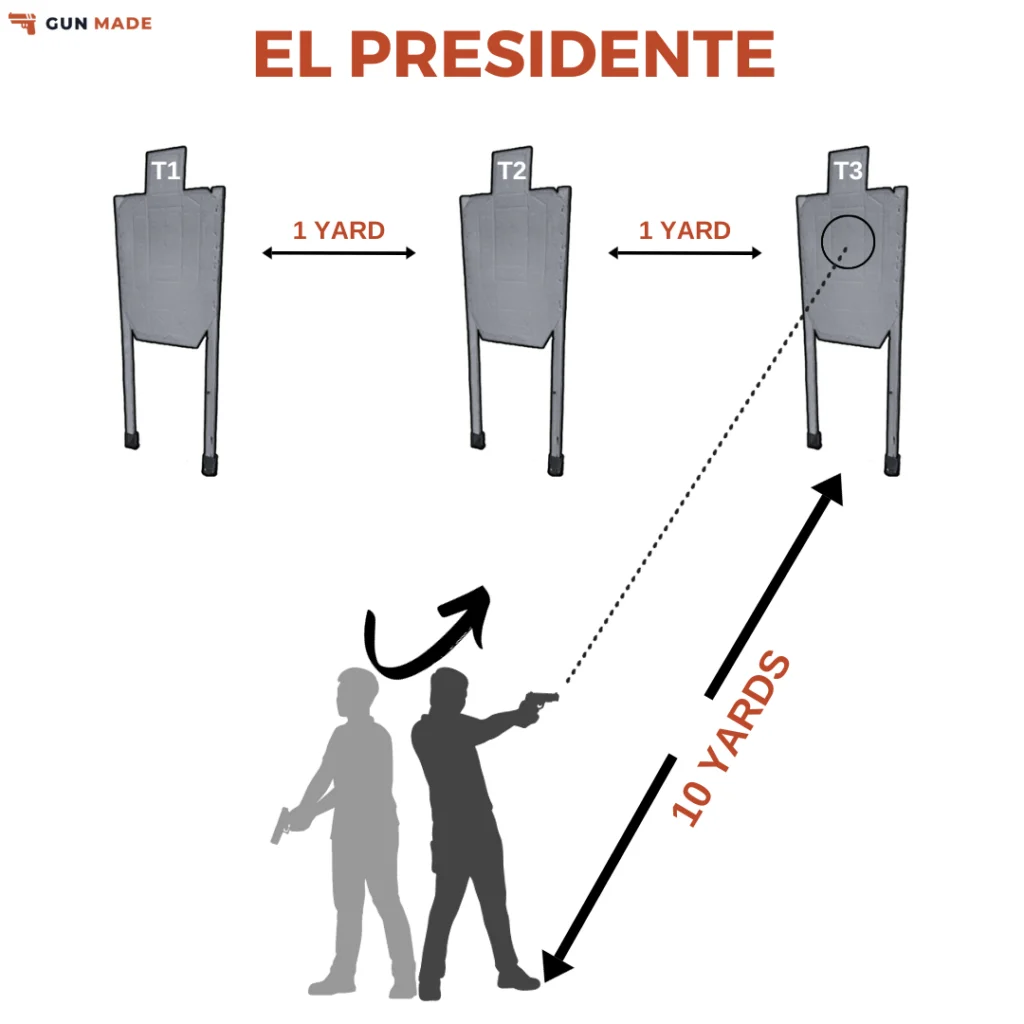
The El Presidente drill aims to assess and develop a shooter’s skills in target acquisition, marksmanship, and reloading. Here’s a breakdown of the drill:
- Target Setup: Three targets are placed in a row, usually 10 yards down range. These targets represent potential threats.
- Starting Position: The shooter stands facing away from the targets, with their back to the targets and their hands relaxed at their sides.
- Start Signal: Upon the start signal (usually a buzzer or verbal command), the shooter turns 180 degrees to face the targets, draws their firearm from a holster, and engages each target with two well-aimed shots. The shooter must quickly assess the targets and engage them in order of threat priority, typically from left to right or right to left.
- Reload: After engaging all three targets, the shooter performs a reload, which may involve dropping the magazine and inserting a fresh one or conducting a tactical reload (retaining partially used magazines).
- Re-Engagement: The shooter then re-engages each target with two additional rounds, ensuring that all threats are effectively neutralized.
- Time Measurement: The shooter’s time is recorded, including the time taken to draw, fire, and reload, emphasizing speed and efficiency without sacrificing accuracy.
Box Drill
The Box Drill, also known as the 4-Box or 4-Corner Drill, is a versatile and challenging firearms training exercise that focuses on enhancing a shooter’s ability to transition between multiple targets while incorporating movement and situational awareness.
This drill is valuable for improving tactical shooting skills and is often used by law enforcement, military personnel, and competitive shooters.
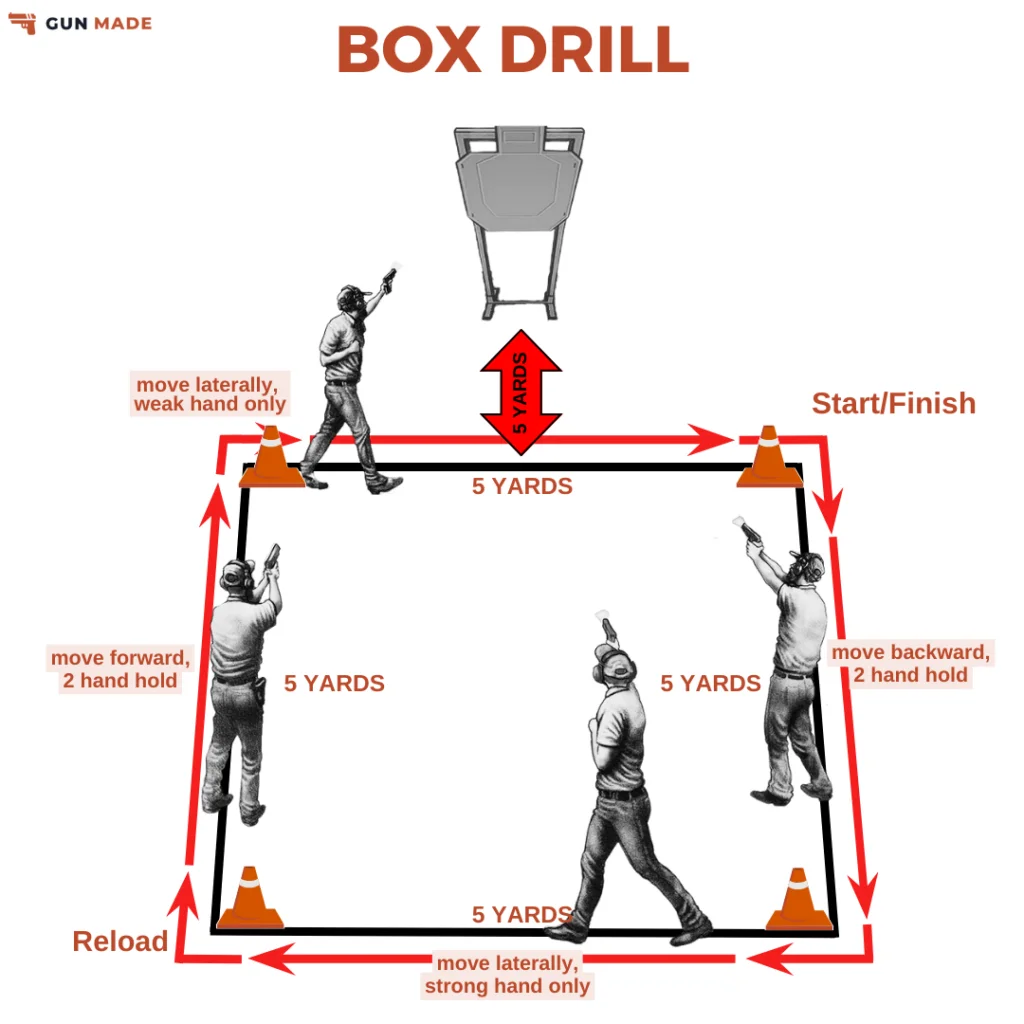
- Setup: The Box Drill typically involves placing four targets in a square formation at varying distances from the shooter. The targets represent potential threats or points of interest.
- Starting Position: The shooter begins in a predetermined start position, which can vary but often involves standing at the center of the square formed by the targets, facing one of them.
- Target Engagement: On the start signal (usually a buzzer or command), the shooter engages the first target with a specified number of rounds, typically two to three shots. The shooter must maintain accuracy while firing rapidly.
- Movement: After engaging the first target, the shooter moves to the next corner of the square (clockwise or counterclockwise) while transitioning to the next target. Movement can involve lateral steps, pivoting, or even moving forward or backward, depending on the drill’s variation.
- Repeat: The shooter continues to engage each target in the square, moving and shooting until all targets have been engaged with the designated number of rounds.
- Reload: If necessary, the shooter performs a reload during the drill, emphasizing the importance of efficient and controlled magazine changes.
- Time Measurement: The shooter’s time to complete the drill, from the initial shot to the final target engagement, is recorded. This time measurement serves as a metric for assessing speed and proficiency.
One-Handed Firing
The One-Handed Firing drill is a critical firearms training exercise designed to prepare shooters for situations where they may have to use only one hand to operate their firearm. This drill helps individuals develop proficiency and accuracy in shooting with both their strong hand and weak hand.
- Setup: The setup for the One-Handed Firing drill is typically straightforward. Shooters can use a single target or multiple targets placed at various distances, depending on their training goals.
- Starting Position: Depending on the specific exercise, the shooter begins from a ready position, with their firearm holstered or in a low-ready position.
- Strong Hand Shooting: On the start signal or command, the shooter draws their firearm and engages the target(s) using only their strong hand (the dominant hand). This part of the drill focuses on developing accuracy and control when using the primary hand.
- Weak Hand Shooting: After completing the strong hand shooting portion, the shooter holsters their firearm (if necessary) and then transitions to using only their weak hand (the non-dominant hand). Again, they engage the target(s), emphasizing accuracy and control with the less dominant hand. Shooters can also opt to just focus on strong or weak hand shooting during a training session.
- Time Measurement: While time can be recorded for this drill to track progress and measure proficiency, the primary focus is on accuracy and control rather than speed. Shooters should prioritize precise shot placement over rapid shooting in this exercise.
Shoot Two-Load Two
The “Shoot Two-Load Two” drill is a firearms training exercise designed to improve a shooter’s proficiency in magazine changes, weapon manipulation, and target engagement under time constraints.
This drill emphasizes speed and accuracy and is particularly valuable for individuals, including law enforcement officers and competitive shooters, who must quickly transition between loaded and empty magazines in high-stress situations.
- Setup: The Shoot Two-Load Two drill typically requires a semi-automatic handgun or rifle, a suitable target, two loaded magazines, and a holster or magazine pouch. The target is placed at a predetermined distance downrange.
- Starting Position: The shooter starts from a ready position with the firearm holstered and a loaded magazine in the weapon. Another loaded magazine is typically carried on their person, often in a magazine pouch or pocket.
- Start Signal: On the start signal, which can be a buzzer or verbal command, the shooter draws the firearm and fires two aimed shots at the target as quickly as possible while maintaining accuracy.
- Magazine Change: After firing the initial two rounds, the shooter performs a magazine change, quickly dropping the empty magazine and inserting a fresh one. The goal is to minimize the time it takes to complete this action.
- Additional Shots: Following the magazine change, the shooter continues to engage the target with two more aimed shots, emphasizing accuracy and control.
- Time Measurement: The shooter’s total time to complete the drill, from the start signal to the firing of the last two rounds, is recorded. The primary focus is on achieving fast, efficient magazine changes while maintaining accuracy on target.
Malfunction Clearing
The Malfunction Clearing drill is a crucial aspect of firearms training, focusing on a shooter’s ability to recognize and rectify firearm malfunctions swiftly and effectively. Knowing how to clear malfunctions is essential for maintaining weapon reliability and ensuring personal safety in high-stress situations, whether for self-defense, law enforcement, or military applications.
- Setup: The Malfunction Clearing drill can be conducted with various firearms, including handguns, rifles, and shotguns. The setup typically involves a functioning firearm, one or more dummy rounds, and a safe shooting range or training environment. Ideally, a friend will load the magazine for you, so you can’t anticipate where the malfunction will occur in the shooting session, but you can set up the mag yourself if you don’t have a shooting buddy.
- Starting Position: The shooter begins with the firearm in a ready state, either holstered, shouldered, or at the low-ready position, depending on the firearm type and training goals.
- Firearm Malfunction: To simulate a malfunction, a dummy round is intentionally inserted into the firearm’s chamber, creating a scenario where the weapon fails to cycle correctly.
- Recognition: The shooter must promptly recognize that a malfunction has occurred. Common malfunctions include failures to eject (stovepipes), failures to feed, double feeds, and failures to fire.
- Immediate Action: The shooter then performs the appropriate malfunction clearing technique based on the type of malfunction encountered. This may involve tap-rack-bang (for failures to fire or failures to eject), remedying double feeds, or other specific actions tailored to the malfunction.
- Re-Engagement: Once the malfunction is cleared, the shooter re-engages the target or continues with the training scenario.
- Time Measurement: While the primary focus is on the shooter’s ability to correctly identify and clear malfunctions, some drill variations may include time constraints to add an element of stress and urgency.
Why You Should Trust Us
Over my years as a firearms writer and recreational shooter since childhood, I’ve gained extensive hands-on experience with firearms, giving me a thorough understanding of firearm safety, proficiency, and responsible gun ownership.
My journey in firearms has involved rigorous training, countless hours of practice, and exposure to real-world scenarios, all of which have shaped my knowledge and judgment, making me a credible source of information.
Furthermore, my professional background underscores my unwavering commitment to adhering to strict safety protocols and regulations, reinforcing my dedication to responsible firearm use. I aim to provide accurate and dependable insights into firearms, shooting drills, and related subjects.
Best Tools for Shooting Drills
You need the right tools to get the most out of your training session. Like a shot timer and dummy rounds. Here are a couple of our favorites:
Shot Timer: PACT Club Timer III
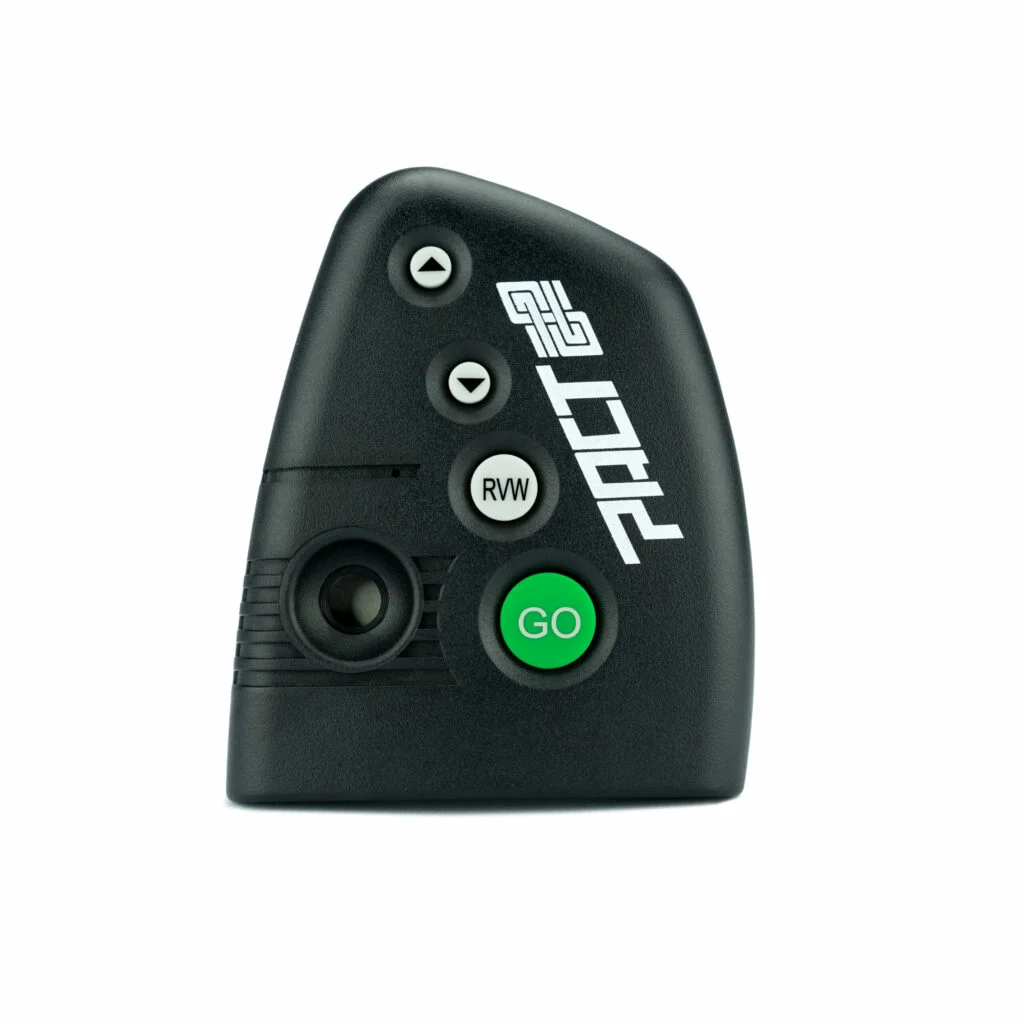
The PACT Club Timer III is a top-notch shot timer that has garnered immense popularity among shooters. With compact dimensions (5.5 × 4.75 × 2.5 inches) and a lightweight build (0.58 pounds), it’s highly portable for trips to the range. Powered by a 9-volt alkaline battery, it offers extended operational life without needing frequent battery changes.
This shot timer provides precise shot timing, a critical aspect of enhancing shooting speed. It shines with its customizable par time settings, allowing shooters to tailor training sessions to their specific needs. The large, easy-to-read display ensures you can closely monitor your shooting performance with ease.
Though lacking Bluetooth connectivity, which some shooters may desire for data transfer, the Club Timer III compensates with its exceptional features. It is versatile across various shooting disciplines, from USPSA to IPSC. However, it relies on non-rechargeable batteries, which might not suit those seeking eco-friendliness. Additionally, it lacks water resistance, requiring care in adverse weather conditions.
For more shot timer recommendations, check out my round-up of the best shot timers.
Snap Caps
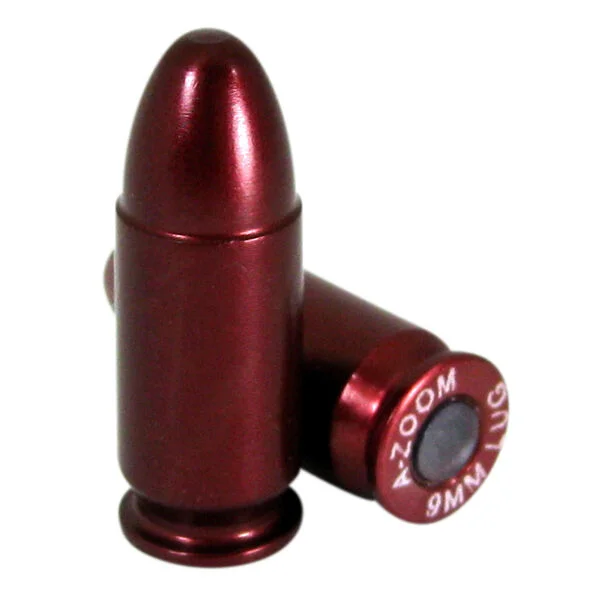
A-Zoom Snap Caps are an essential tool for any firearm owner, and they have consistently proven their worth in the world of firearms training and maintenance. These snap caps are essentially dummy rounds that replicate real ammunition’s size, weight, and shape, making them invaluable for various purposes.
One of the standout features of A-Zoom Snap Caps is their durability. Crafted from precision-machined aluminum, they can withstand thousands of dry fires without any noticeable wear or damage to your firearm’s firing pin.
This feature is particularly beneficial for practicing trigger control, malfunction drills, and even safely testing the function of your firearm without risking live ammunition.
Additionally, A-Zoom Snap Caps are available in a wide range of calibers, ensuring that shooters can find the right fit for their specific firearms. Whether you’re a novice shooter looking to develop proper handling skills or an experienced marksman fine-tuning your techniques, these snap caps provide a safe and cost-effective way to do so.
Overall, A-Zoom Snap Caps are an indispensable tool for firearm owners, offering durability, versatility, and enhanced safety in various aspects of firearms training and maintenance.
Other great options include Tipton Snap Caps and NewBold Dummy Rounds.
FAQs
What is the 3 seconds or less drill?
The “3 Seconds or Less” drill is a self-defense shooting exercise where the shooter must draw, aim, and fire accurately on a target within a strict 3-second time frame to simulate a real-world threat scenario.
How many rounds do you need for pistol practice?
The number of rounds needed for pistol practice can vary widely depending on your goals. 100-200 rounds per session is a good starting point for basic proficiency and marksmanship. However, advanced training or competition preparation may require 300-500 rounds or more to focus on specific skills and drills.
Does grip strength help with pistol shooting?
Yes, grip strength is crucial for pistol shooting. A firm and consistent grip helps control recoil, reduces muzzle rise, and improves accuracy. It ensures the firearm stays stable during rapid fire, aiding in shot placement. Grip strength training can enhance shooting performance and overall firearm control.
Conclusion
We’ve taken you on a thrilling journey through the world of shooting drills, from precision shots to rapid-fire maneuvers, all in the pursuit of enhancing your marksmanship skills. Each drill has its merits, catering to various aspects of firearm proficiency.
Now, it’s your turn! We’d love to hear your thoughts and experiences with these shooting drills. Did one of them revolutionize your shooting game? Do you have a favorite drill that didn’t make the list? Leave a comment below and share your insights. Remember, every shot counts in this discussion, and your input may just help another shooter hit that elusive bullseye!