


Introduction
I have fond memories of assembling Legos as a kid. I spent endless hours looking at instructions, finding pieces, and putting blocks together to make epic creations. While my childhood is long over, my love of building has not stopped.
The folks at Davidson Defense have helped scratch my itch to build with the LR-308 6.5 Creedmoor Upper Build Kit. The specific kit I am building is the Davidson Defense ‘Ferrule’ 20” LR-308 6.5 Creedmoor Nitride Rifles Complete Upper Build Kit.
I had a blast assembling this kit, and as I went through the process, I tried to document my experiences and the steps I followed to get the kit put together. You can find a complete AR-10 build guide at the end of this article. Hopefully, my experience assembling the kit will help you assemble yours once you grab one.
After building the kit, I put a Vortex Viper scope on the rifle and took it to the range to put it through its paces. Keep reading to see my experiences building and shooting the Davidson Defense ‘Ferrule’ 20” LR-308 6.5 Creedmoor Nitride Rifles Complete Upper Build Kit.
If you don’t have interest in building an AR-10, go check out our guide on the best complete AR-10 rifles.
Davidson Defense ‘Ferrule’ 20” LR-308 6.5 Creedmoor Nitride Rifles Complete Upper Build Kit Build Review
Why Build An AR
One of the first questions you should ask yourself when deciding where you want to build an AR-10 or AR-15 is why you want to build one as opposed to buying an already completed rifle. There are several reasons.
First, building your own AR allows you to customize your rifle. We all have different likes, wants, and desires. Building your AR lets you pick and choose which components make up your AR.
Second, there is the possibility of saving some money……who are we kidding? If we wanted to save money, we would not be spending every last penny of our hard-earned money on the coolest guns we can afford. Yes, there is the possibility of saving some money when building your own AR.
I suspect many of you are like me, though, and saving money only means you have more money to spend on ammo.
Third, building your own AR helps to give you a better understanding of how your rifle works and how to troubleshoot any issues you may experience with the rifle down the road. Additionally, when you want to upgrade your rifle one day, you will have the skills that you learned when building your AR.
The knowledge and skills you gain from building your AR will be useful someday.
Finally, building your own AR can be incredibly fun and fulfilling.
I had an absolute blast putting the Davidson Defense AR-10 kit together, and I am already looking forward to finding another project to start. In my mind, building ARs is like legos for kids. You can customize your AR to fit your needs, try new things out, and if the desire arises, you can take the thing apart and build it again.
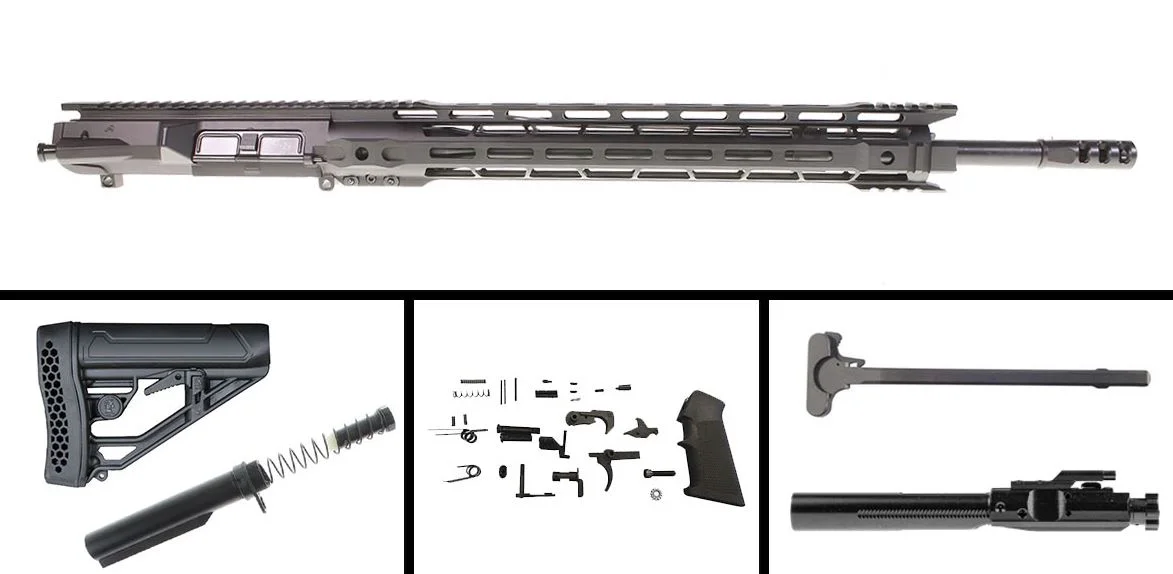
Specifications
| Caliber | 6.5 Creedmoor |
| Barrel | ELD Performance Alpha Series LR-308 20″ 6.5 Creedmoor, Rifle Gas, 1-8 Twist, Nitride Barrel with Nickel Boron Extension |
| Muzzle Device | Helius Tactical 1776 Muzzle device 5/8X24 Muzzle Brake |
| Upper Receiver | Aero Precision .308 M5 Upper Receiver Assembled |
| Handguard | Gauntlet Arms “Lancaster” High Profile 17″ LR-308 M-Lok Handguard |
| Bolt Carrier Group | Recoil Technologies .308 Win, 7.62 NATO, 6.5 Creedmoor, .243 Win Bolt Carrier Group |
| Charging Handle | Omega Manufacturing LR-308 Charging Handle Aluminum |
| Gas Tube | Rifle Length Stainless Steel Gas Tube AR-15 AR-15 |
Pros & Cons
- Easy to assemble
- Looks great
- Easy to customize
- Great shooter
- No included instructions
- The finish on some components appear to be lower quality
Features
Customizable Kit
Davidson Defense kits can be customized to suit the shooter’s needs and budget. You can add various parts or services to help you get your AR build off the ground. Additionally, they have lots of other parts available on their website, giving you the option to pick out what you want to have the build of your dreams.
Legos for Adults
Who doesn’t like knowing the level of care and precision put into their stuff? Who cares more about your gun than you do? With an AR-10 or AR-15 build kit from Davidson Defense, you’re the one who puts your gun together.
You can take as much or as little time as you desire assembling your firearm and ensure that the end result is exactly what you want.
What We Think About the Process
This is the second AR build kit I have completed. The first time I built an AR-15 on a Palmetto State Armory lower and with a Palmetto State Armory (PSA) build kit. Both building that AR-15 and this AR-10, I have found the process very easy and enjoyable.
The one difference between the two experiences that stands out to me is the bags containing the small parts were organized slightly better with the PSA build. This is a really minor gripe and one that would not deter me from completing another build from Davidson Defense.
How We Tested
Range
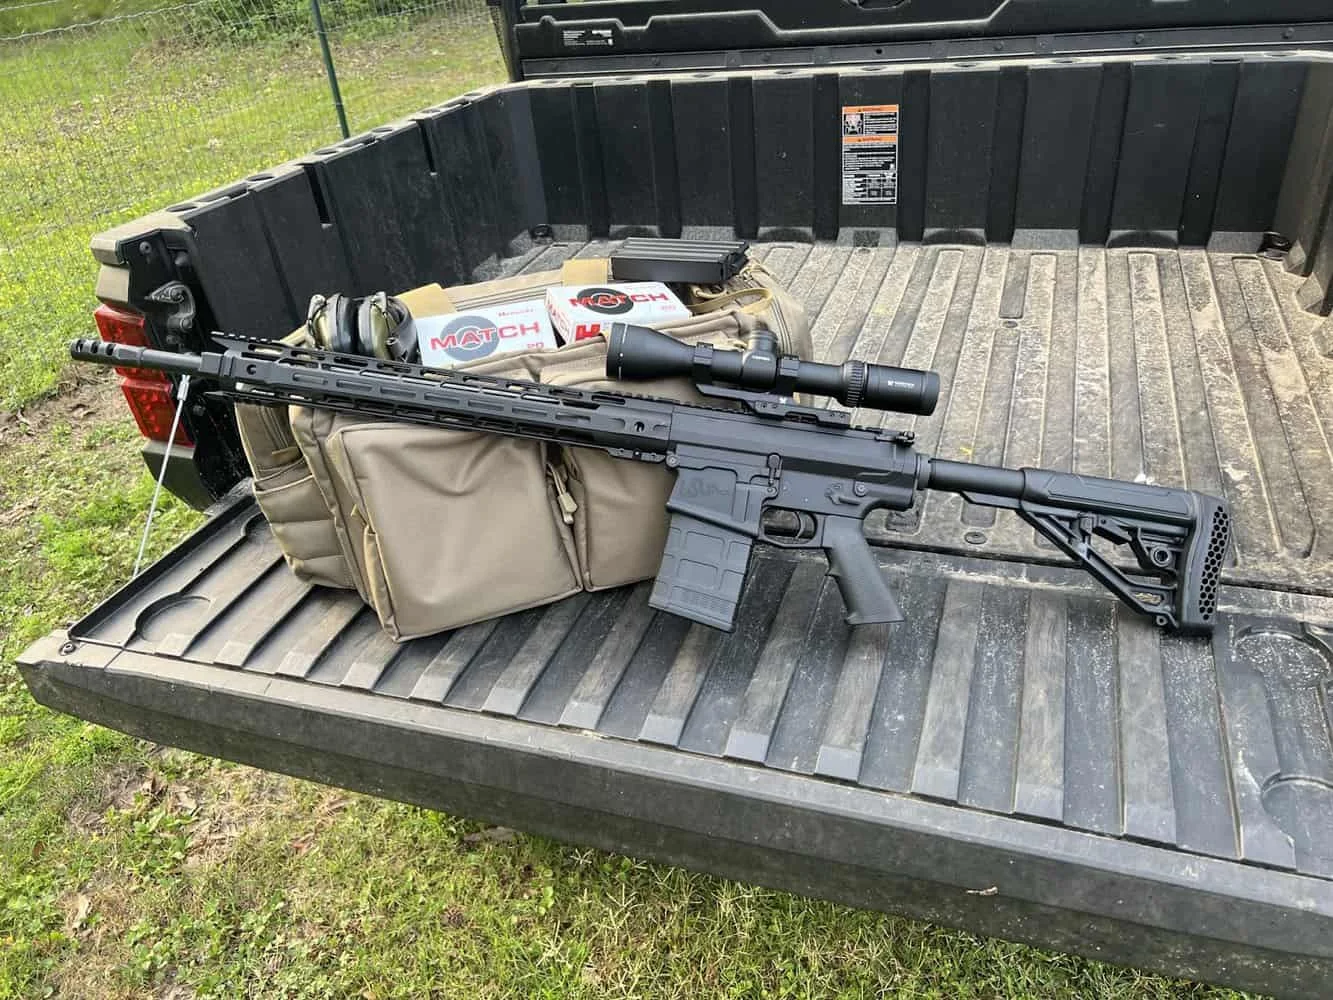
For this review, I took the rifle to Trinity Armory in Cleveland, Texas. Trinity Armory has both a pistol and rifle range for a single flat price.
For this review, I used the rifle range, which has a 300-yard regular rifle range that includes options for paper and steel shooting. For those who want to go even further, you have the option to shoot out to 450 yards, provided you can qualify for the distance.

The staff at Trinity Armory are very friendly and willing to help you have the best experience possible when shooting there.
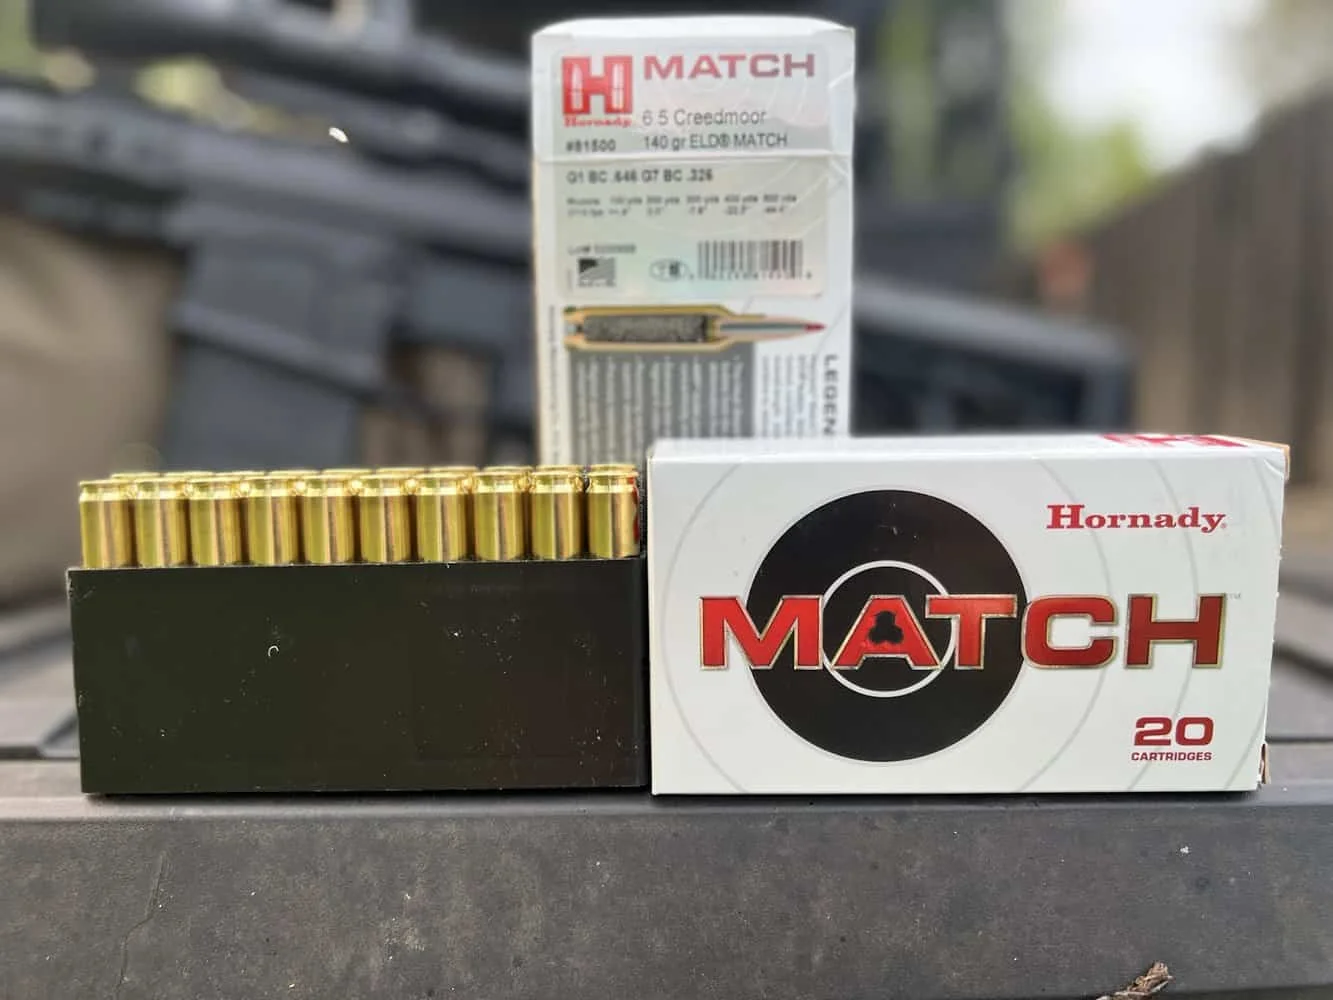
Ammo Used
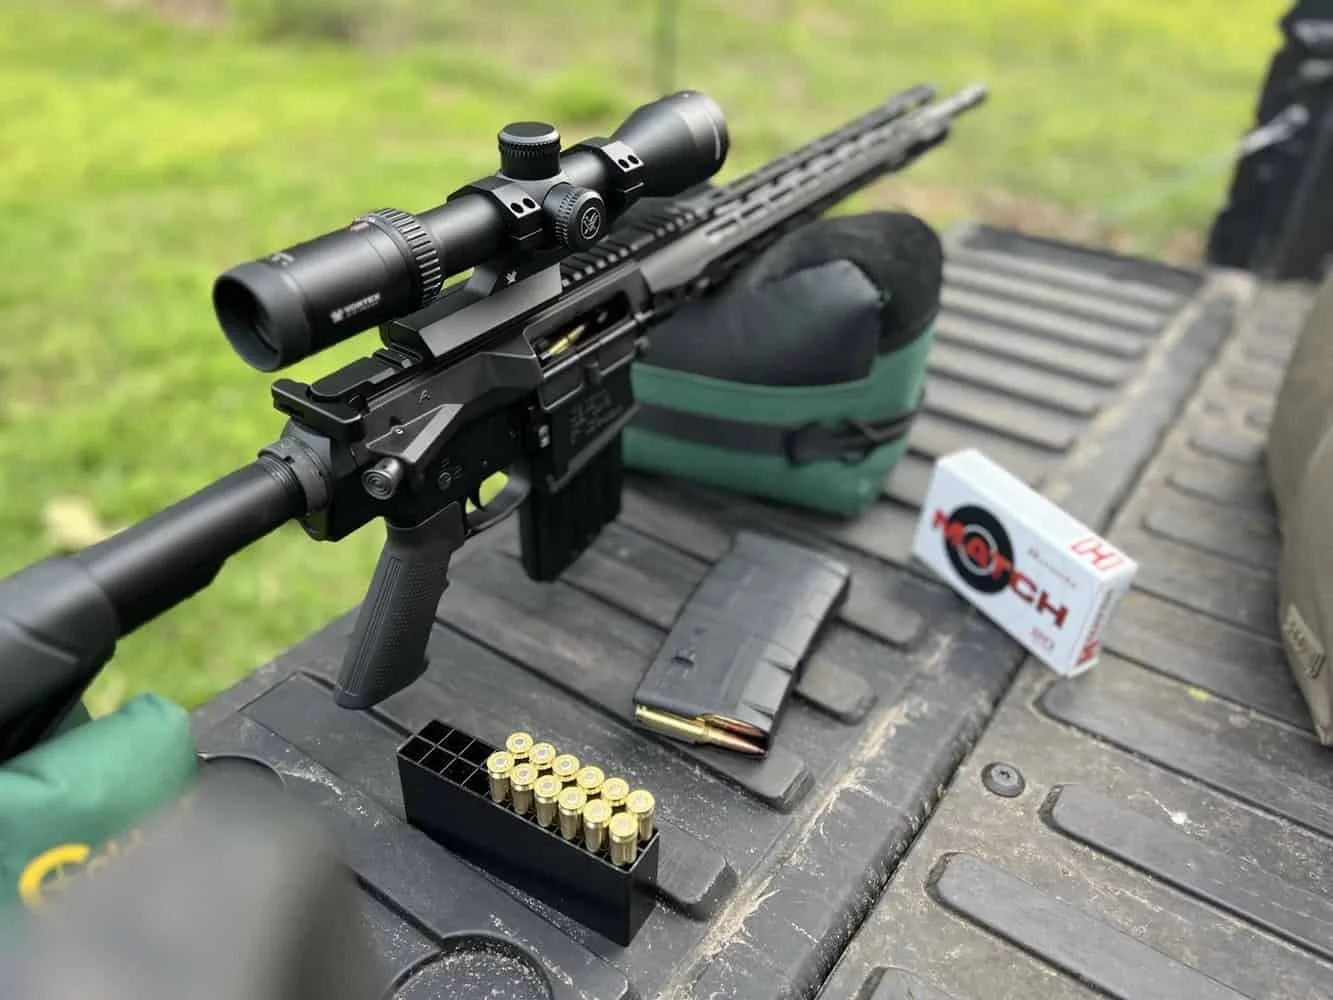
Special thanks go out to Hornady for providing the ammunition for this review.
They sent over a few boxes of their Hornady Match ammo. This ammunition fires their ELD Match bullets. The stuff was fantastic and performed exactly as you would expect Hornady ammo to perform.
Score Card
Reliability (10/10)
The AR-10 functioned fantastic for me both with the function tests at home after assembling as well as at the range. I had zero issues.
Accuracy (10/10)
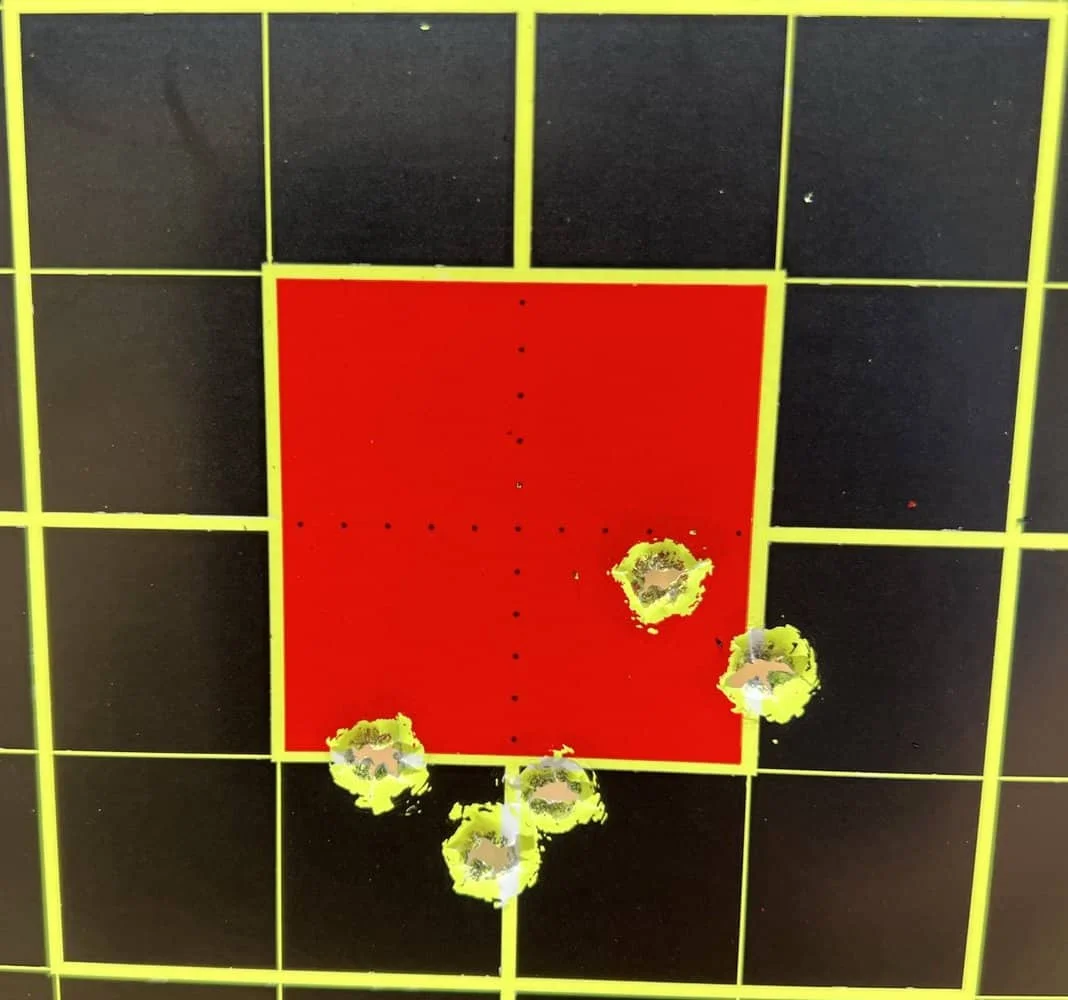
The Davidson Defense ‘Ferrule’ kit was excellent. The few flyers I had when shooting were a function of the trigger and shooter error. I would feel completely comfortable shooting this rifle past 300 yards.
I plan to put a quality aftermarket trigger in the rifle.
Ergonomics (9/10)
It’s an AR. You either love it or hate it. The only reason I took one point off is I would like to add a higher-quality pistol grip.
Customization (10/10)
It’s an AR. The world is your oyster. You can change everything.
Appearance (10/10)
The rifle looks great. It will look even better when I am at the range punching holes in paper.
Value (10/10)
This is not a $3,000 AR-10. It doesn’t pretend to be. The price of the kit plus a quality Aero Precision lower is a very affordable option for getting into an AR-10.
Accessories
LaRue Tactical MBT-2S Trigger
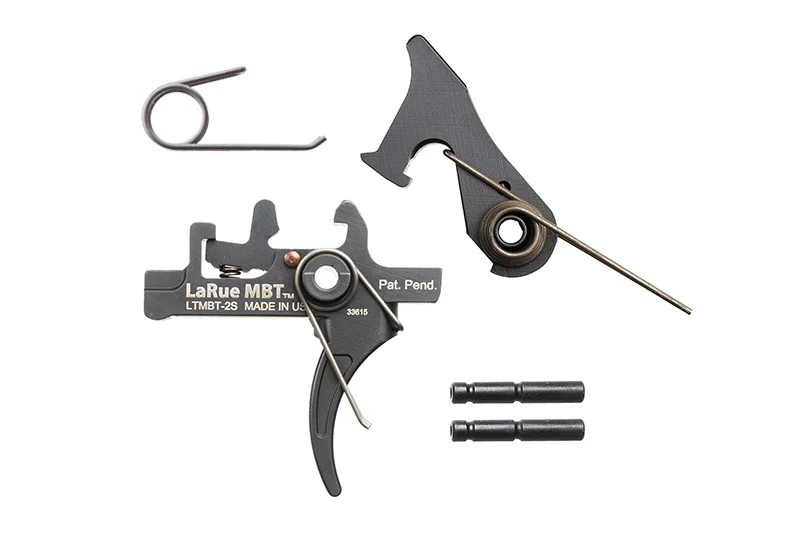
One of the quickest and easiest ways to upgrade your rifle is to upgrade the trigger. Larue is known for their high-quality triggers, and the MBT-2S fits the bill for a high-quality trigger that is a massive upgrade to this kit.
This trigger is easy to install and, when combined with the ease of completing the kit, is a no-brainer.
Hogue: AR-15 / M16: OverMolded Rubber Beavertail Grip with Finger Grooves
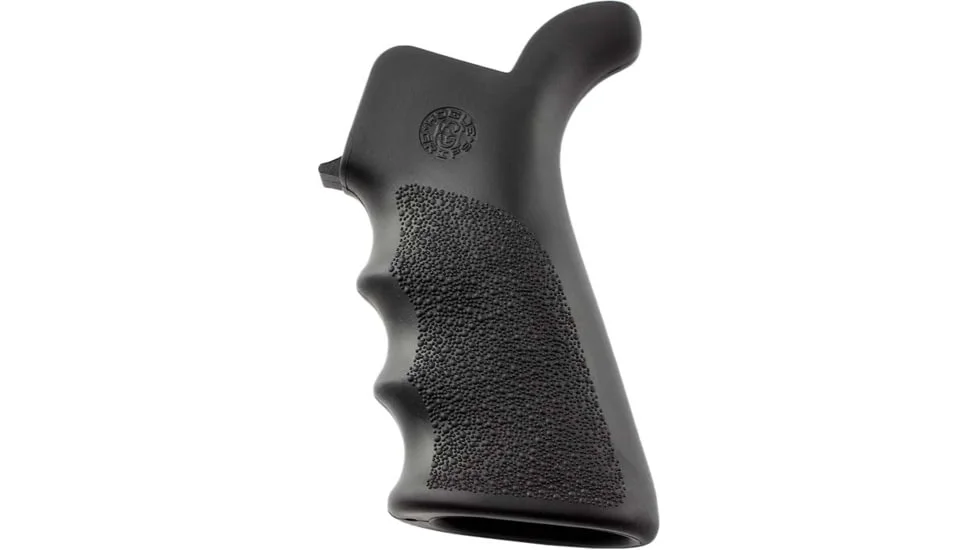
An upgraded pistol grip is another easy way to increase your quality of life with your AR-10. Even if you don’t have the new grip when you assemble your kit, the amount of time required to swap from the standard grip to an upgraded Hogue grip is minuscule.
AR-10 Build Guide
Prepping for Assembly
Inventory
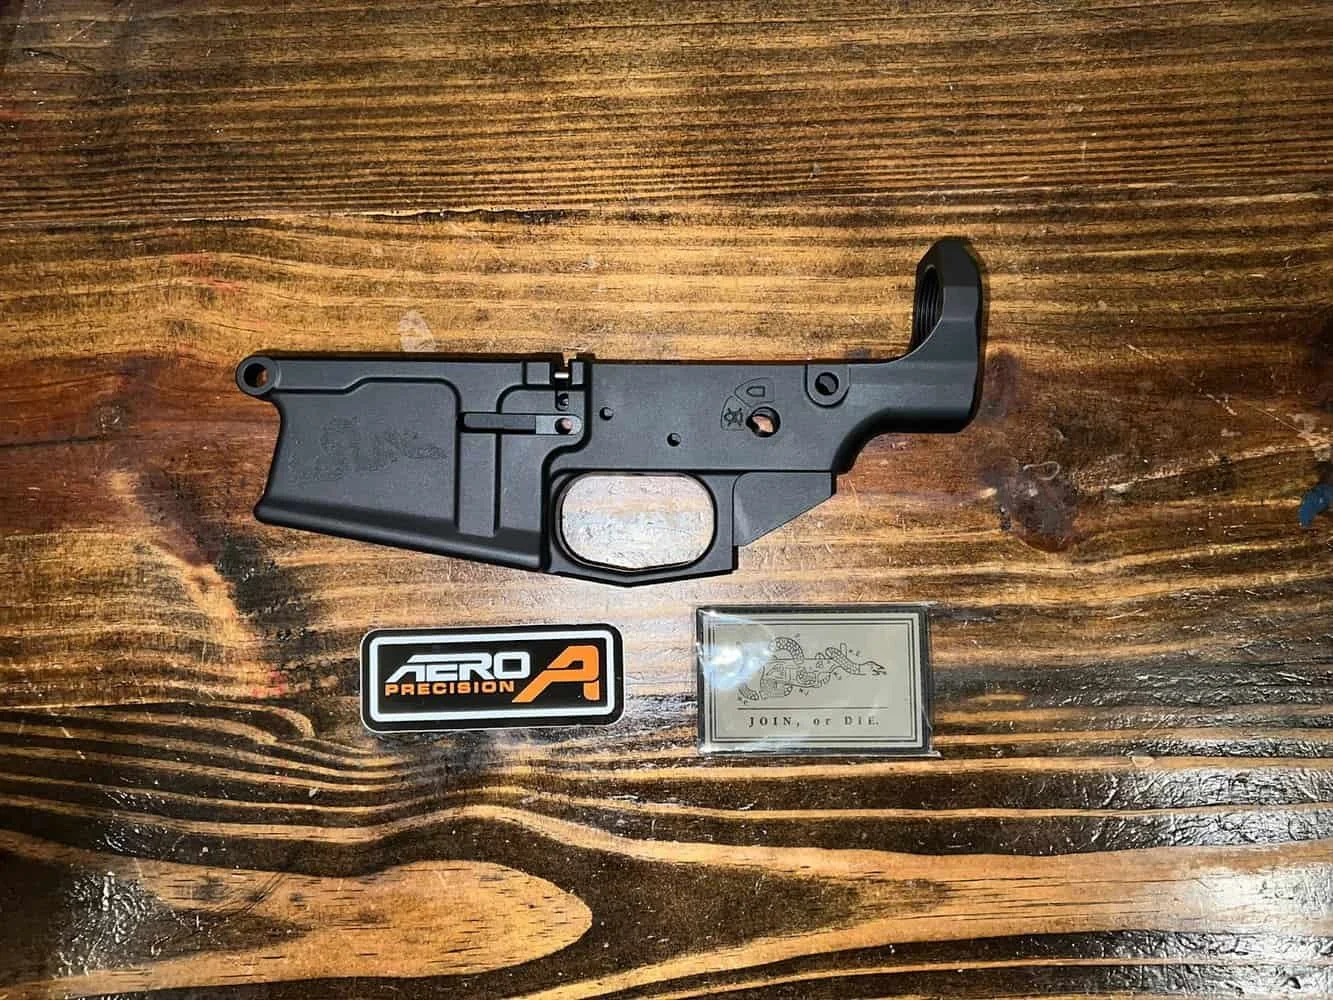
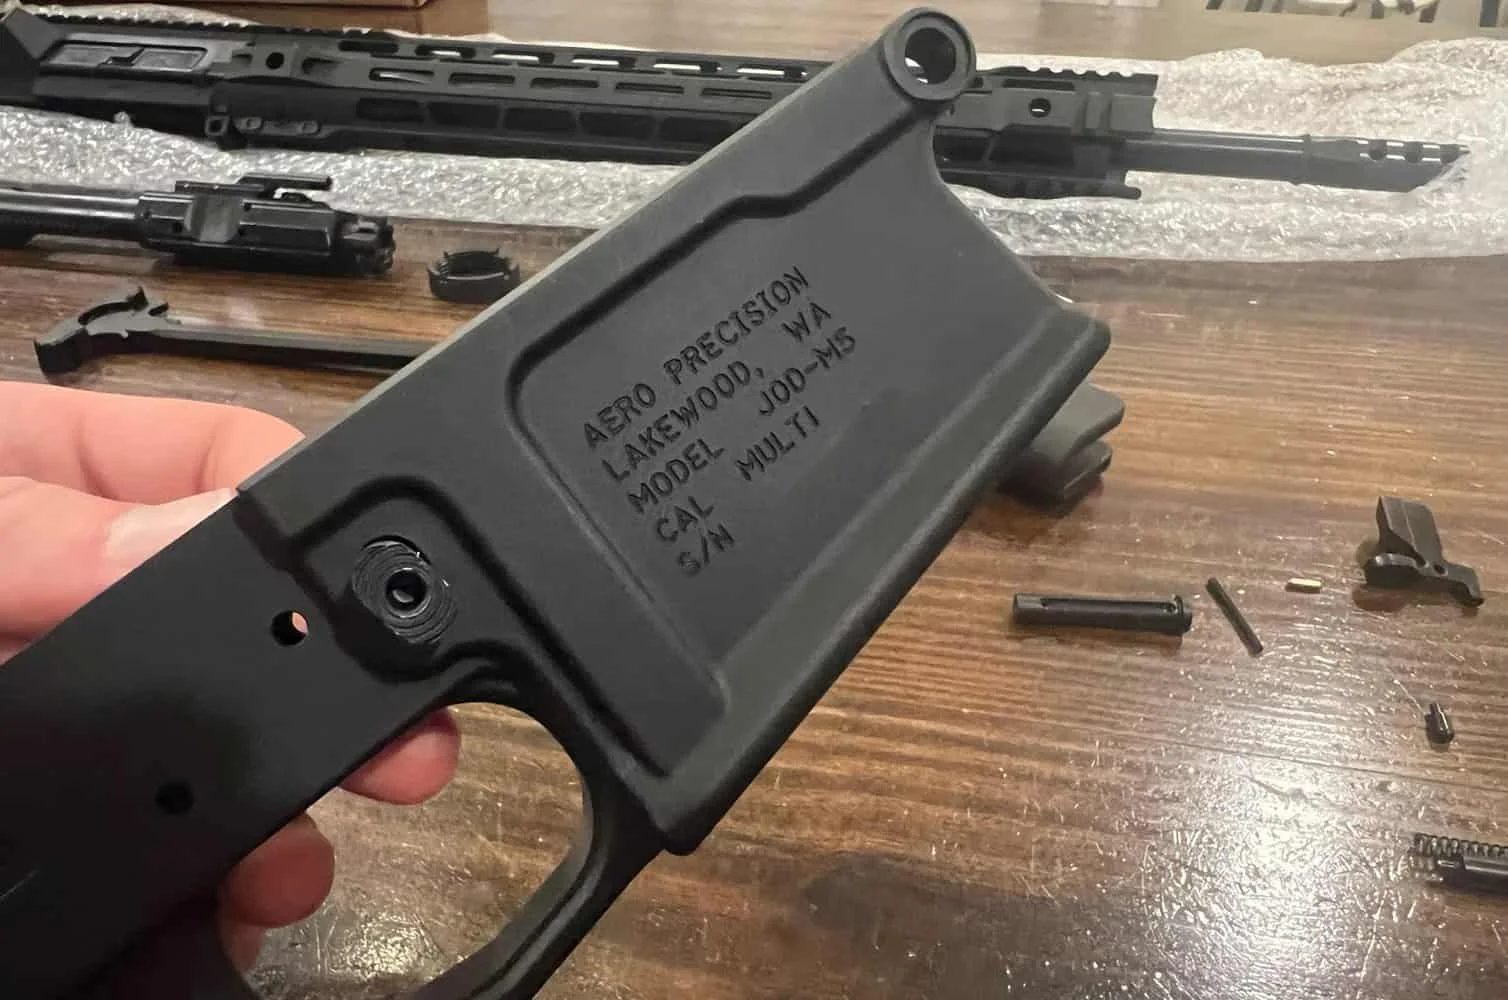
I built my kit on an Aero Precision M5 Franklin Snake lower. The entire kit, not just the lower, was sent to my FFL.
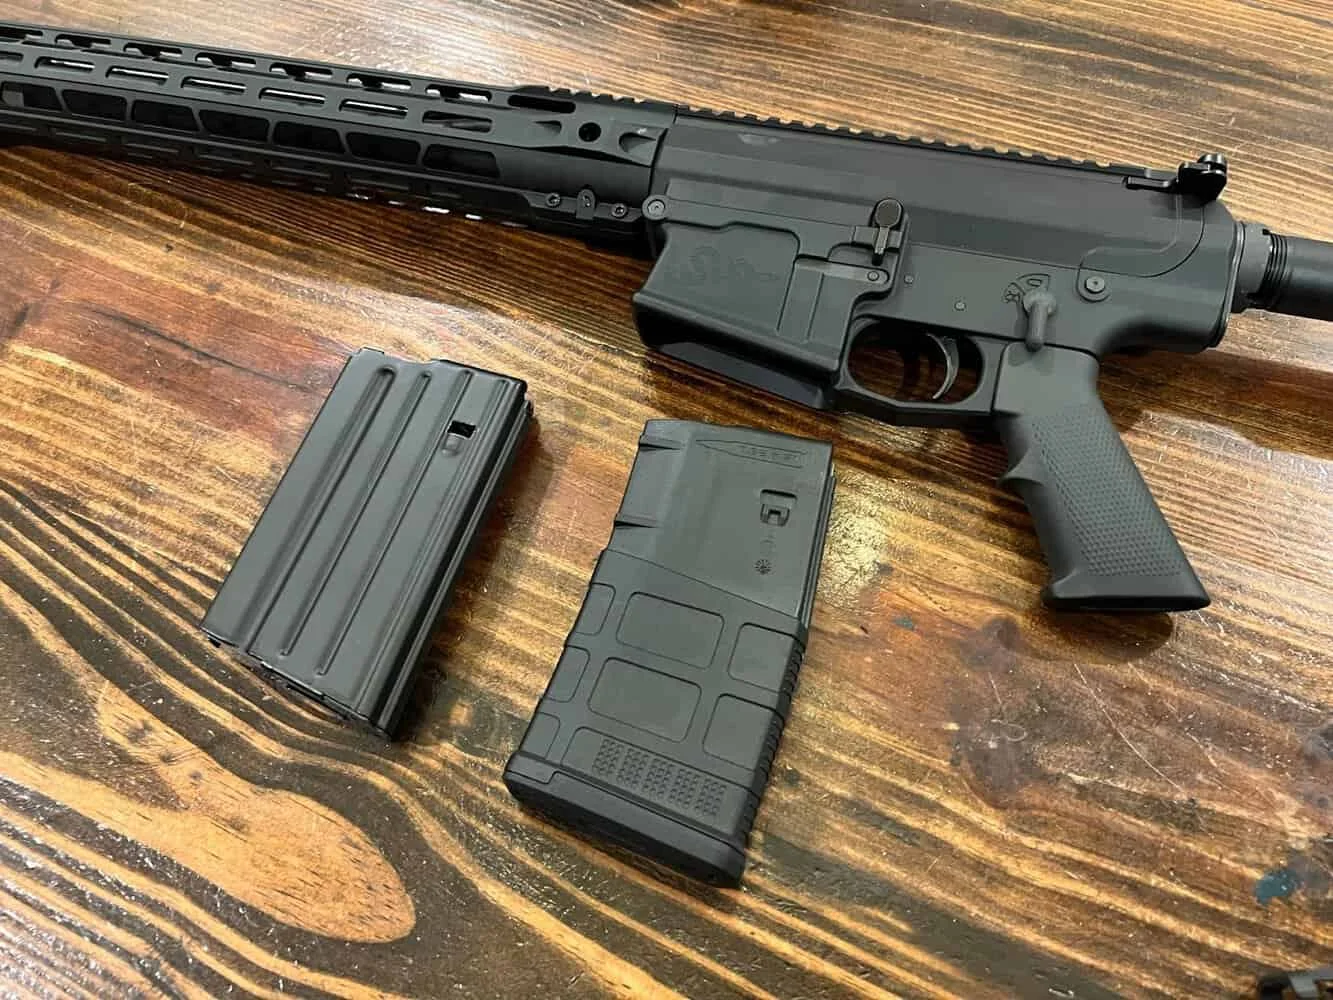
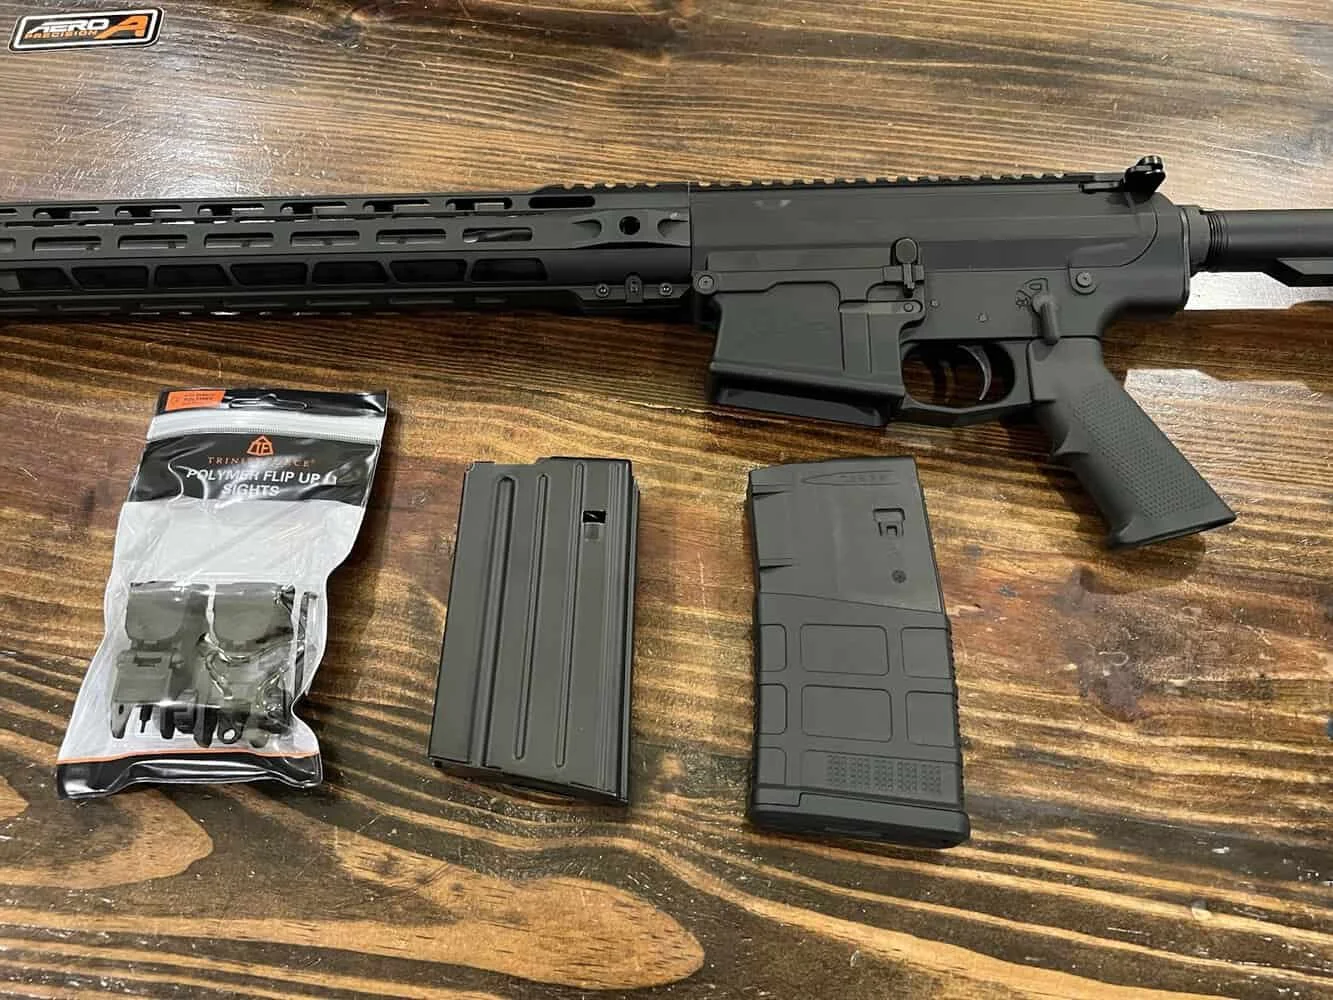
This is what I found when I picked it up. I also got a couple of AR-10 mags and a set of backup polymer sights. Those were sent in the same box as well.
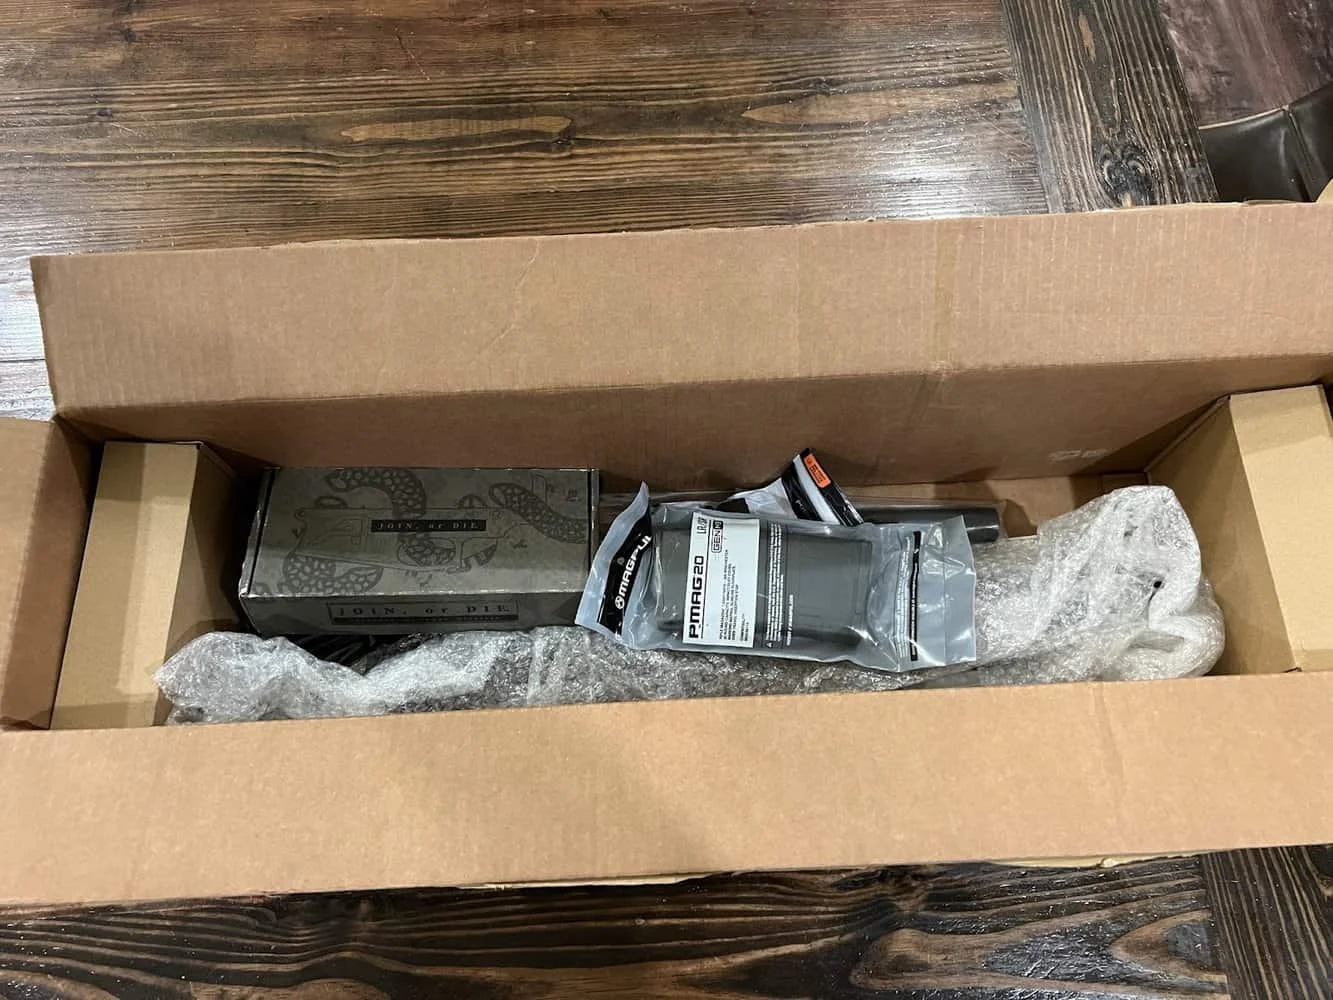
I like to inventory all the pieces before I build something to ensure I have everything and don’t have any surprises waiting for me, so after doing a brief inventory at my FFL when I got home, I laid out all of the pieces.
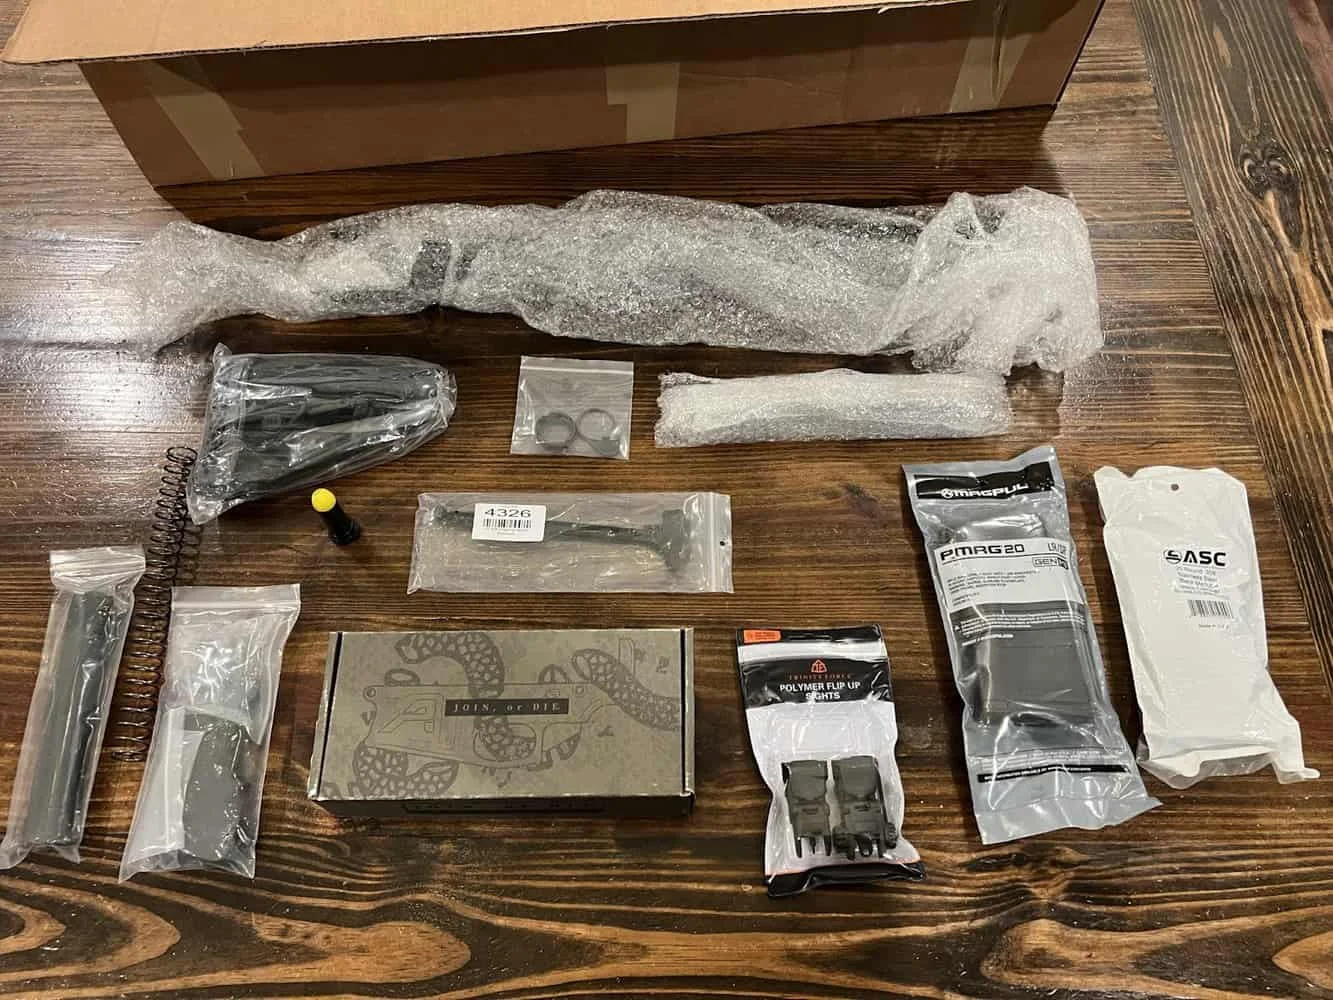
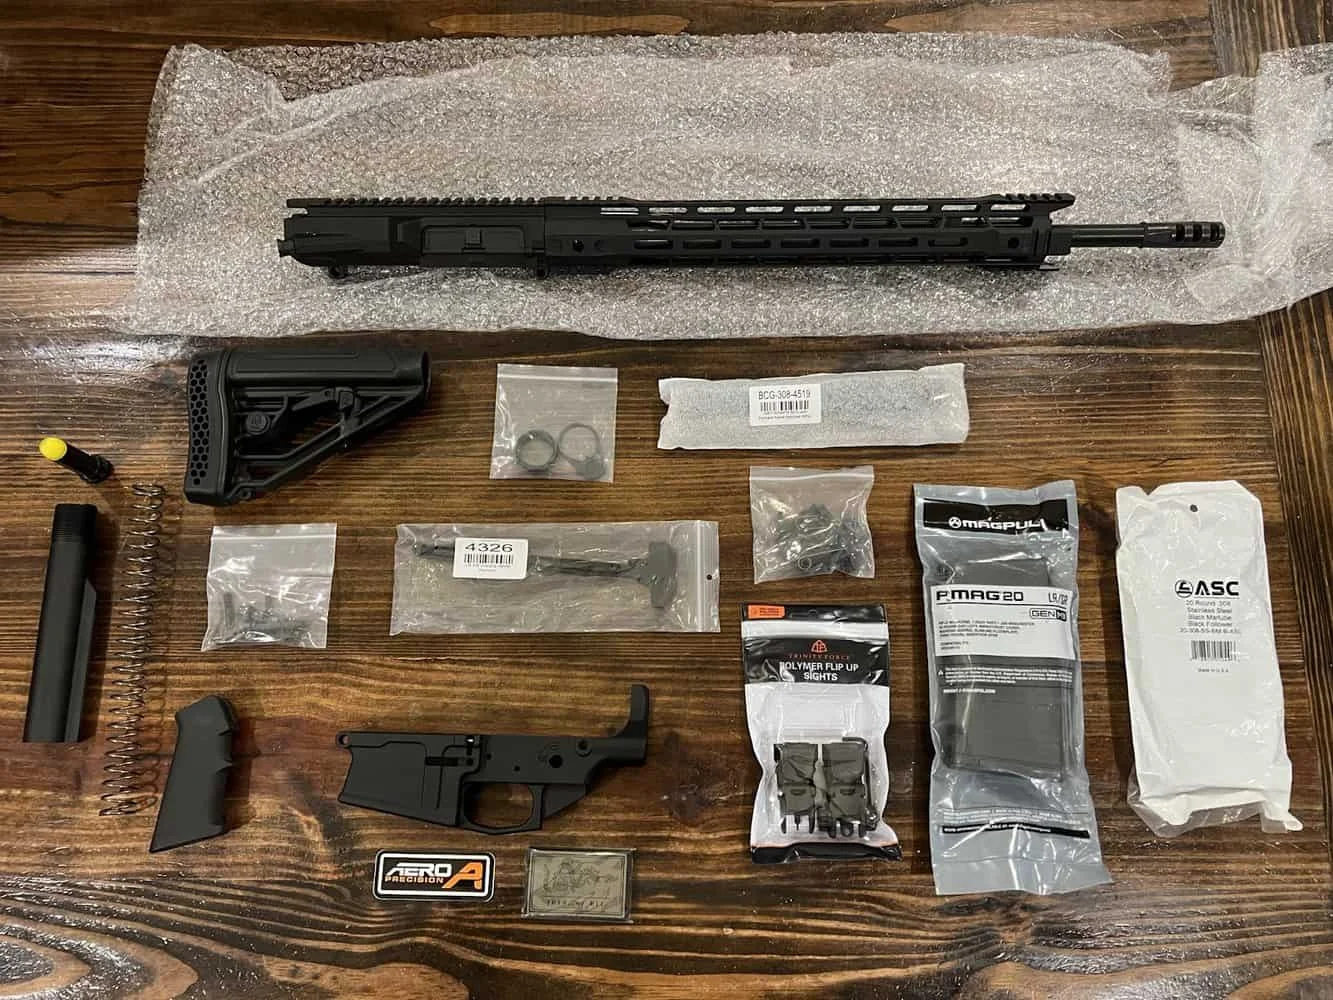
Parts of The Kit Plus the Lower
Barrel
The kit comes with an ELD Performance Alpha Series LR-308 20″ barrel. The barrel is made from 4150 CMV and has a QPQ Nitride Finish. The twist rate on the barrel is 1-8, and it has a thread pitch of 5/8×24. The barrel is a rifle-length gas system.
Upper Receiver
The upper receiver is an Aero Precision M5 Upper Receiver. It is made of 7075 Aluminum.
Handguard
The Davidson Defense ‘Ferrule’ kit has a Gauntlet Arms “Lancaster” High Profile 17″ LR-308 M-Lok Handguard. The handguard is made from T6 6061 anodized aircraft-grade aluminum. It has a black finish. The Gauntlet Arms handguard is a free float handguard. The handguard is compatible with most direct impingement gas systems and accepts Picatinny, Weaver, and M-Lock accessories.
Muzzle Device
The muzzle device is a Helius Tactical 1776 muzzle device with a 5/8×24 thread pitch. The device is designed to reduce muzzle rise.
Bolt Carrier Group
The bolt carrier group is the Recoil Technologies .308 Win, 7.62 NATO, 6.5 Creedmoor, .243 Win Bolt Carrier Group.
Charging Handle
The charging handle is the Omega Manufacturing LR-308 Charging Handle Aluminum.
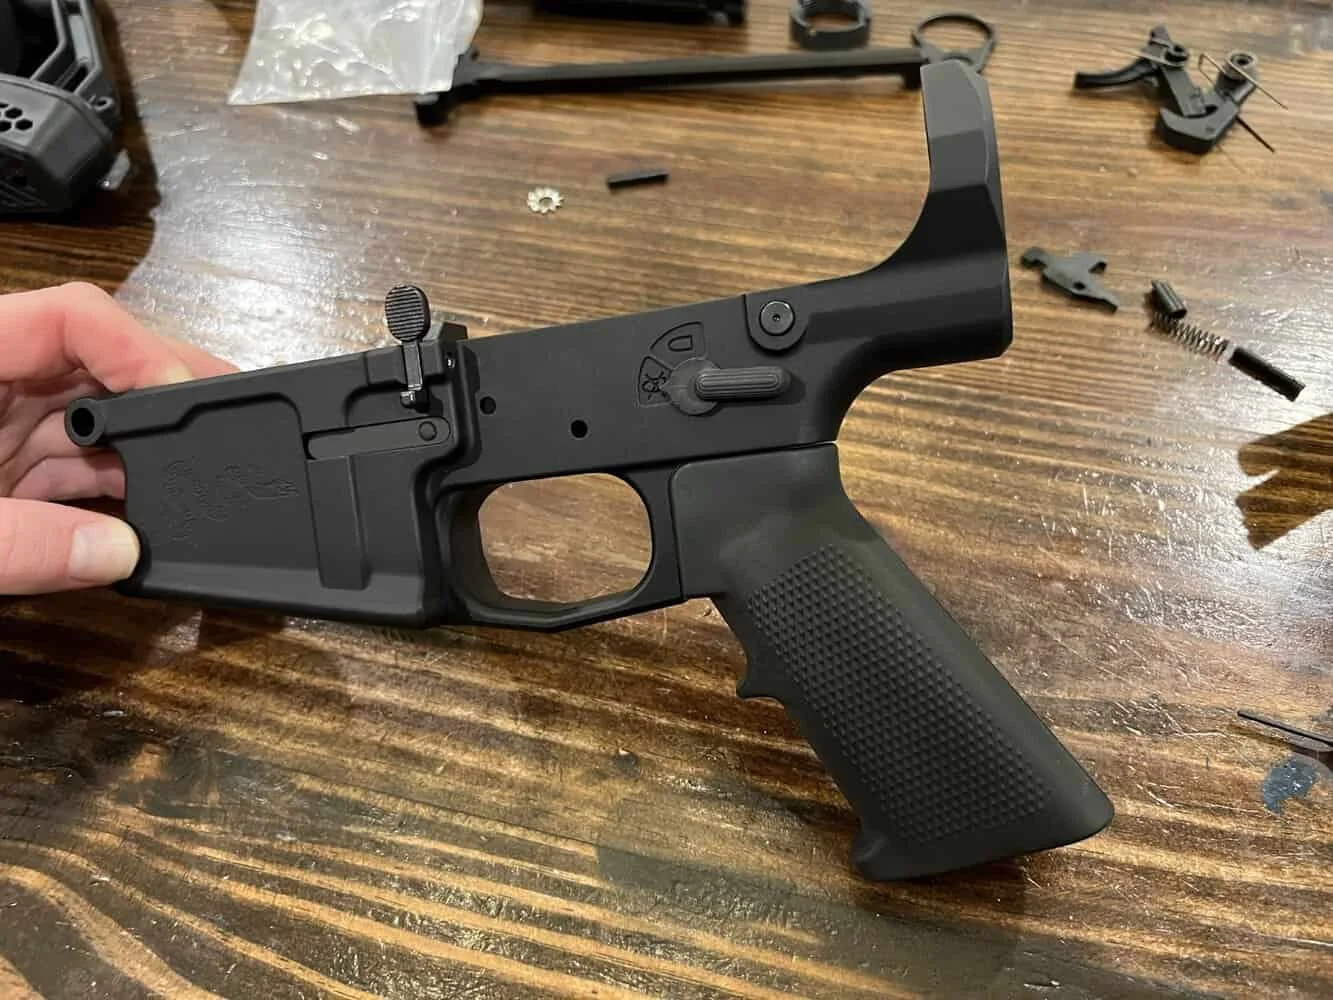
Lower
The last part here, and the part that is serialized and requires a transfer with an FFL, is the lower. The lower is not included in the kit but is available for purchase. The lower I used is the Aero Precision M5 Franklin Snake lower. This is a really sharp looking lower that has Benjamin Franklin’s “Join or Die” political cartoon.
After checking out the parts, I wanted to make sure I had all my tools available.
Tools
Here are the tools I used:
- Screwdriver – long enough to use with the grip screw
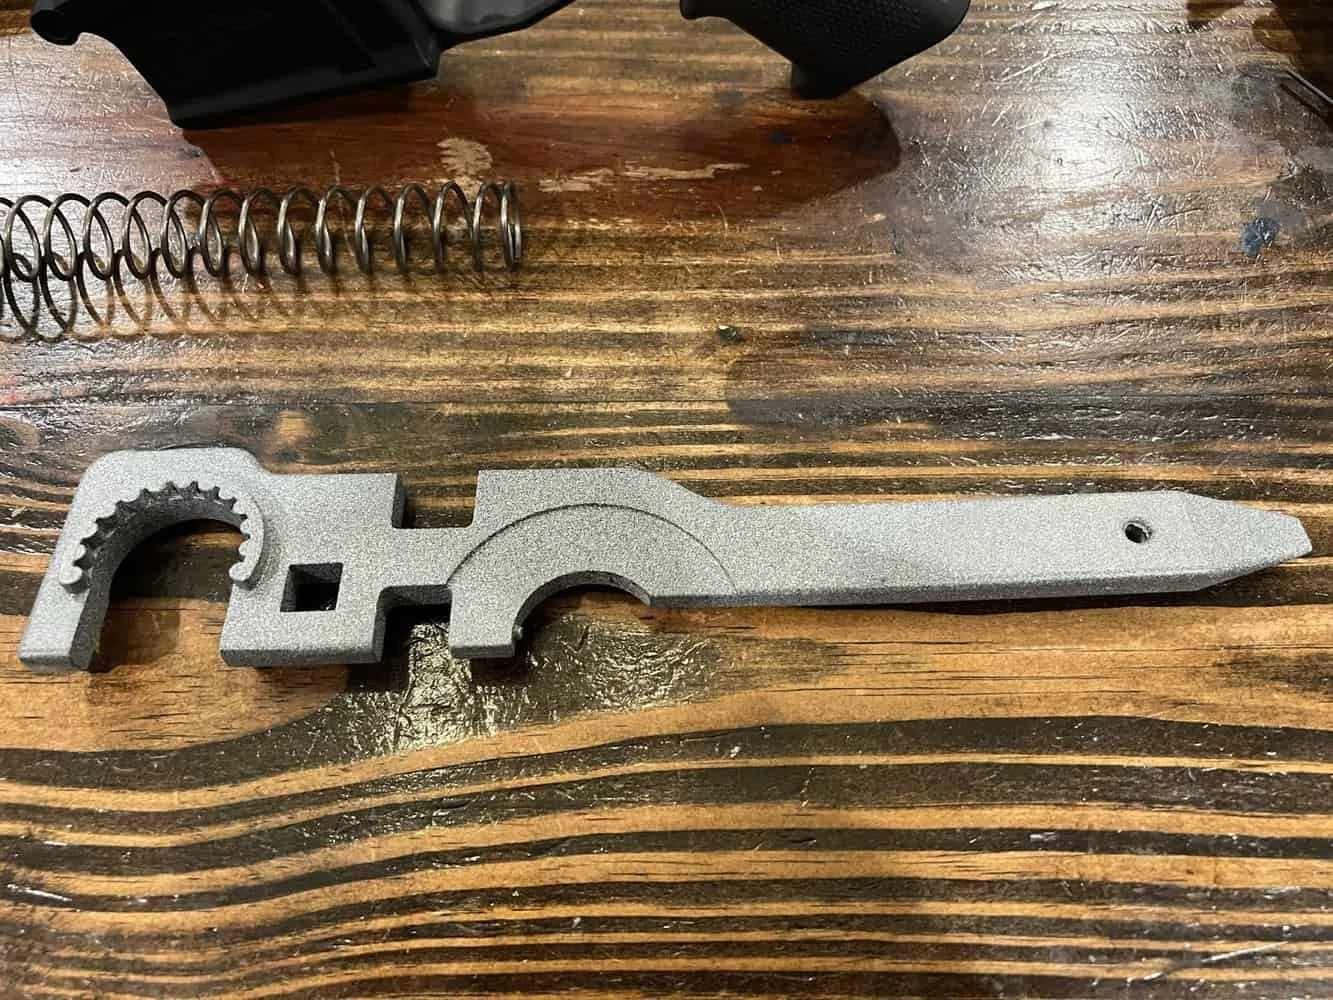
- Castle Nut Wrench – I had one of these sitting around prior to work on another AR I own. I feel like this is one of those tools everyone who likes modern guns probably should have. I am surprised how often I use it or loan it out to a friend to use.
- Punch Set – I used both a 1/16 punch and a 7/16th punch. Neither of these is required but really can make your life easier.
Putting the Kit Together
Installing the Magazine Catch
Place the mag catch into the recess on the left of the lower (I forgot to take a photo of the catch in the actual recess)
Insert the spring on the opposite side. Then put the button on top of it.
Now push the button into the recess and rotate the magazine catch to thread it into the button. Once you get a start on this, at least three rotations, push the button further into the recess using a punch, pencil, or anything that won’t mar the finish. Screw the magazine catch in until it is flush with the button, or any more rotations would scrape the receiver.
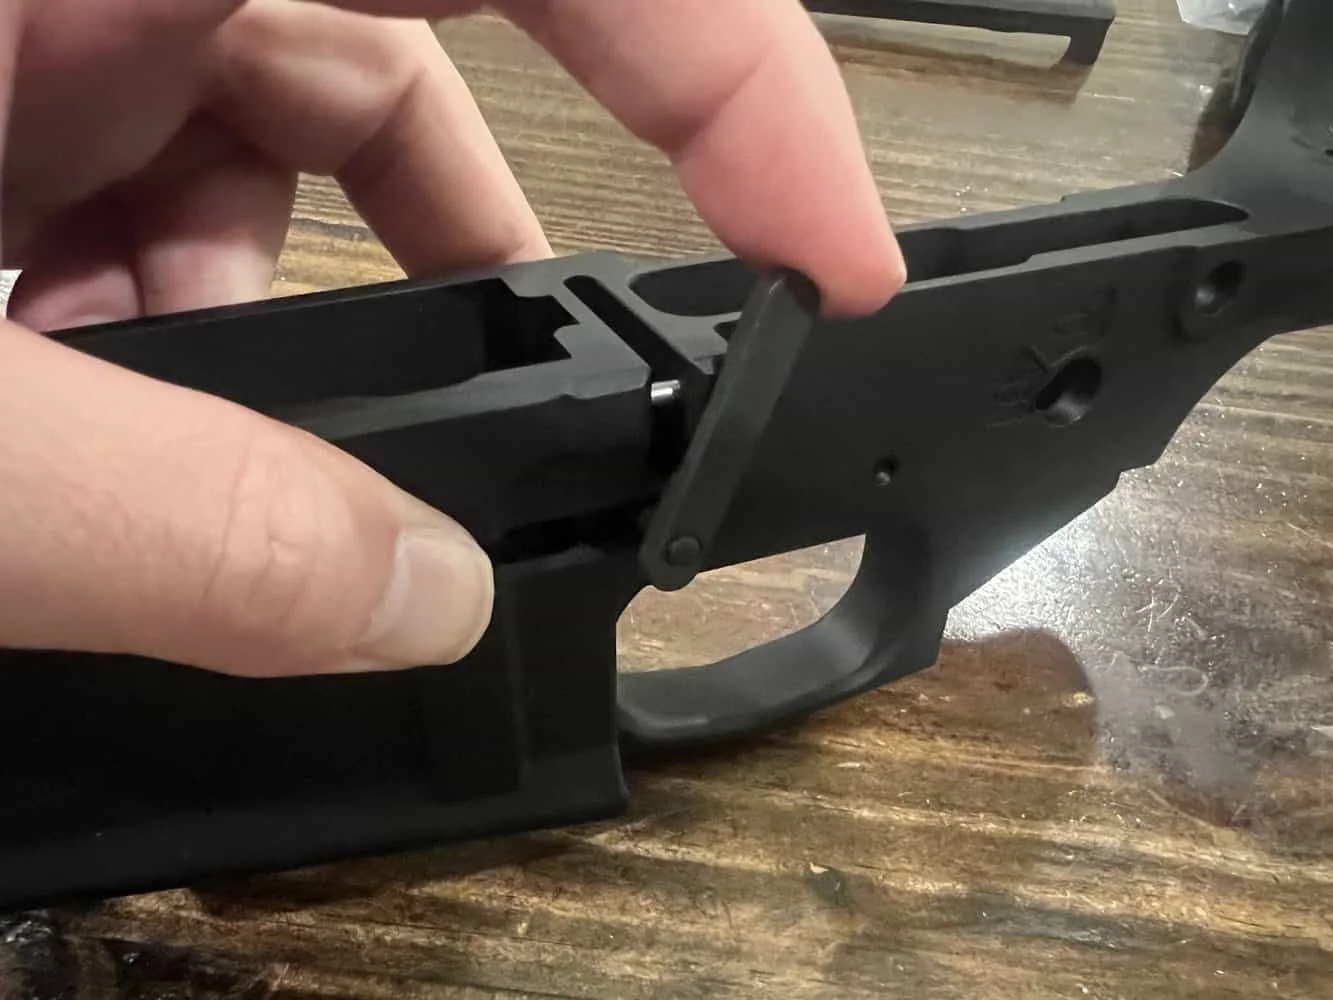
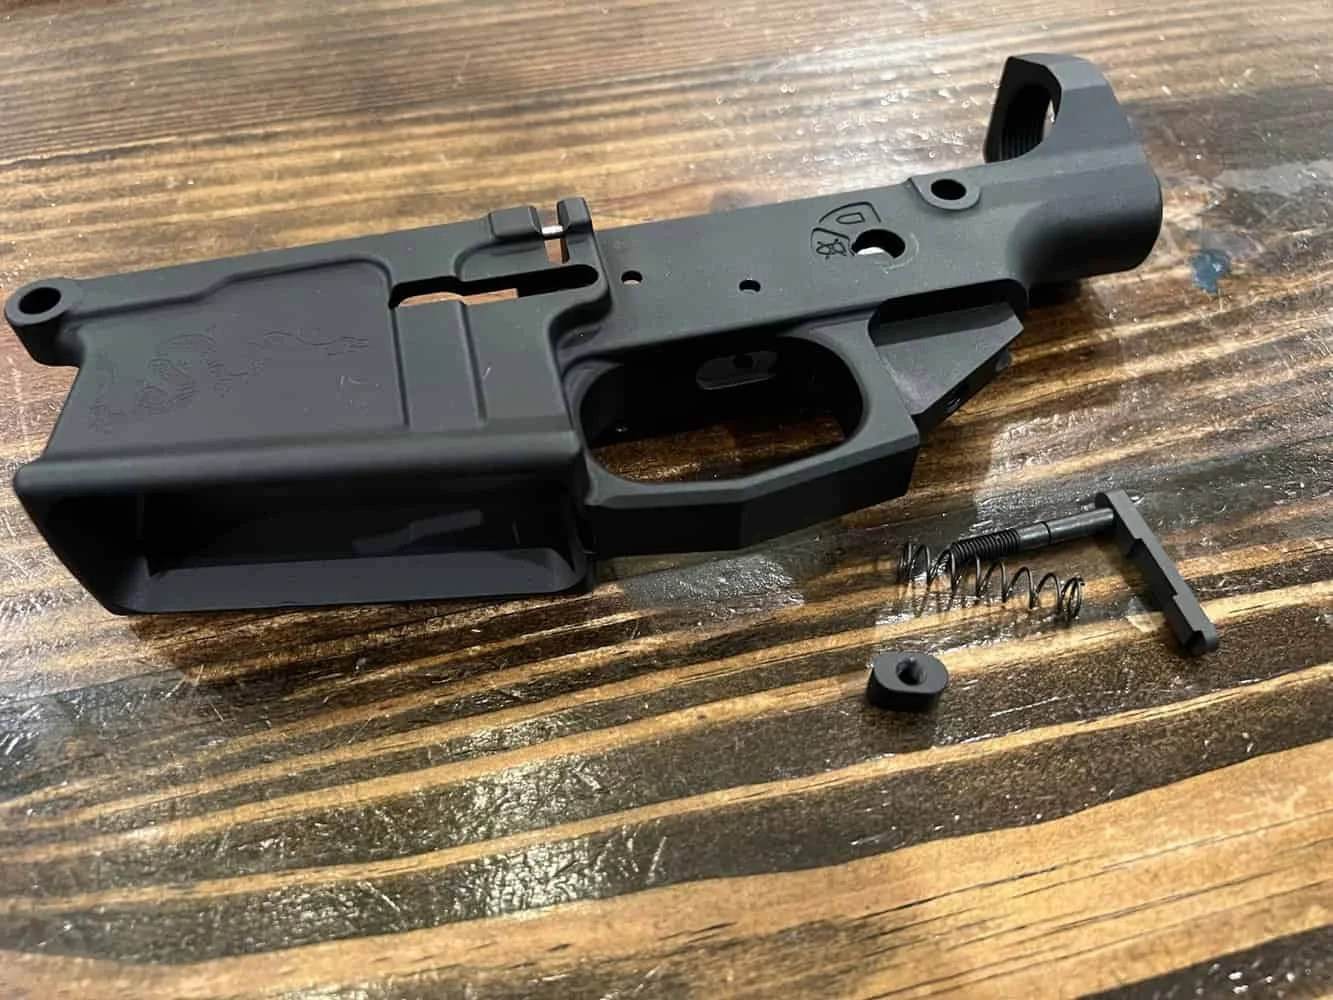
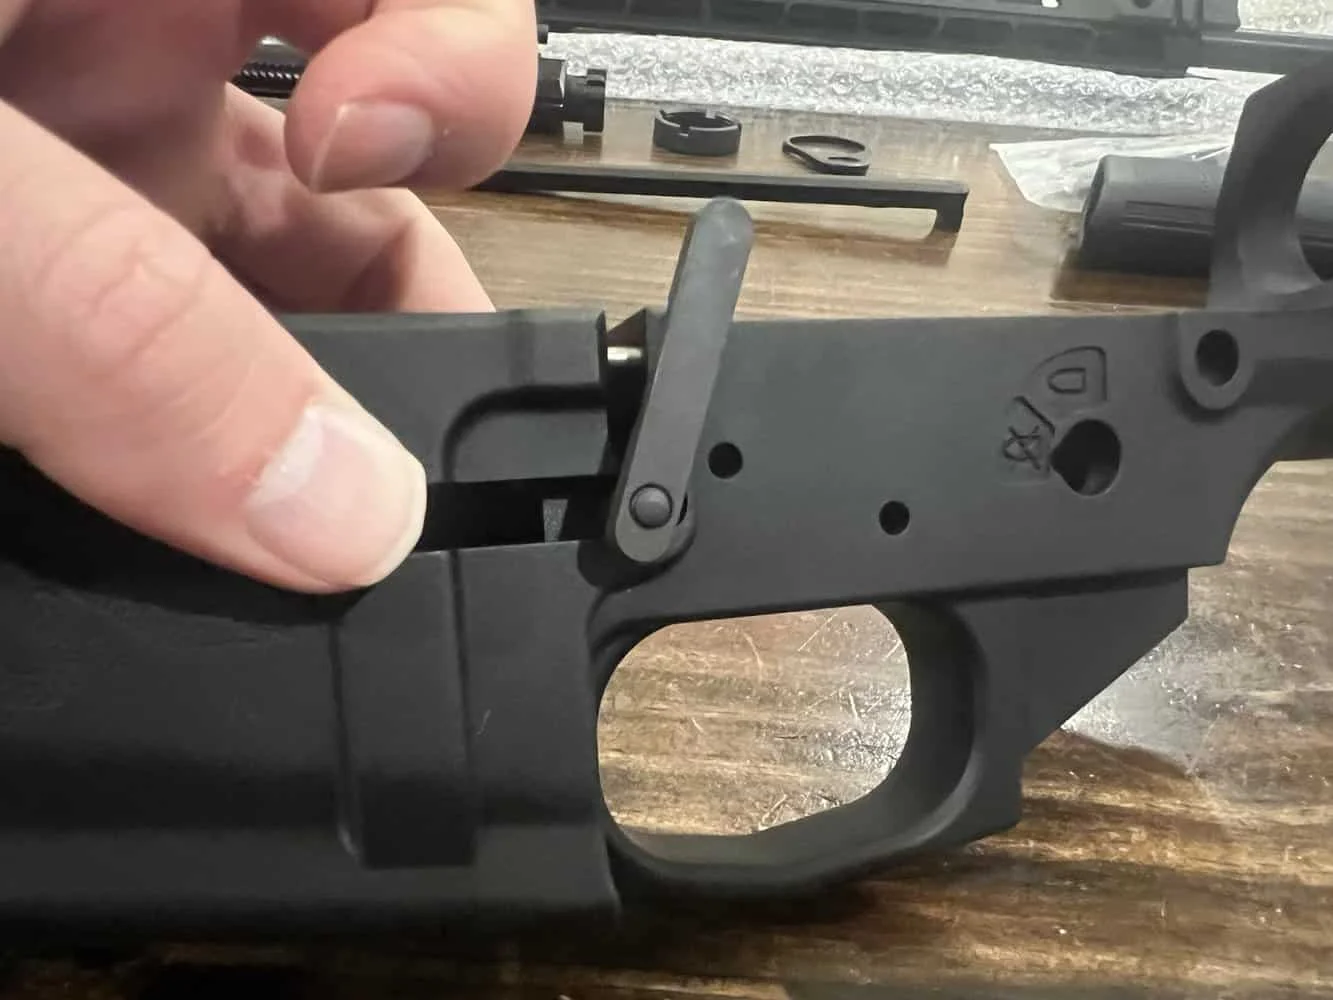
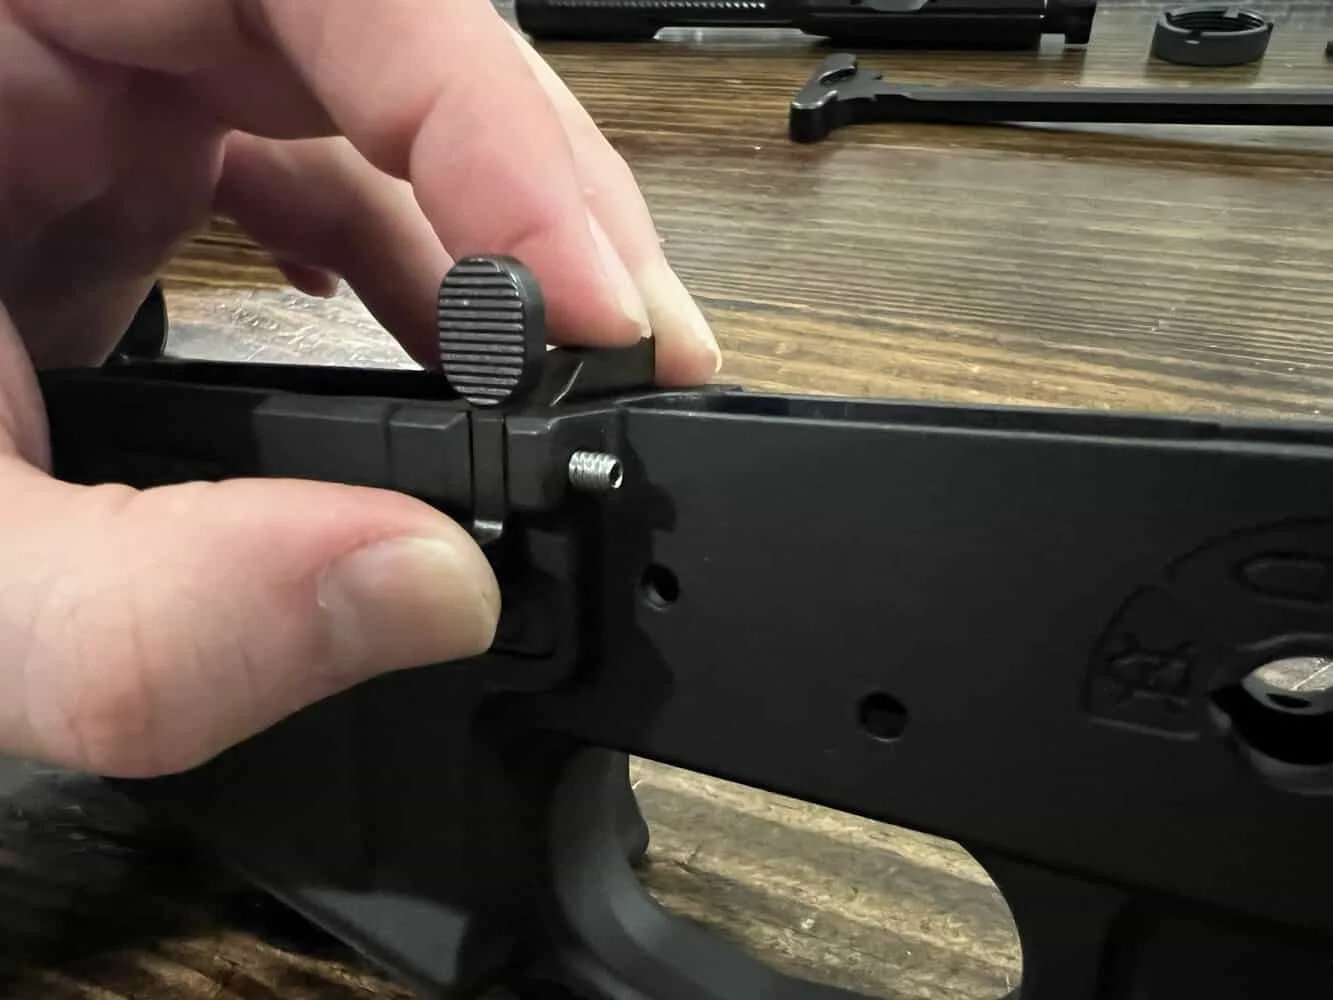
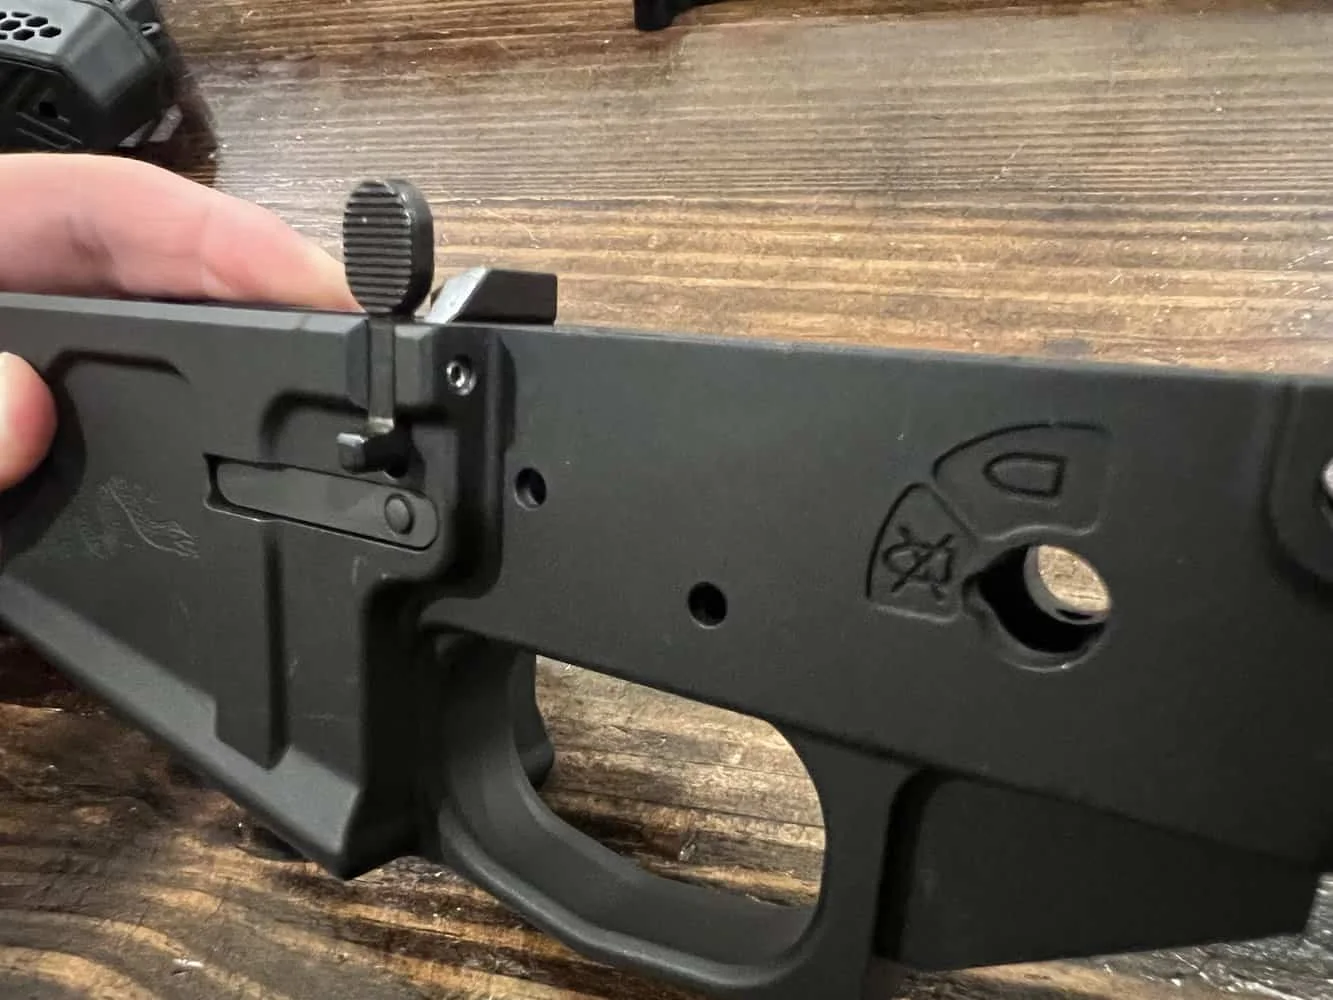
Install the Bolt Catch
Find your bolt catch, buffer, springs, and roll pin (my lower came with a threaded roll pin already screwed in, this needed to be removed)
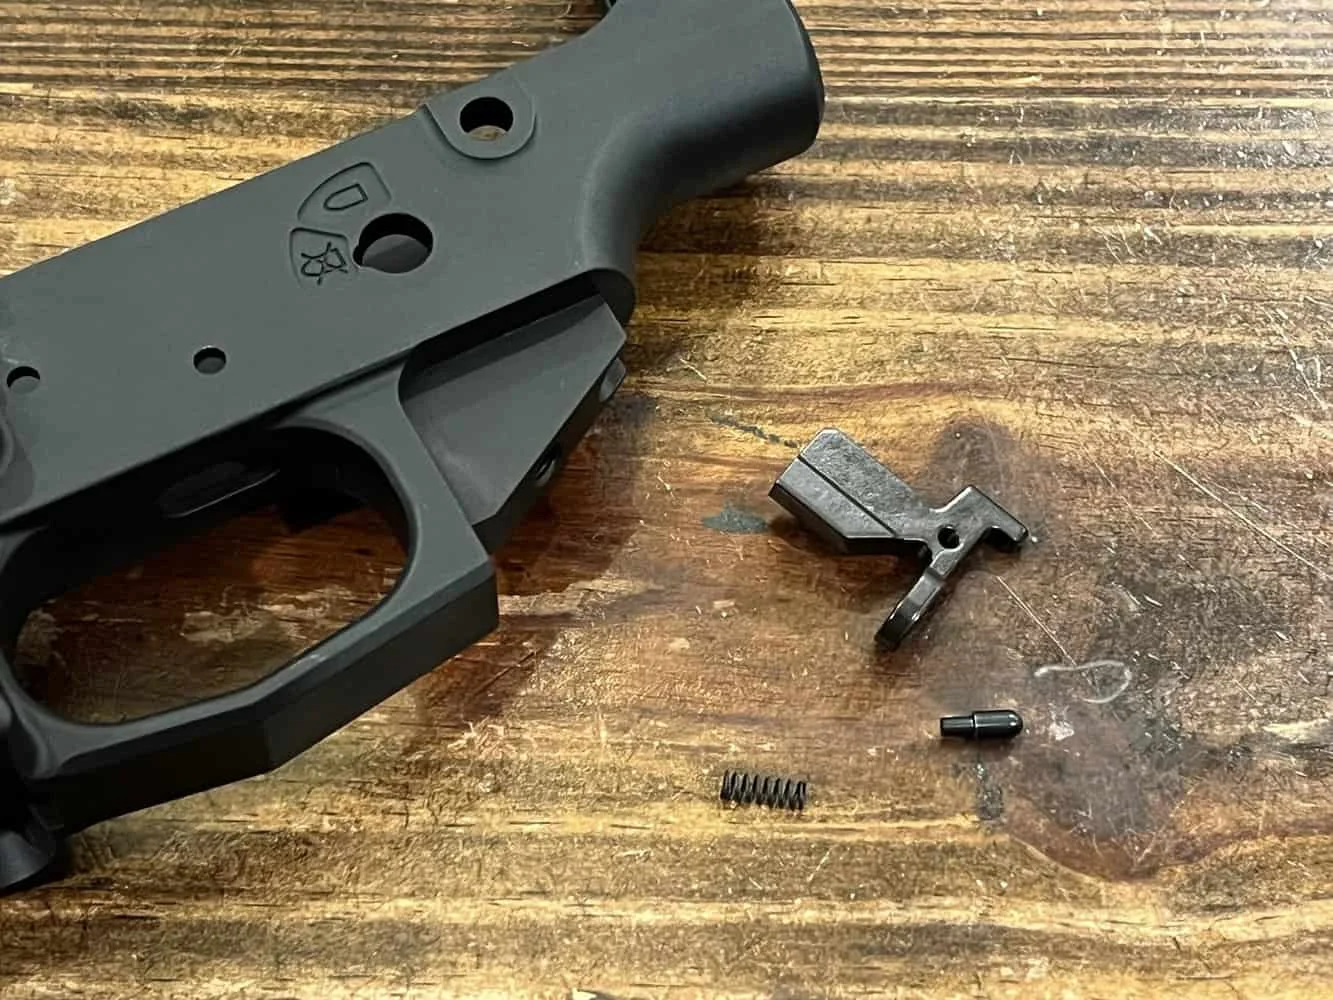
Put the buffer and buffer spring together and drop them into the appropriate hole.
Place the bolt catch into the recess and hold it in place while you insert the roll pin or threaded roll pin and screw it into place.
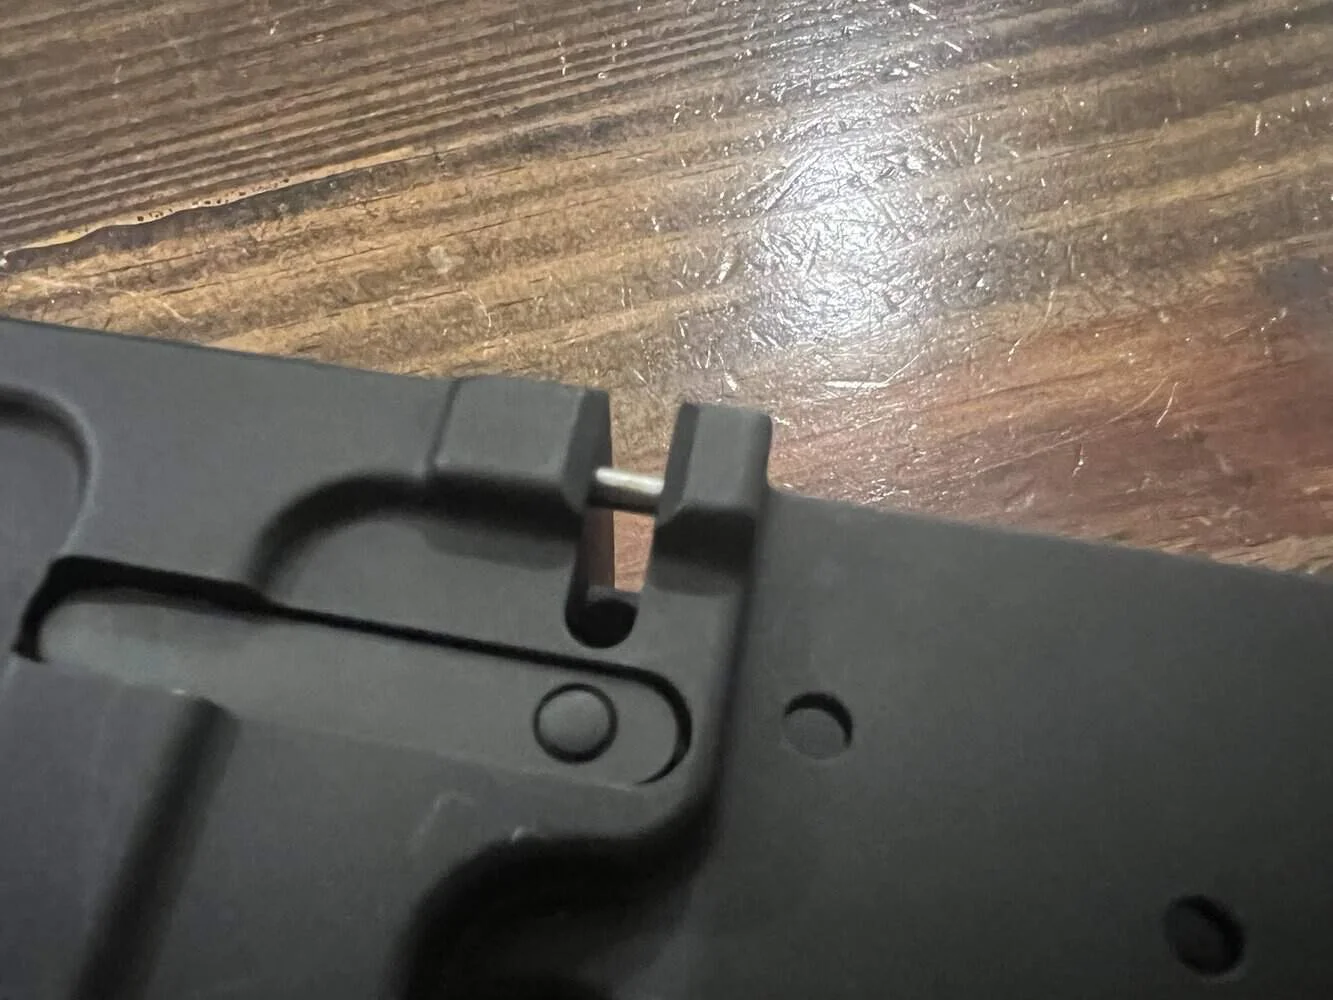
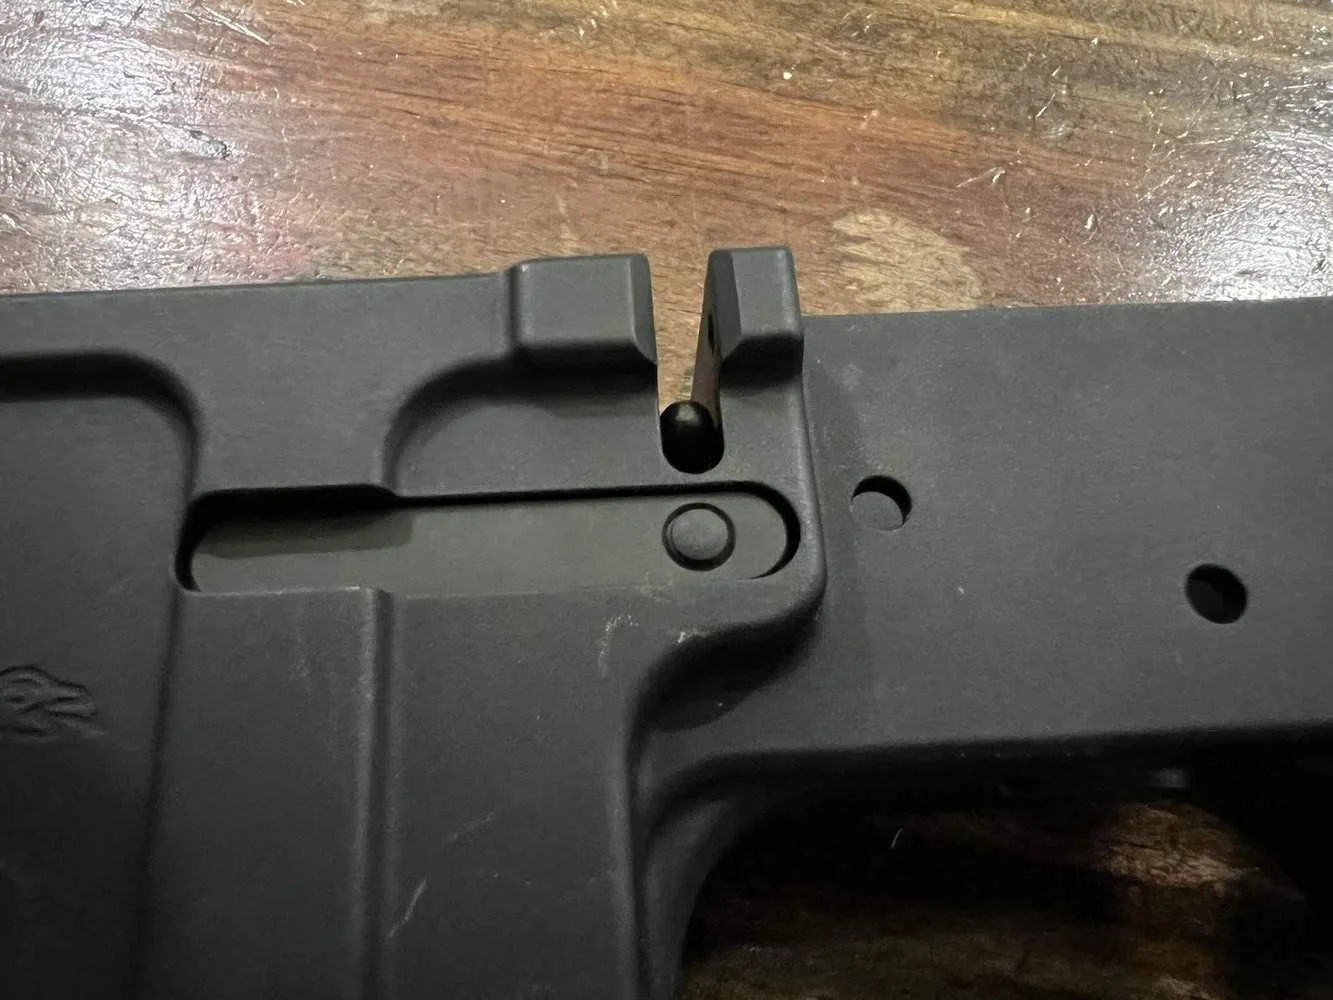
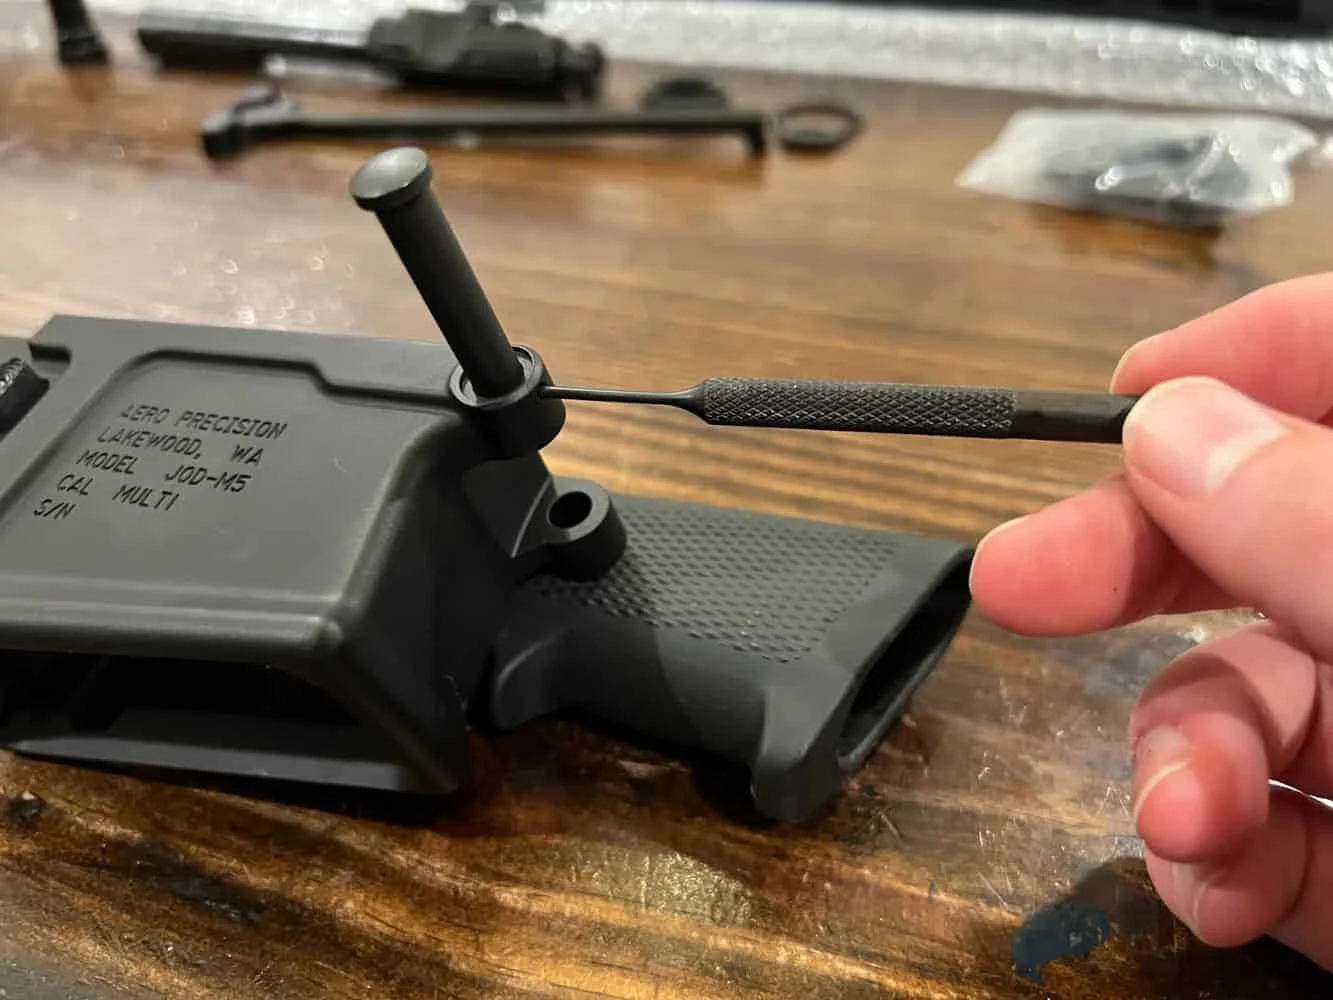
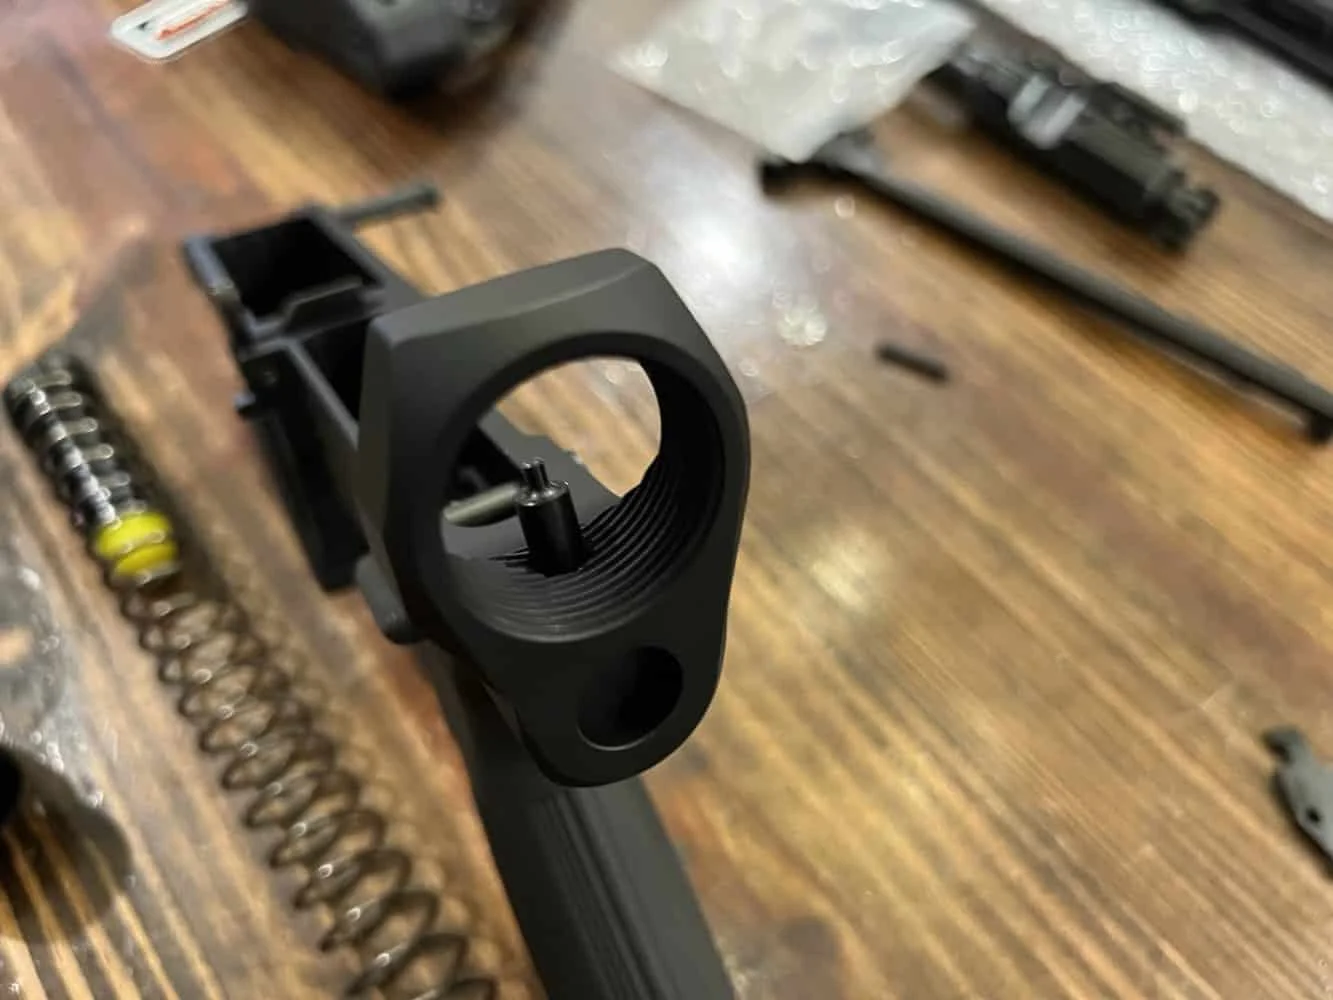
Pivot Pin Assembly
For the pivot pin assembly, you need to get your pivot pin, pivot detent, and pivot spring. Now locate the small hole in the front of your receiver and place the spring in it.
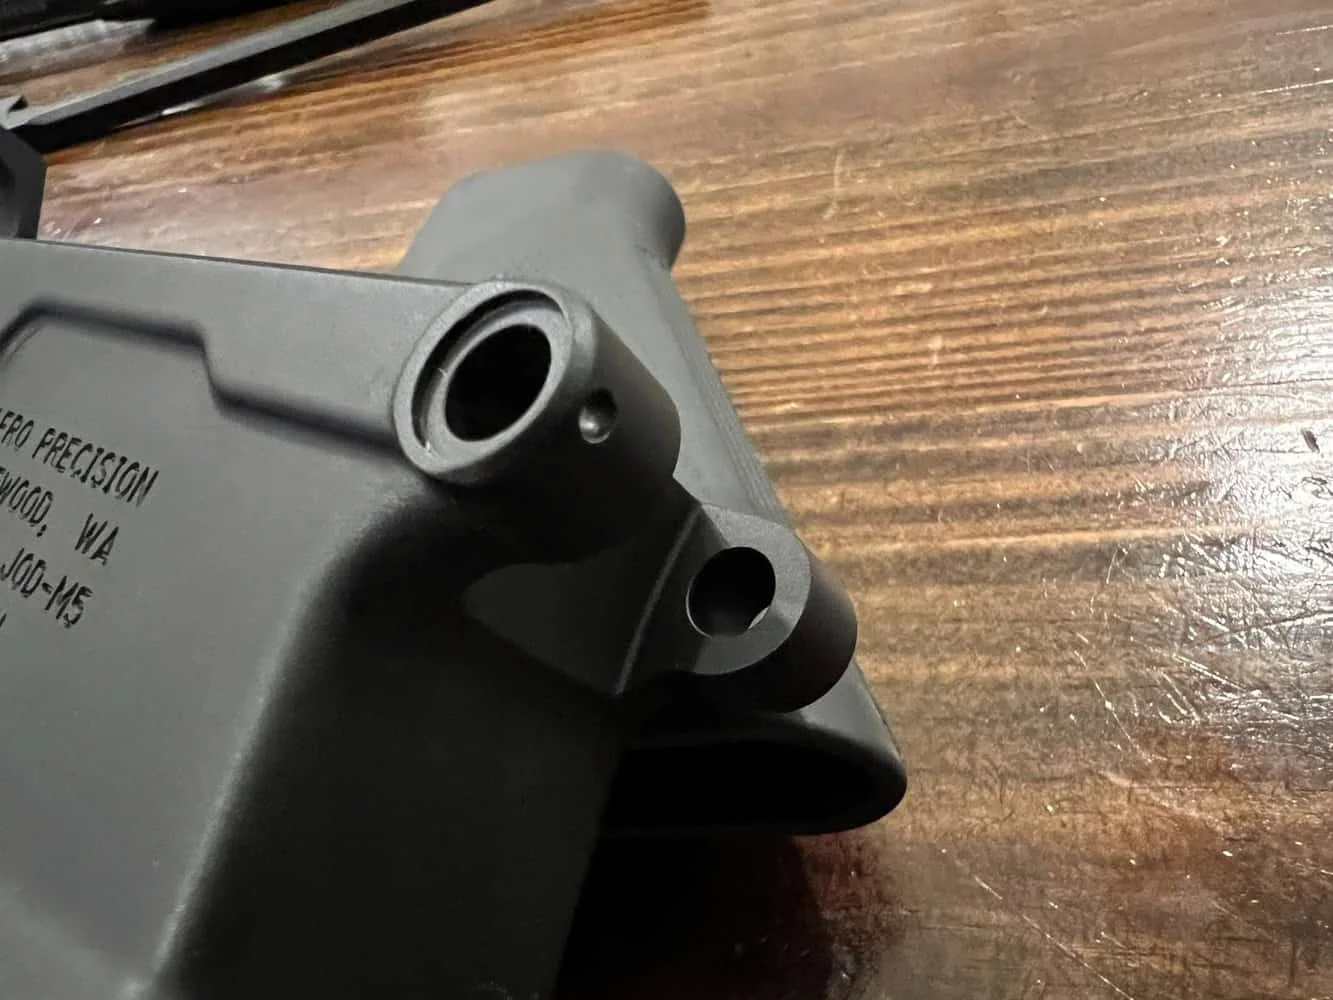
Add the detent and use your 1/16” punch to depress the spring and detent so you can add the pivot pin. If you’re not careful, you will launch your detent and spring and spend the next few minutes trying to find them.
Once you have finished this, you have completed one of, if not the most challenging part of the entire build.
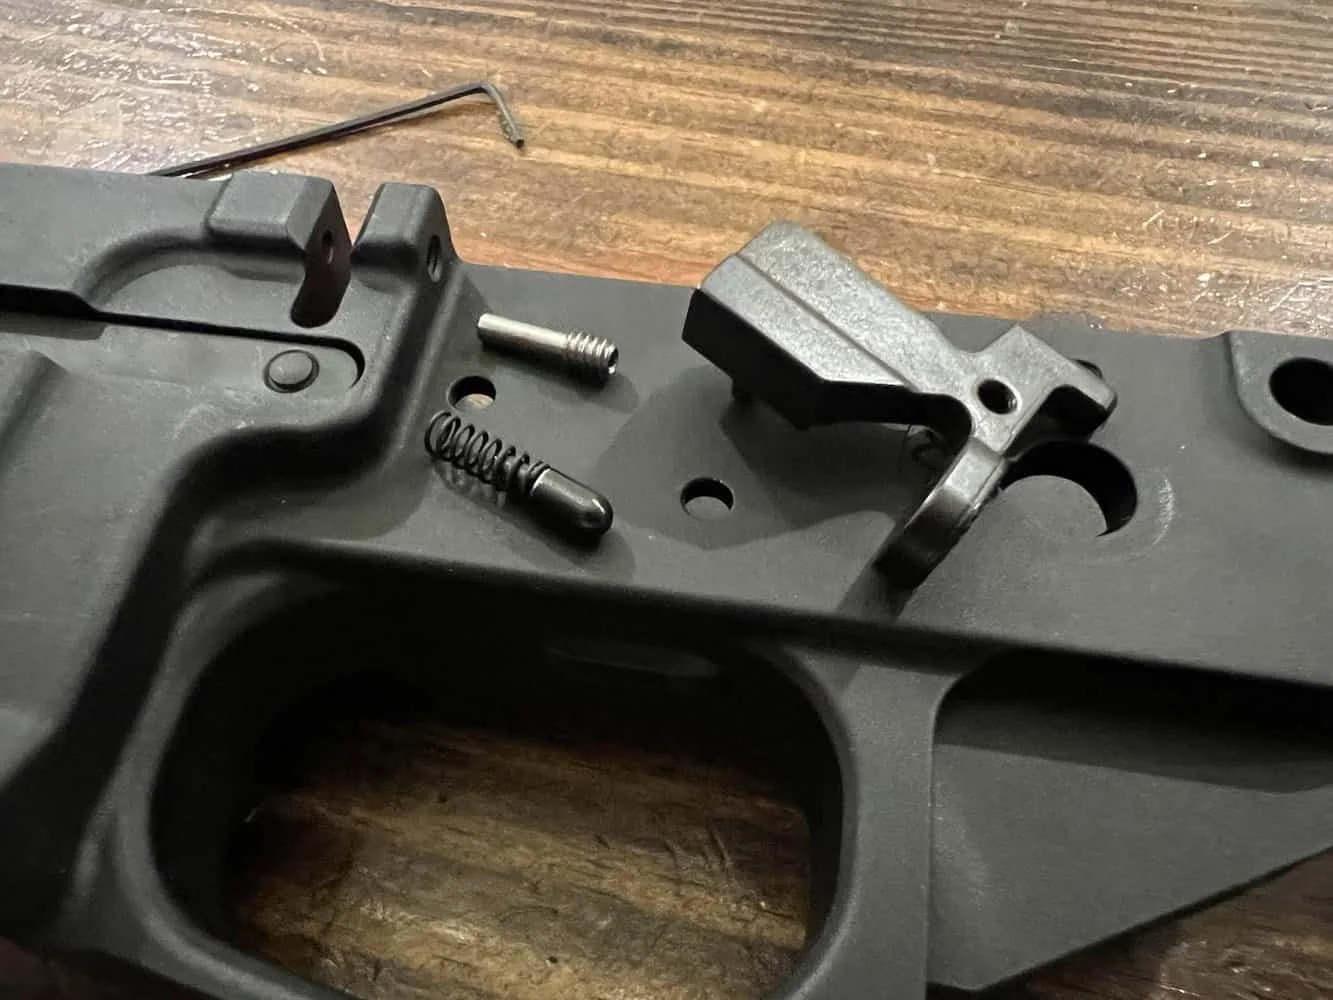
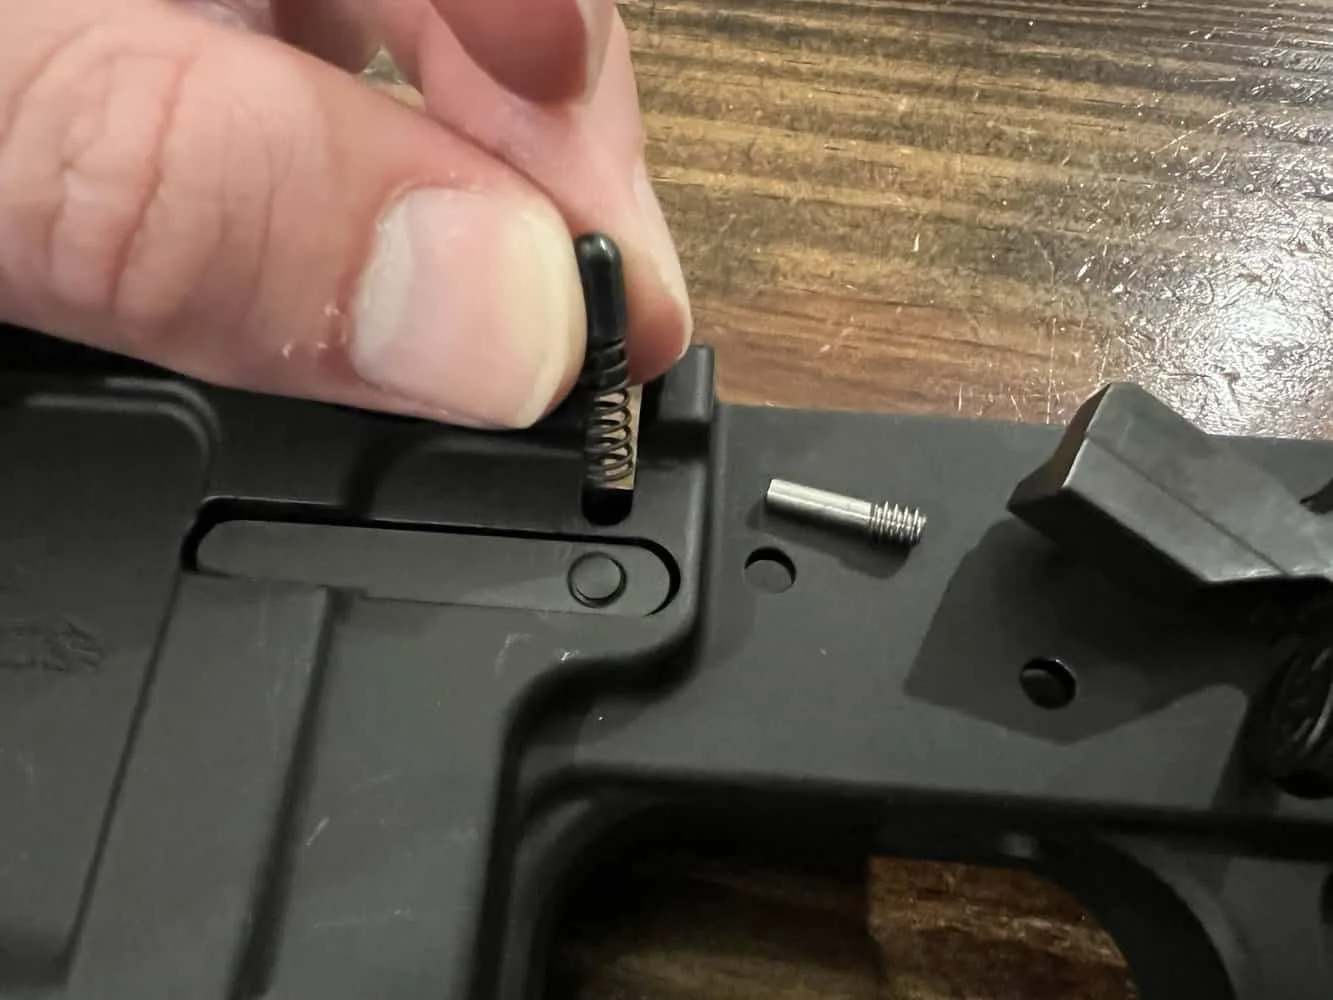
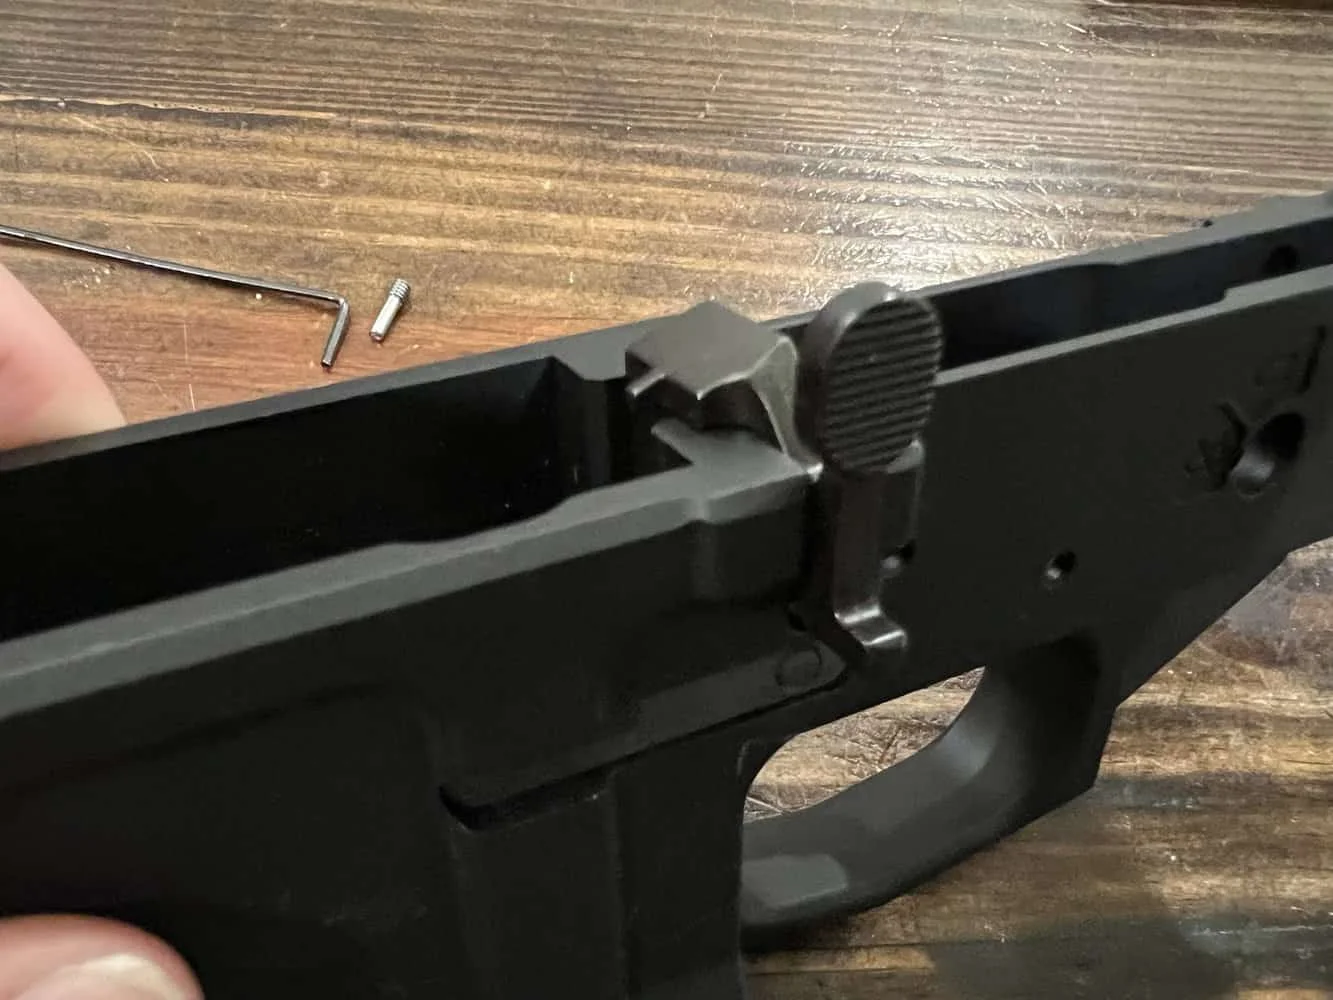
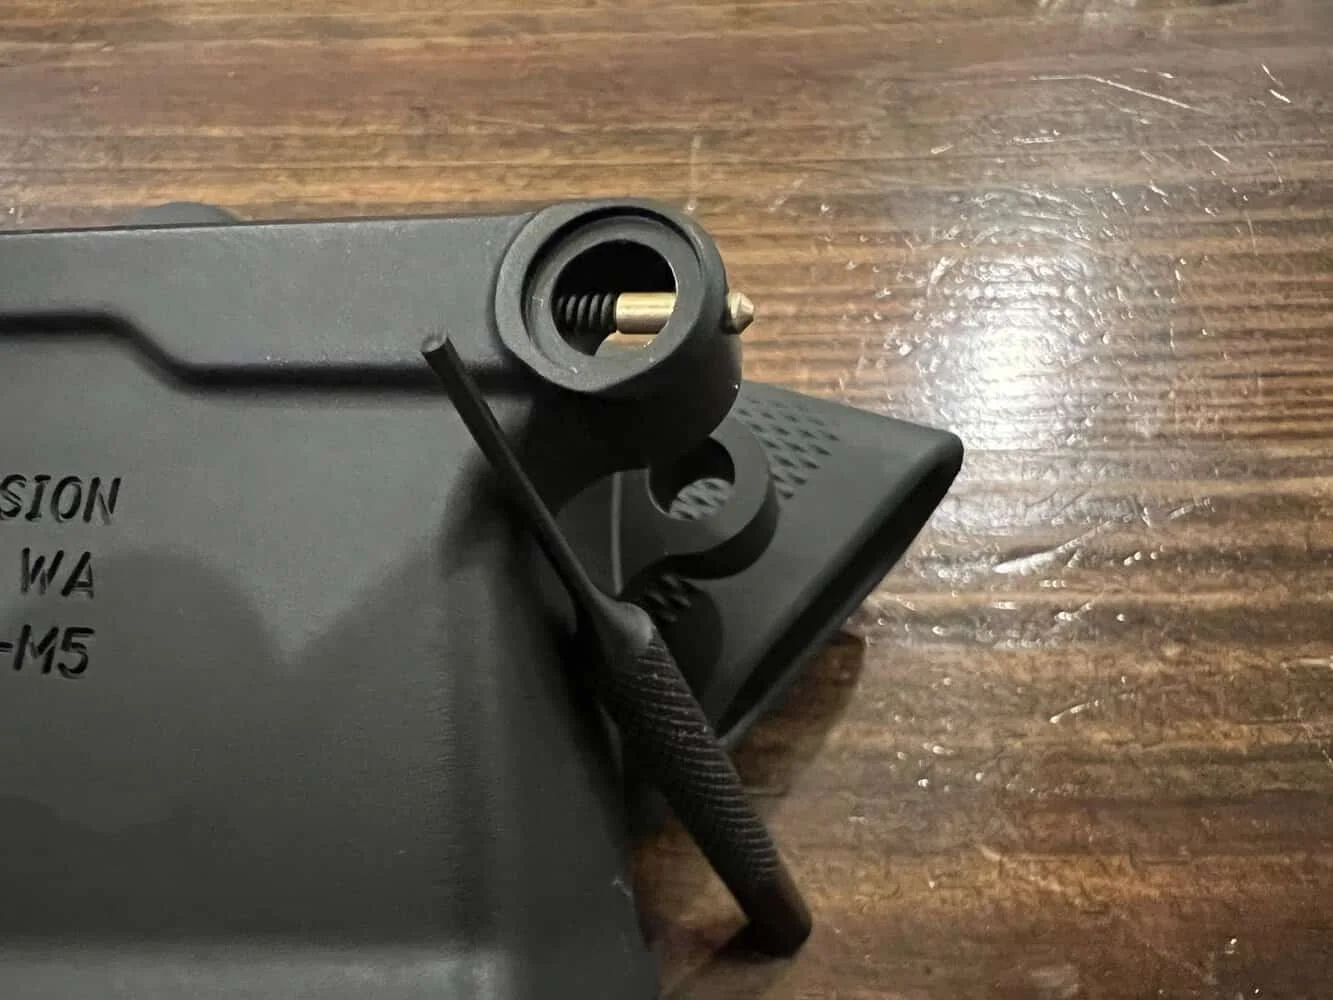
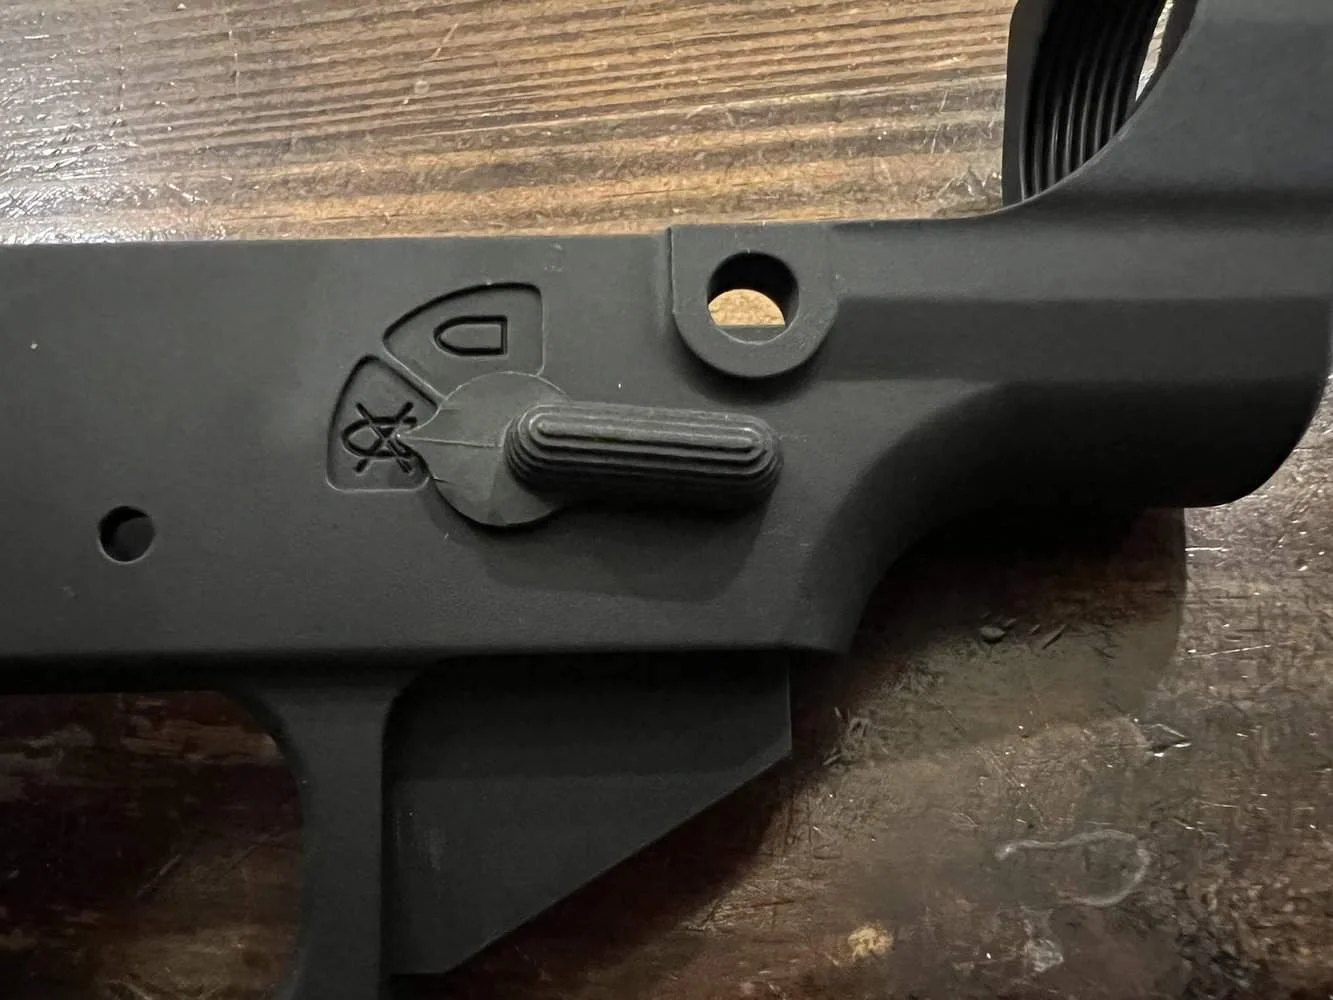
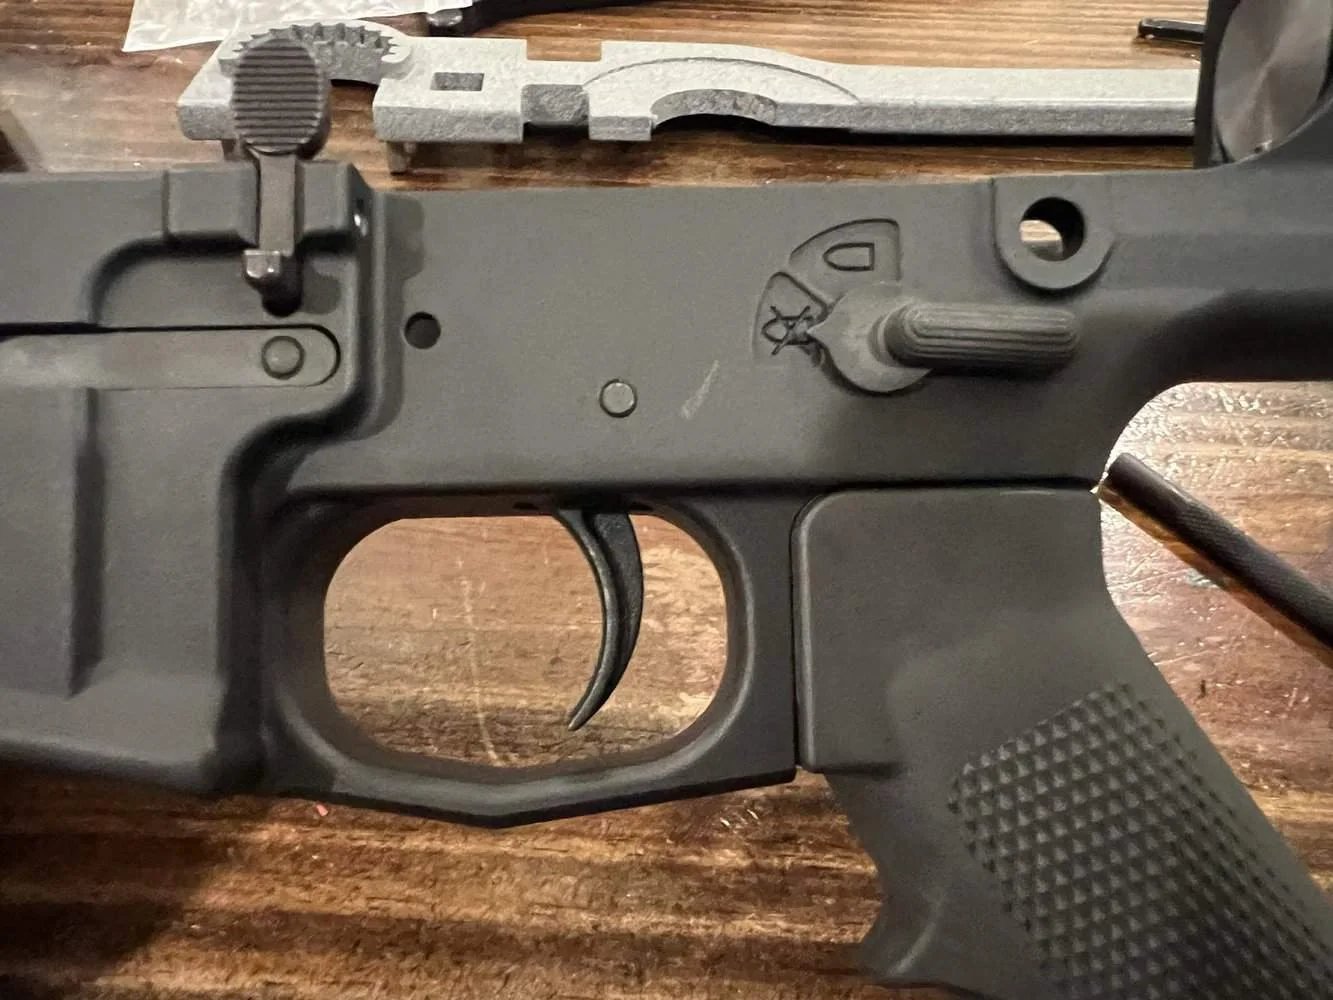
Takedown Pin Assembly, Safety Selector, and Grip
You will do these following parts all at roughly the same time. Grab your takedown pin, takedown pin detent and spring, and safety selector spring and detent.
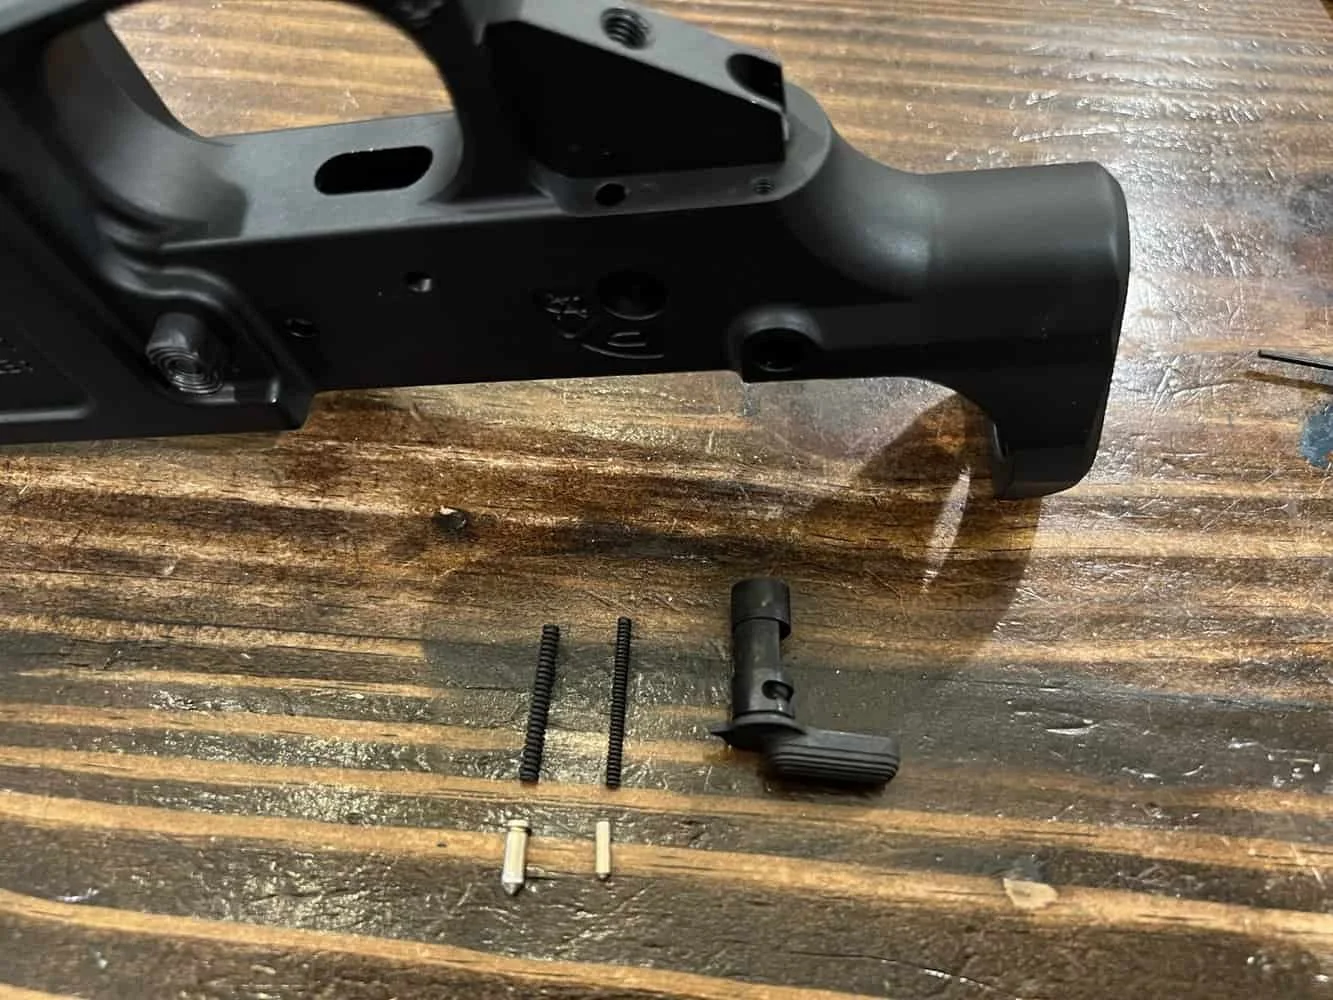
Next, insert your safety selector and takedown pin.
Once you have done this, you need to drop your takedown pin detent and spring into your lower receiver. Then take your safety selector detent and drop it into the lower receiver and the safety selector spring and place it in the appropriate hole on your pistol grip.
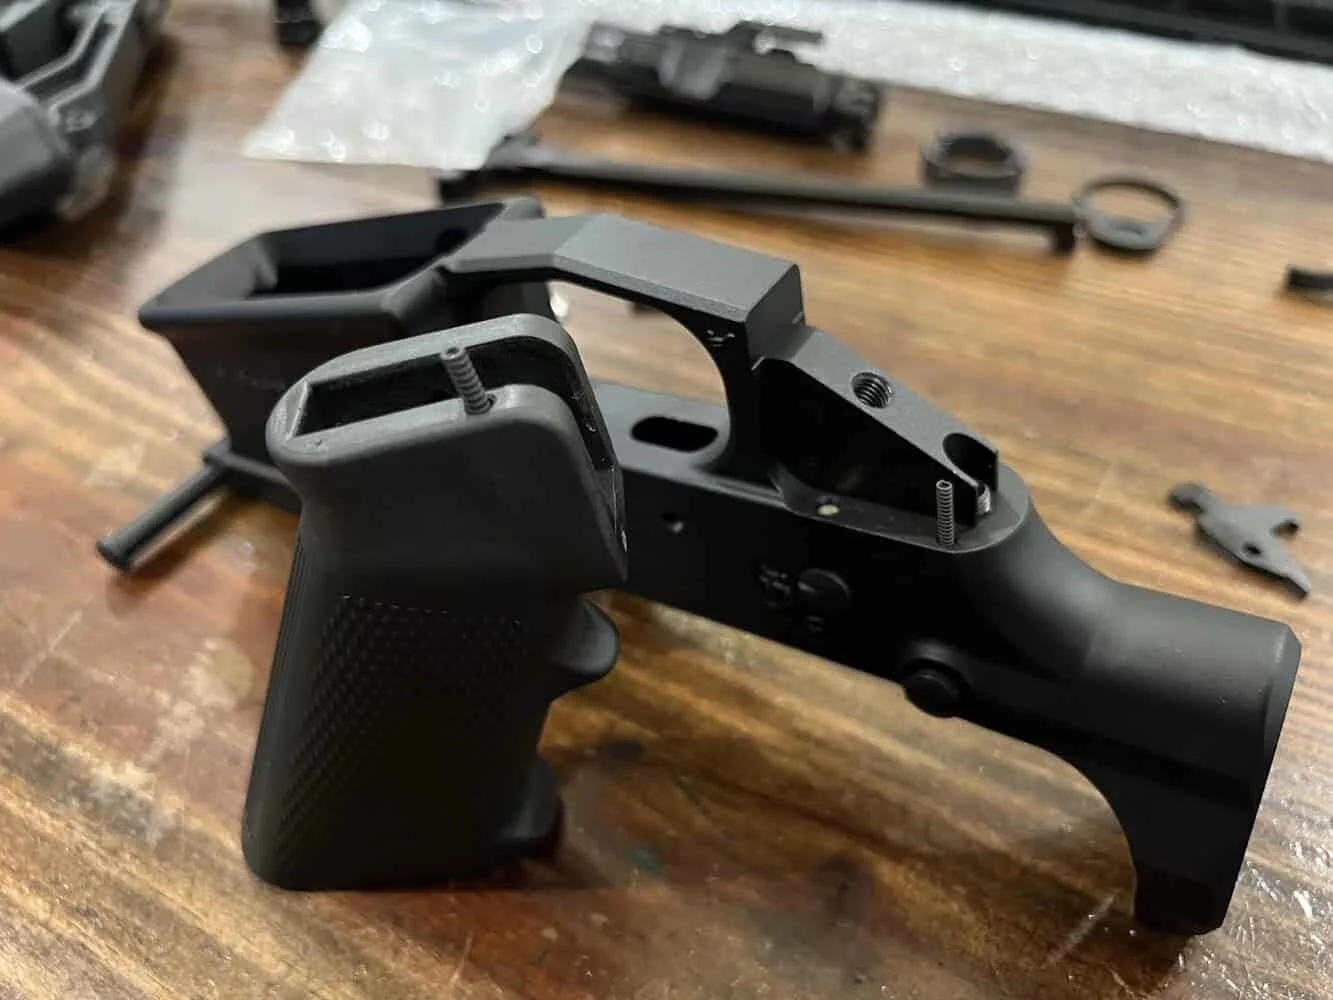
Carefully slide your pistol grip onto your lower receiver and tighten it down with the grip screw. Make sure you do not damage your springs when you are compressing them while putting on the grip.
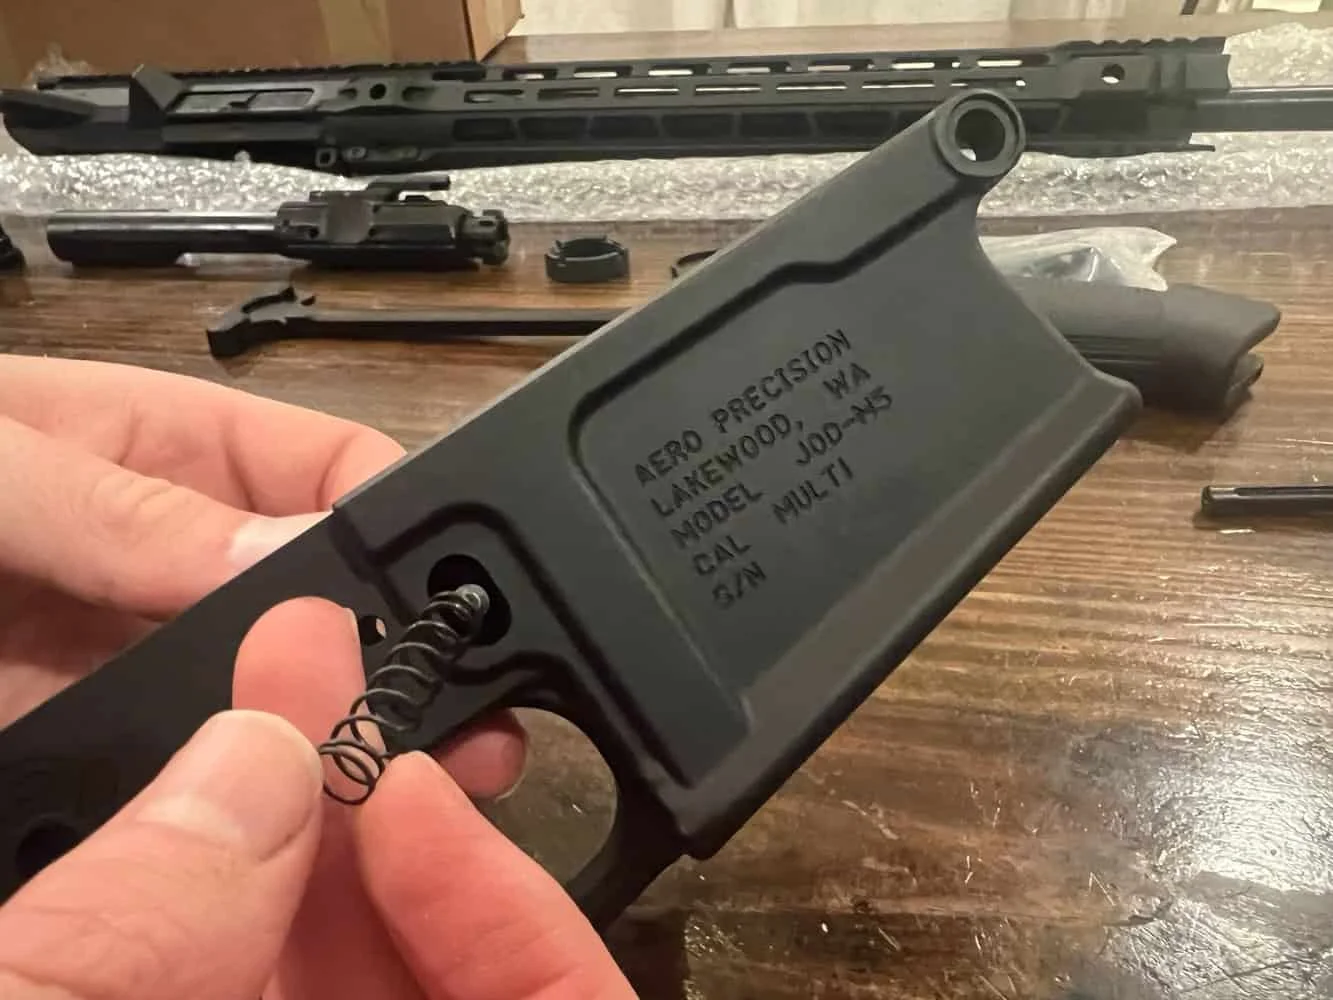
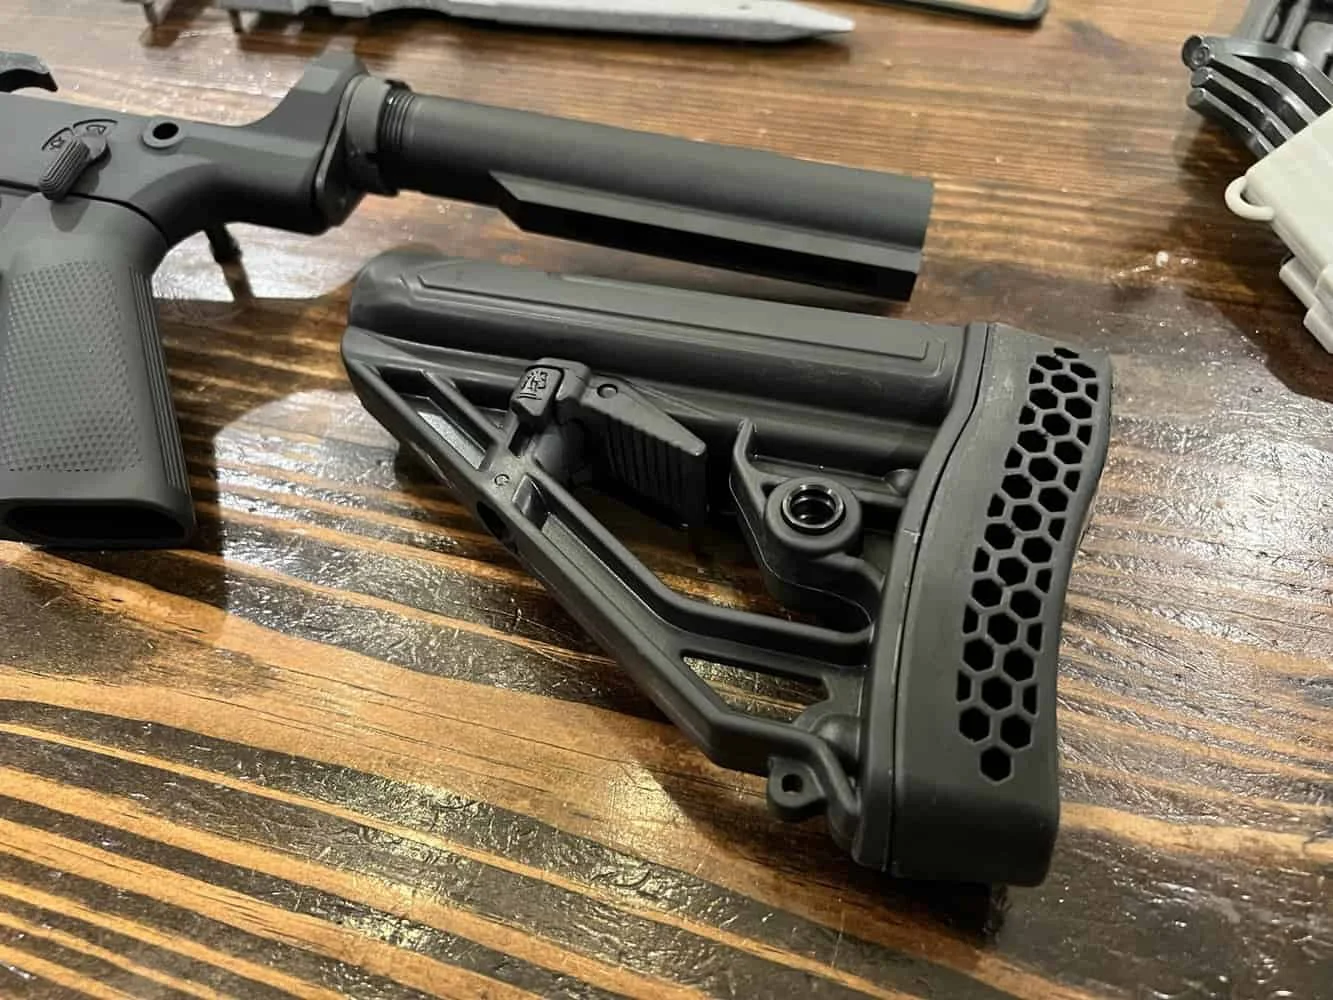
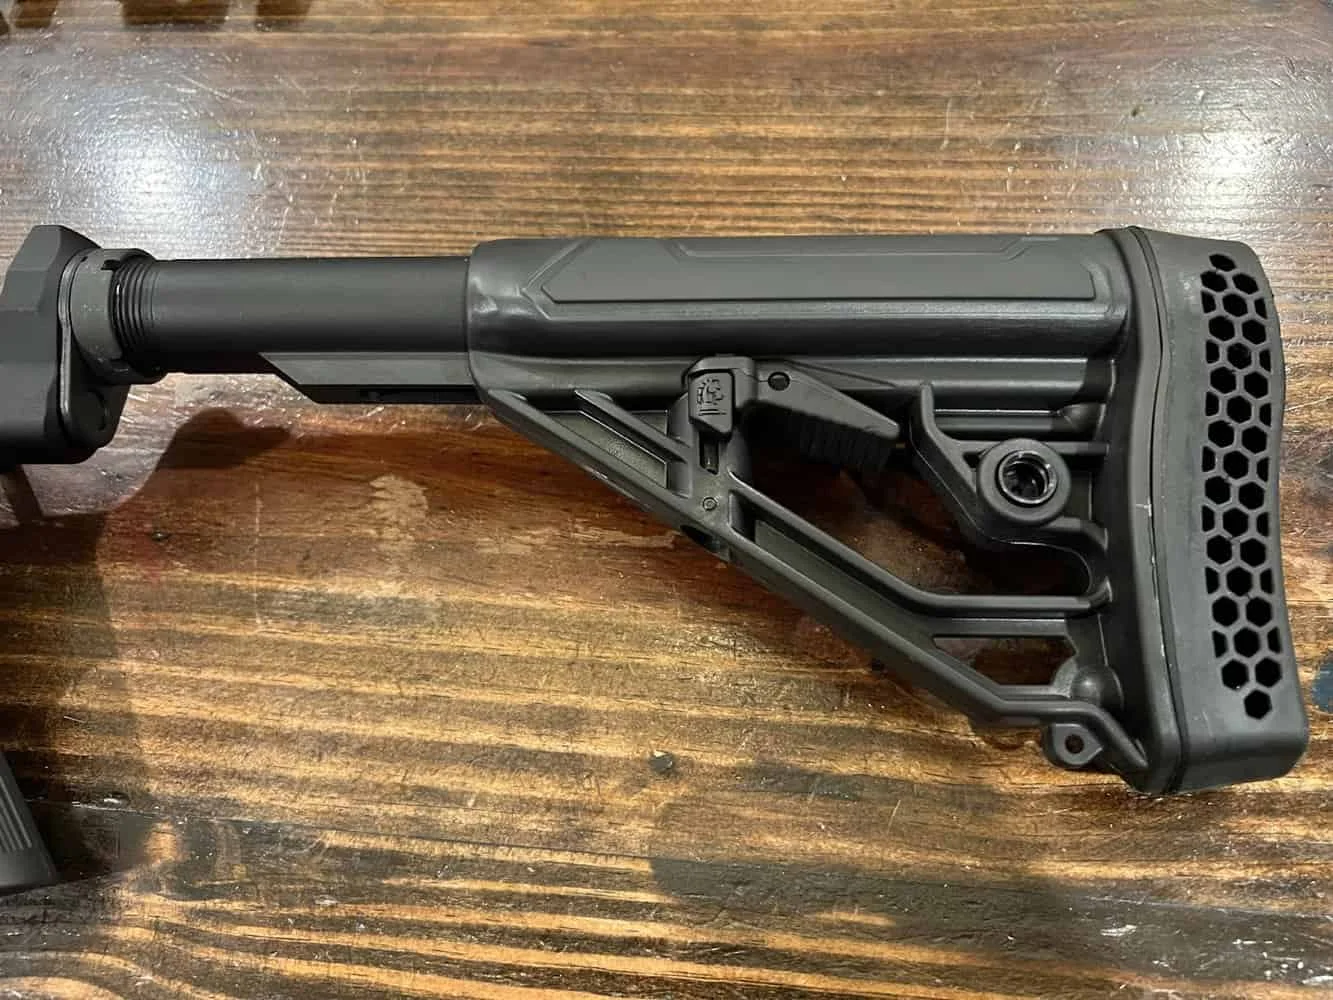
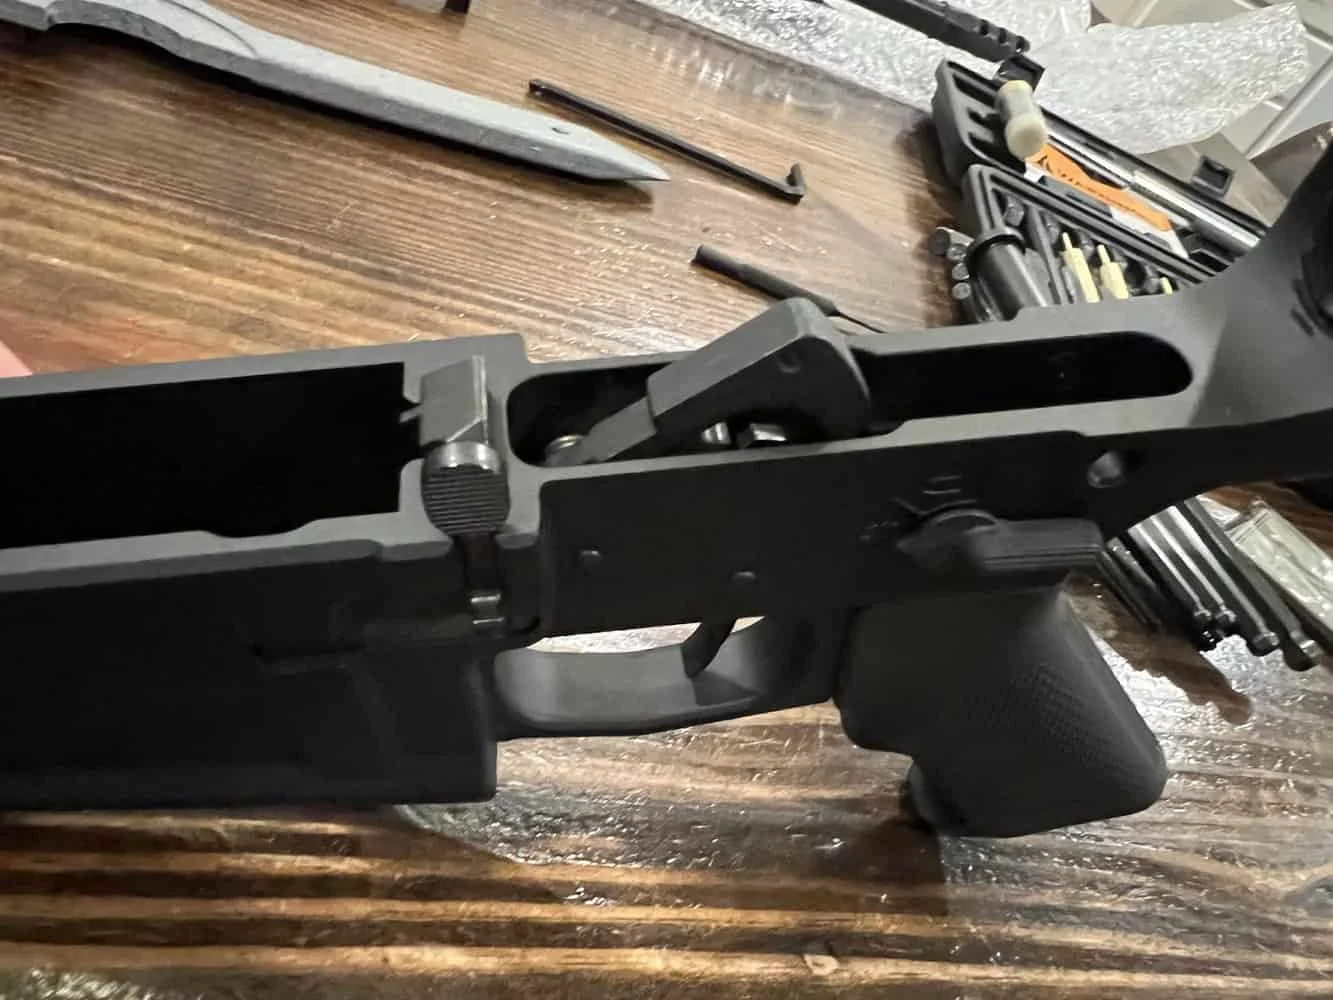
Receiver Extension and Buffer Tube
Thread the castle nut on the receiver extension with the deeper/larger notches facing away from the receiver and toward the eventual location of the stock.
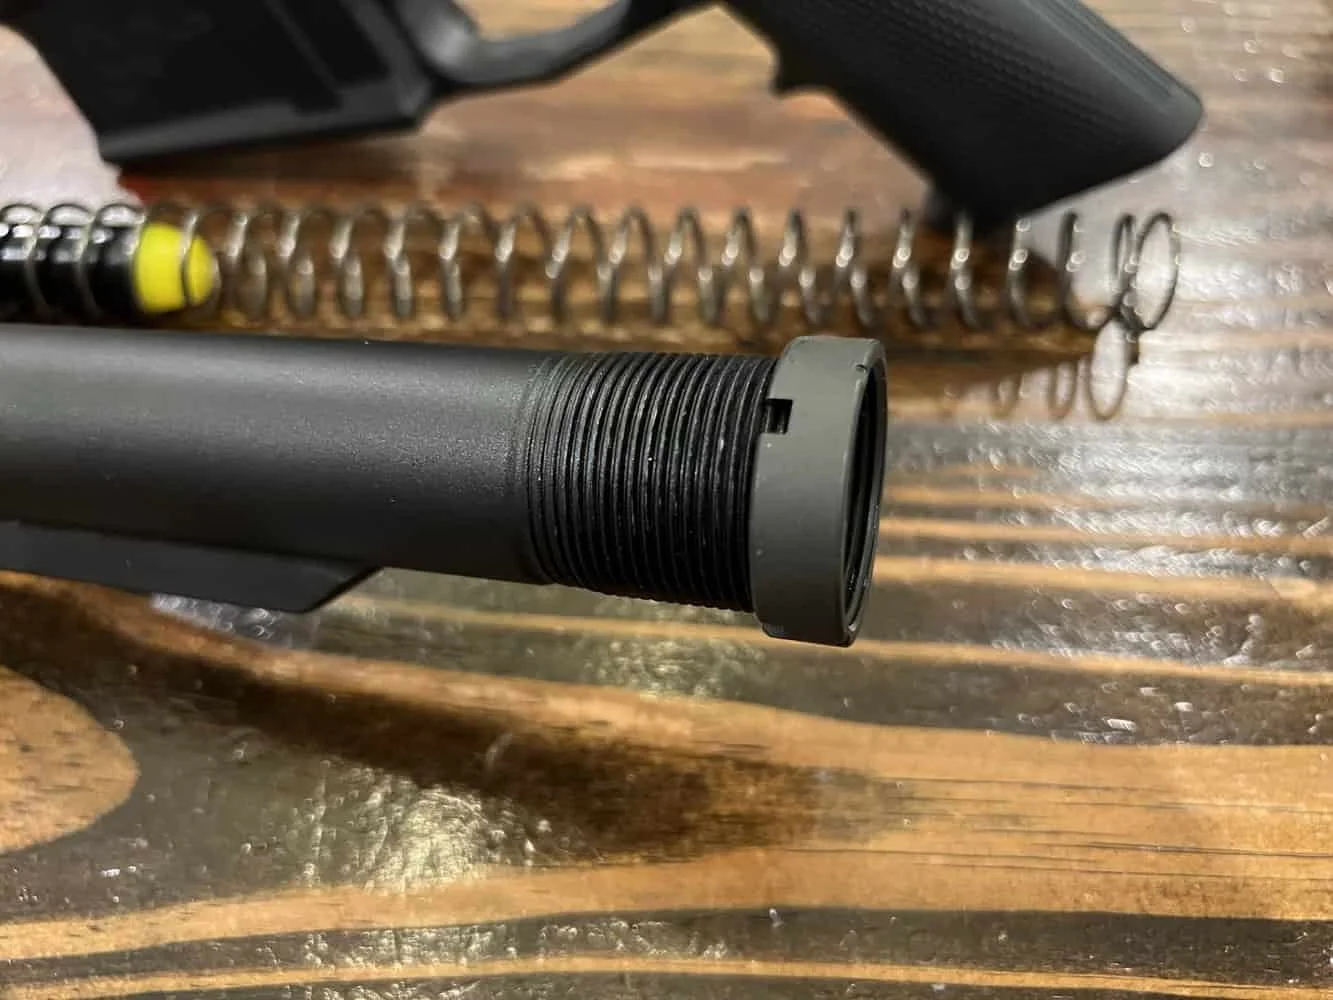
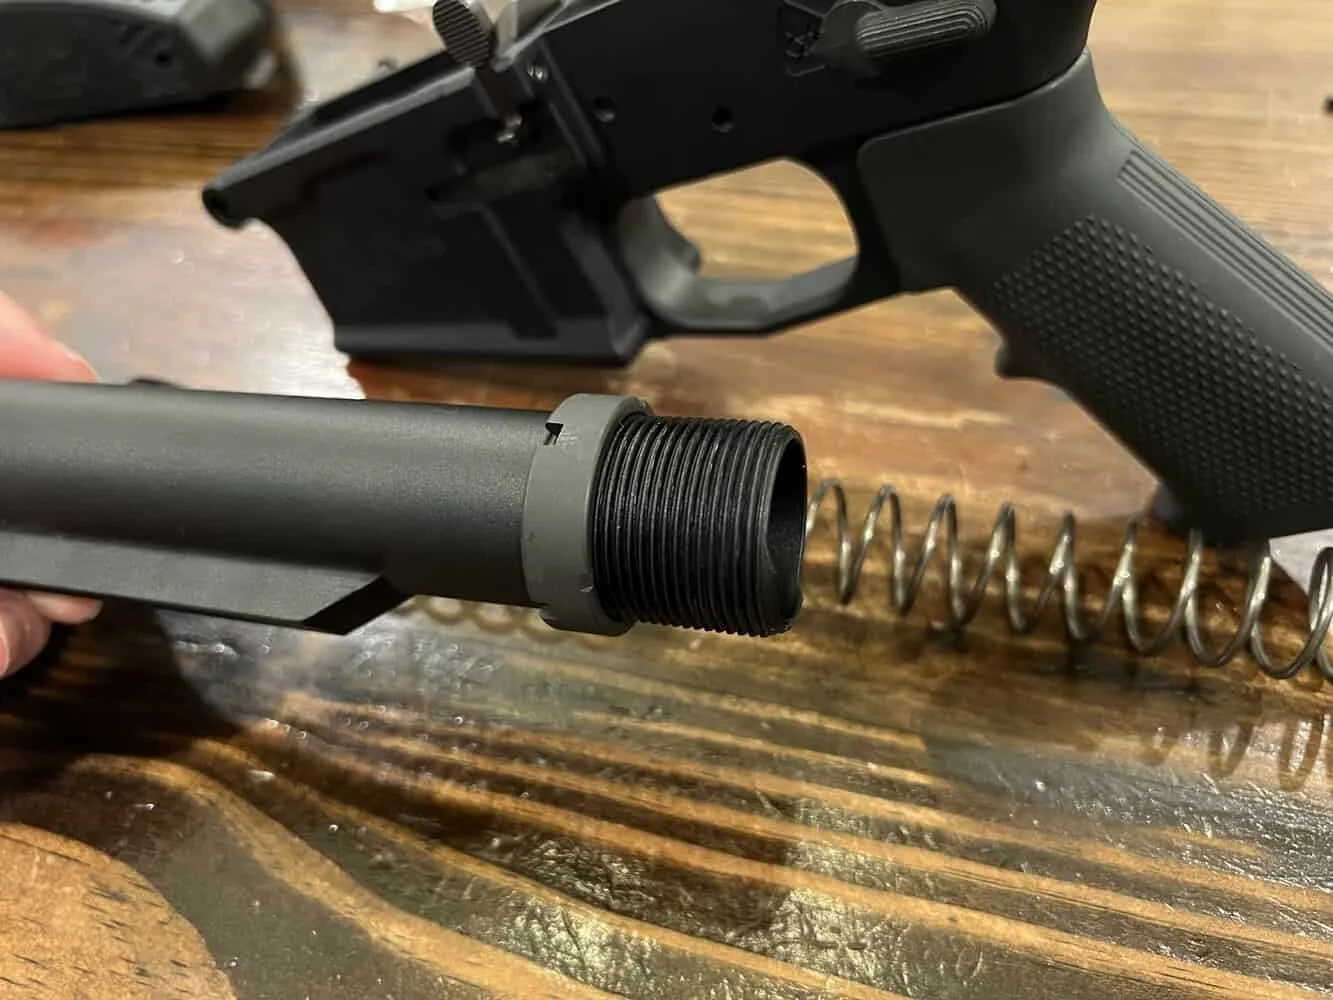
Next, place the end plate onto the receiver extension/buffer tube. Make sure you align the dimple with the appropriate orientation.
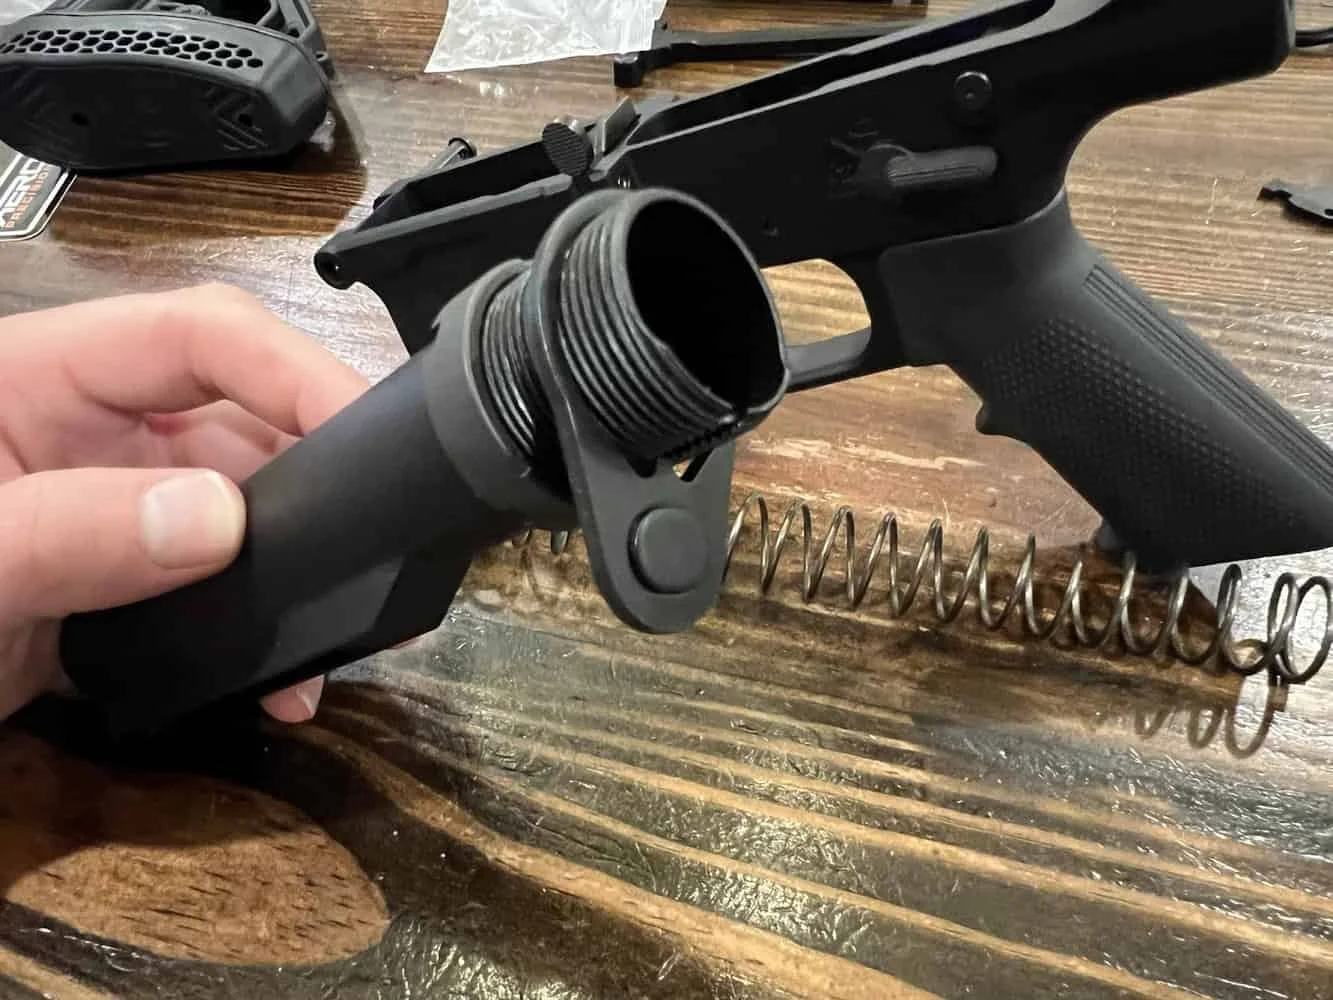
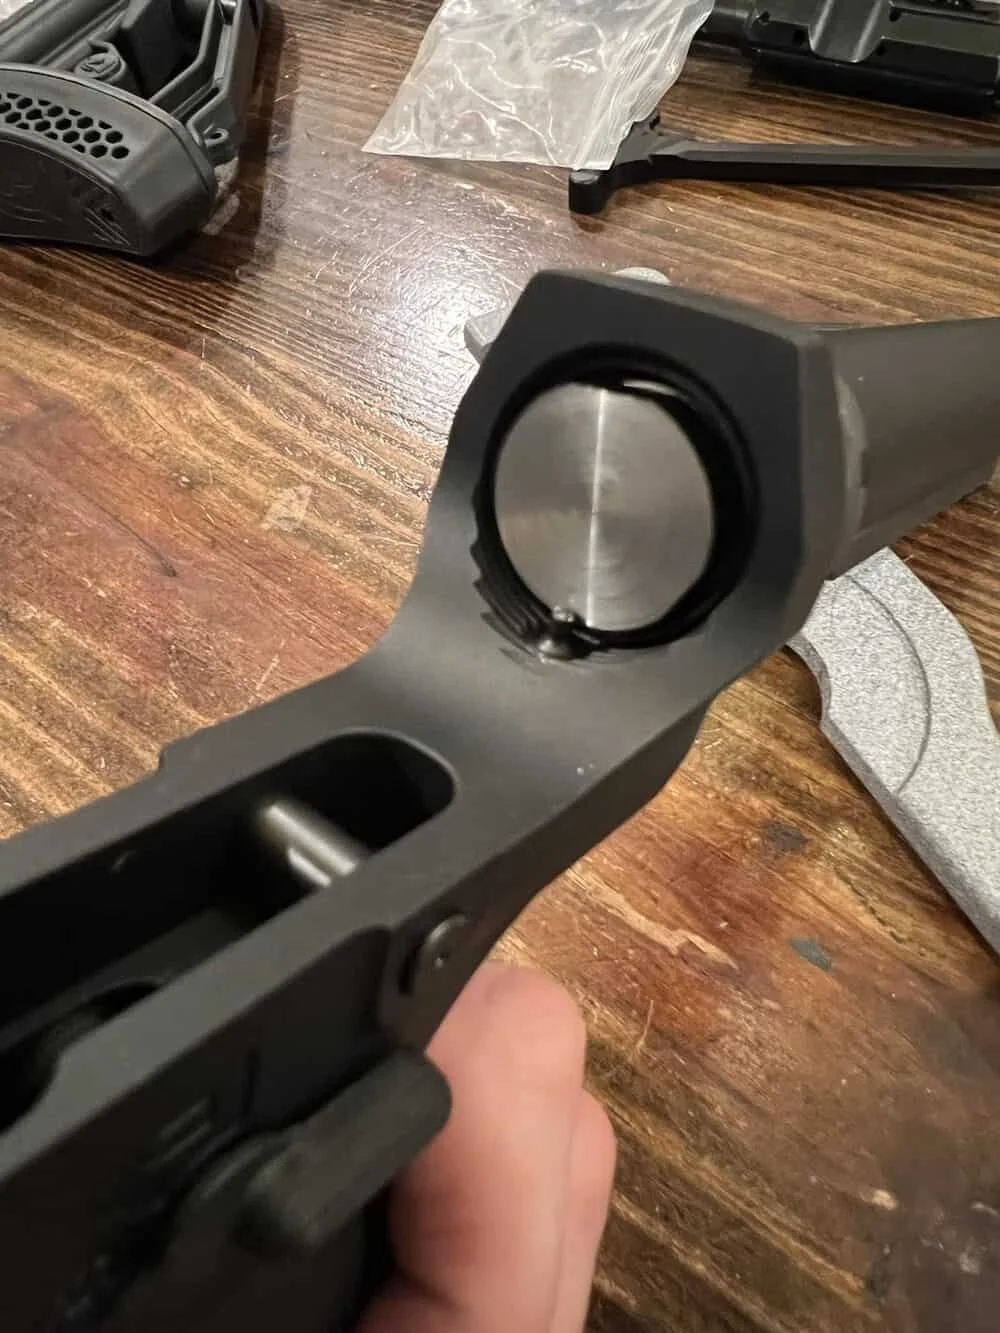
Place your buffer retainer spring and buffer retainer into your receiver and thread the receiver extension/buffer tube into the receiver.
Thread the receiver extension/buffer tube into the receiver until it contacts the buffer retainer. Using your finger, a punch, or another non-marring object, push the buffer retainer down and finish screwing in the buffer tube until the notch on the tube lines up with the buffer retainer. Release the pressure and ensure the buffer retainer is able to freely move up and down.
Once this is completed, take your castle nut wrench or armorer’s wrench and tighten the castle nut down to about 40 foot-pounds.
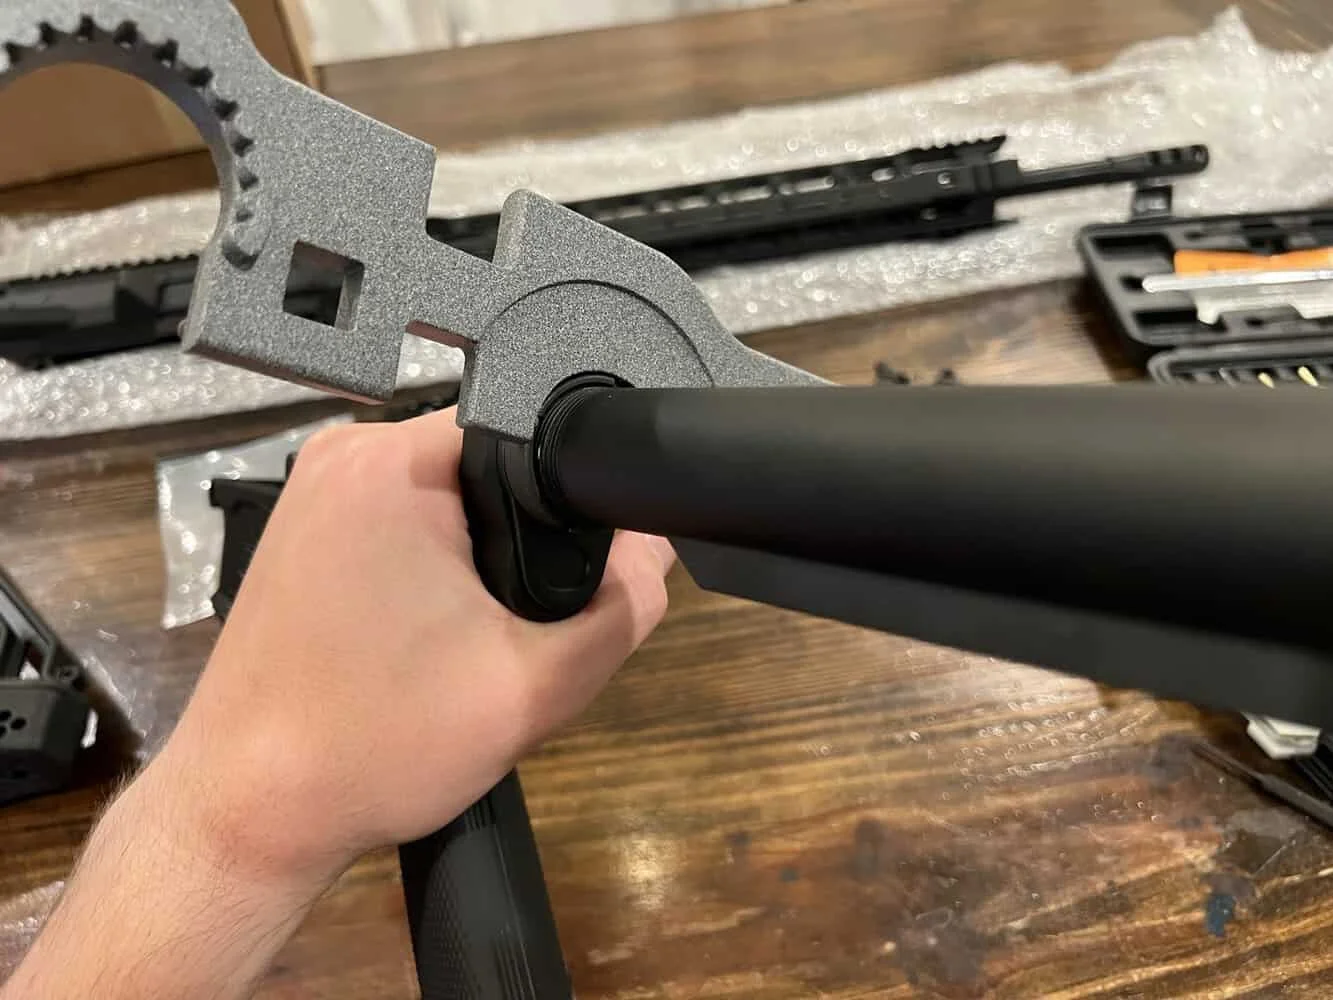
With this completed, insert the buffer spring and butter into the extension/tube. The buffer retainer should click neatly into place, retaining the buffer.
At this point, you can add your choice of stock to the buffer tube or move on to installing the trigger. I waited until after I completed the trigger group assembly installation to install the stock on my rifle.
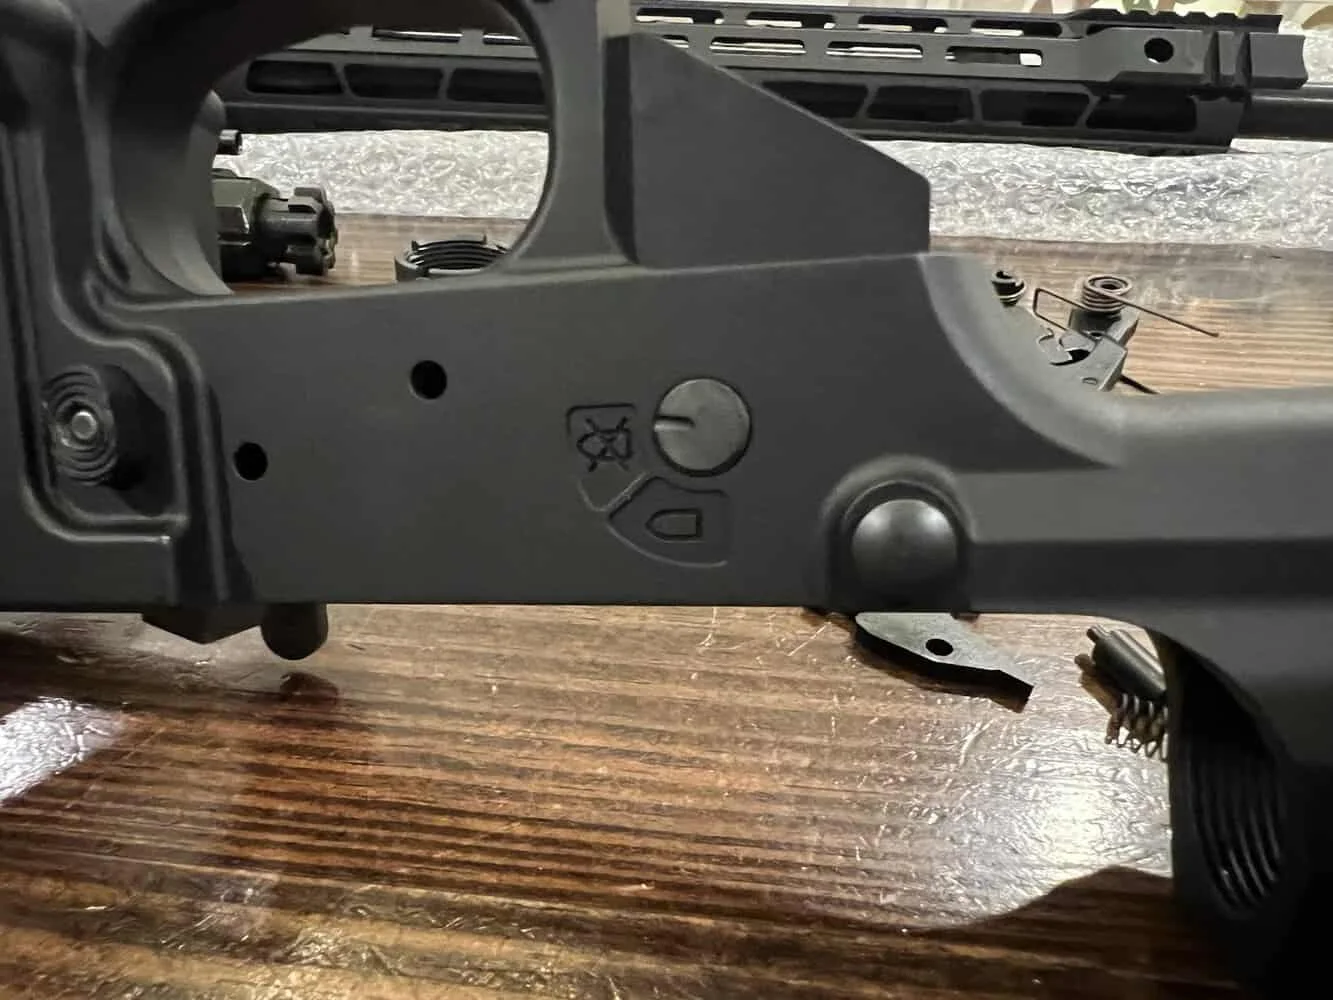
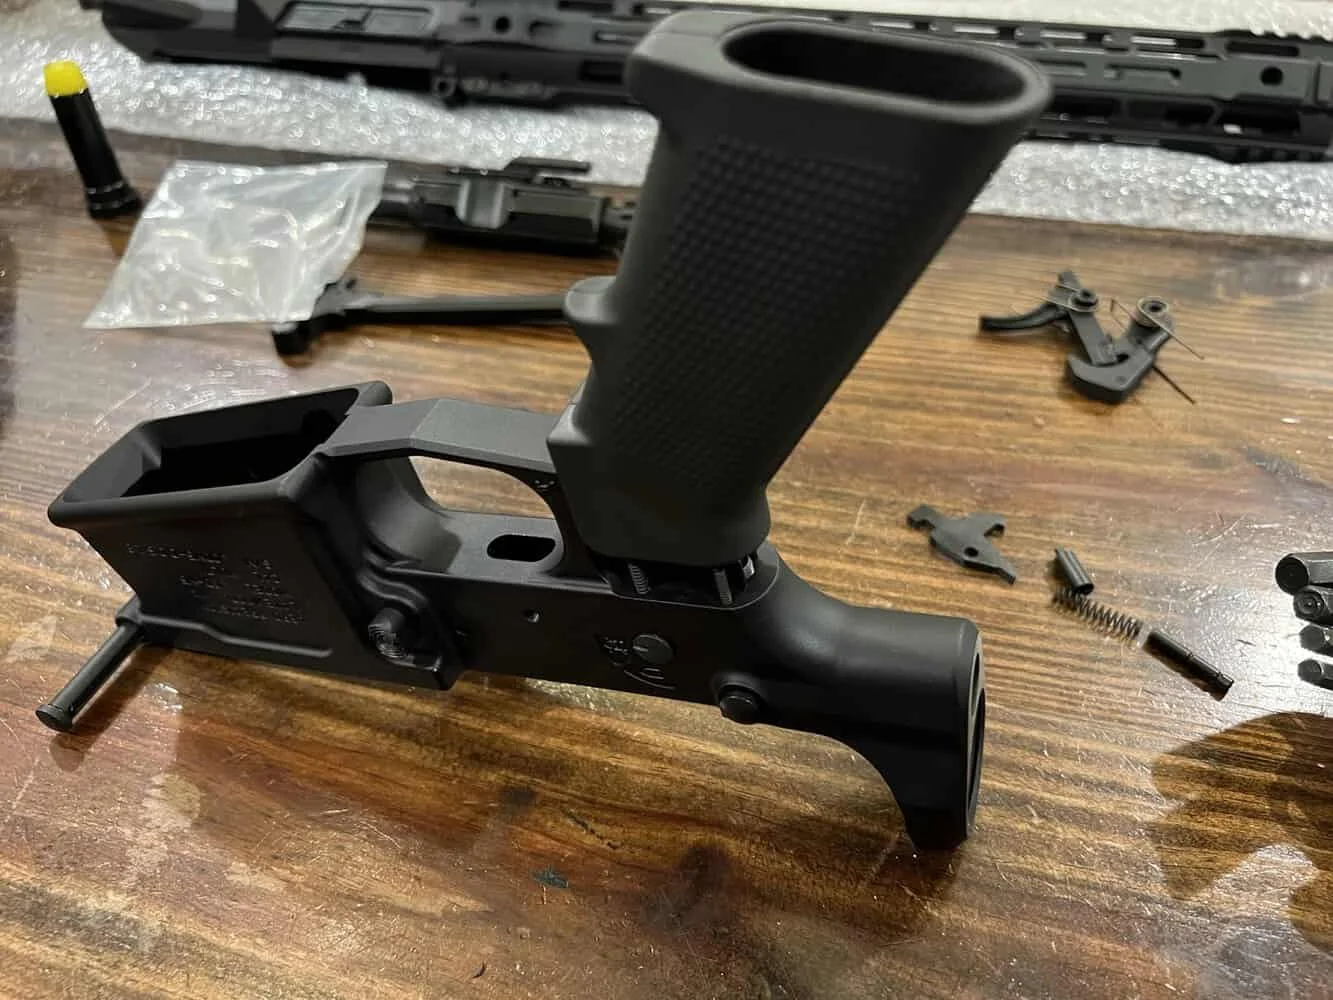
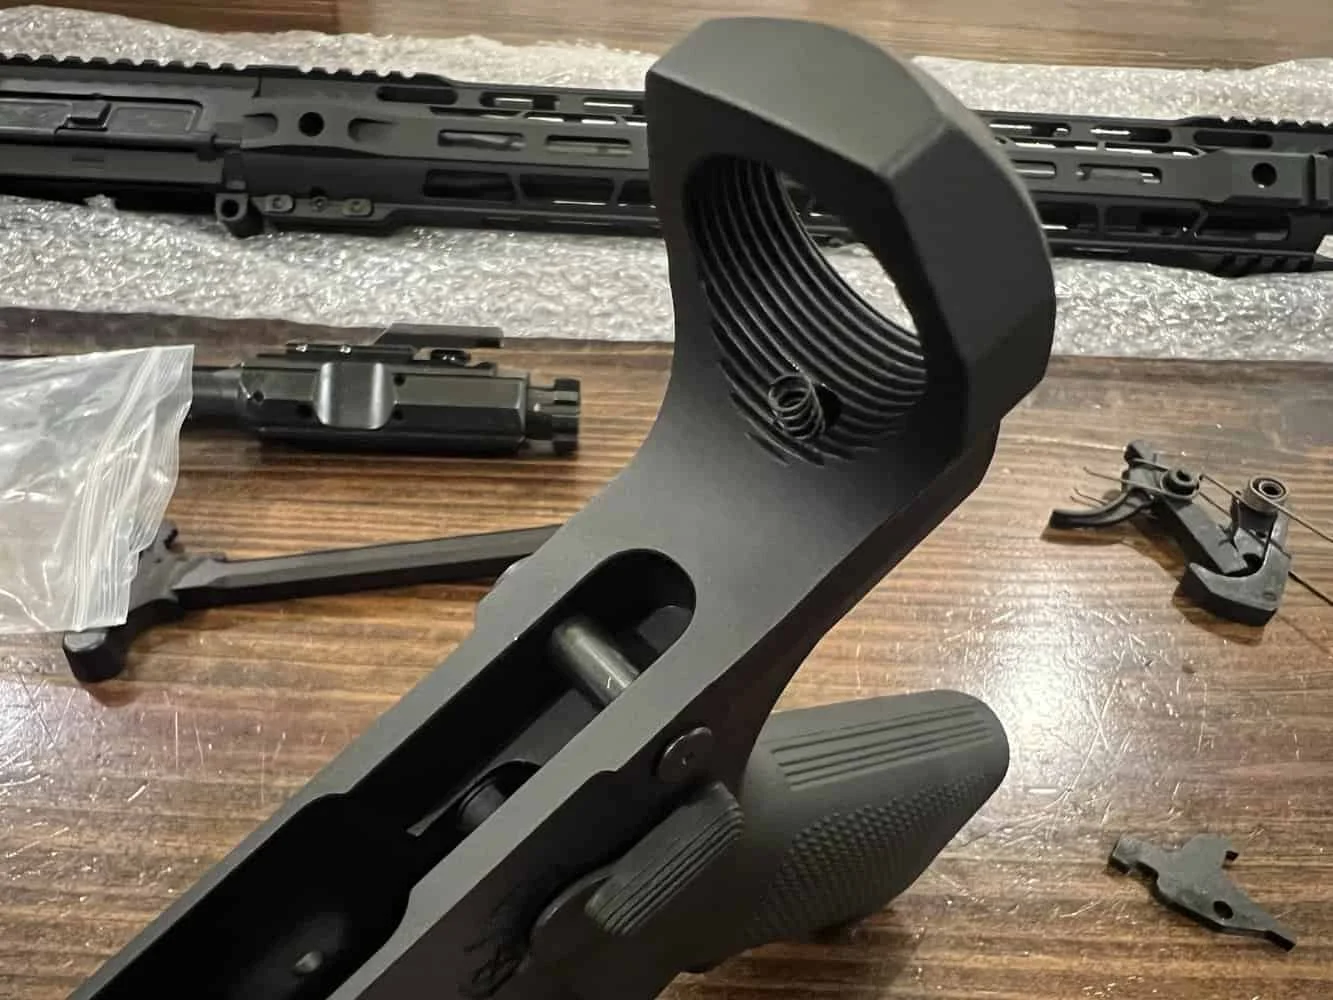
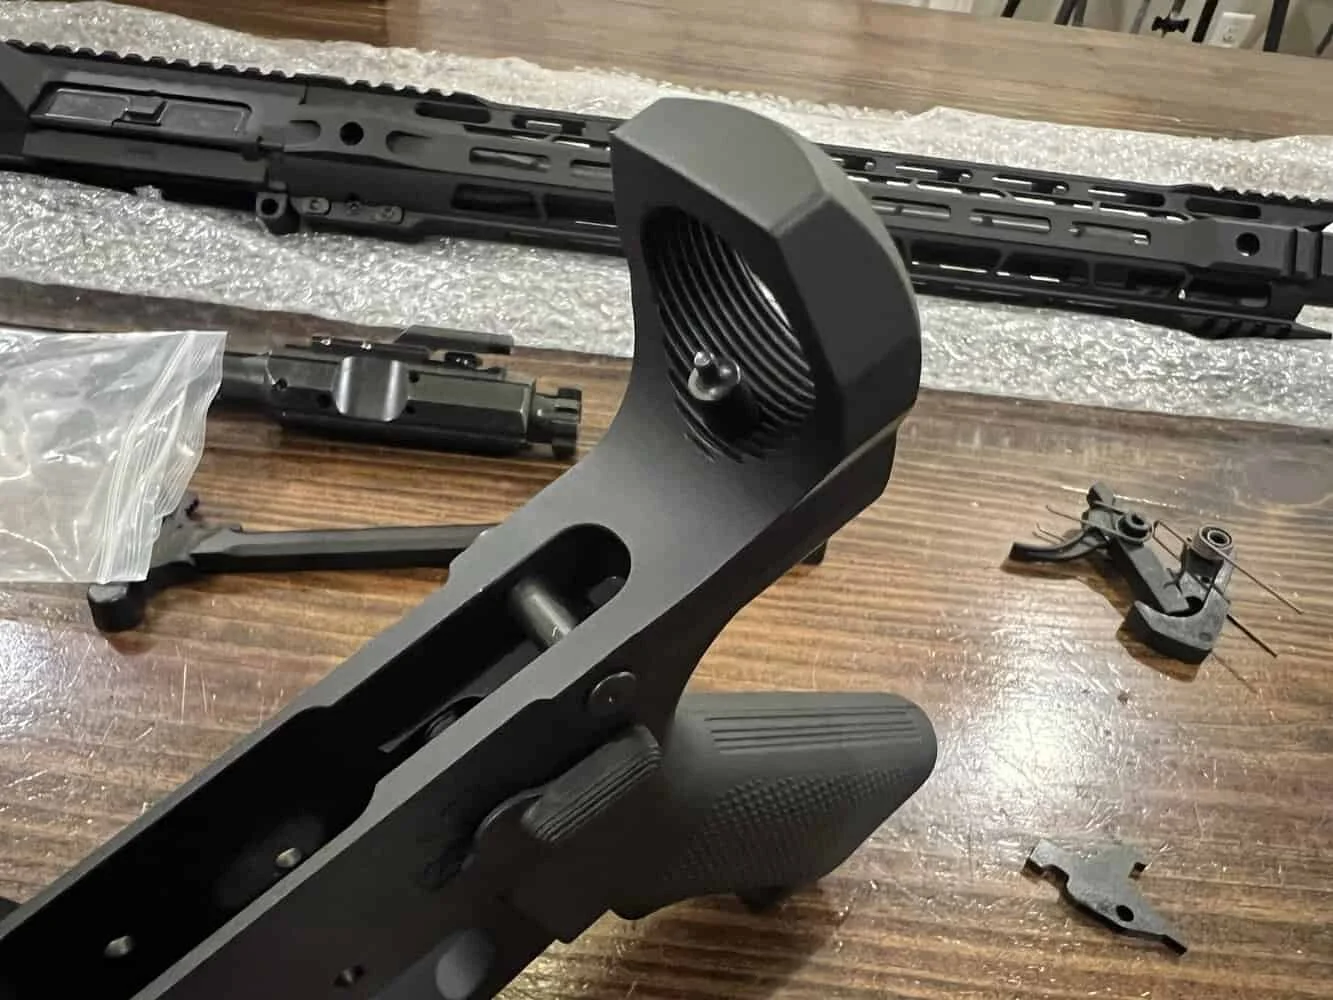
Trigger Group Installation
The included trigger group was a very simple installation process. Since you are building your own AR, this is an excellent opportunity to upgrade the trigger with a high-quality drop-in trigger. If that isn’t in your budget at the moment, though, follow these instructions to install your trigger.
Gather the pieces for your trigger. You will need your hammer pin and trigger pin. Your hammer spring (this is the larger of the two springs and was already installed in my kit).
The trigger and trigger spring (the smaller of the two springs was already installed in my kit), and finally, the disconnector spring. (this was already installed in my kit)
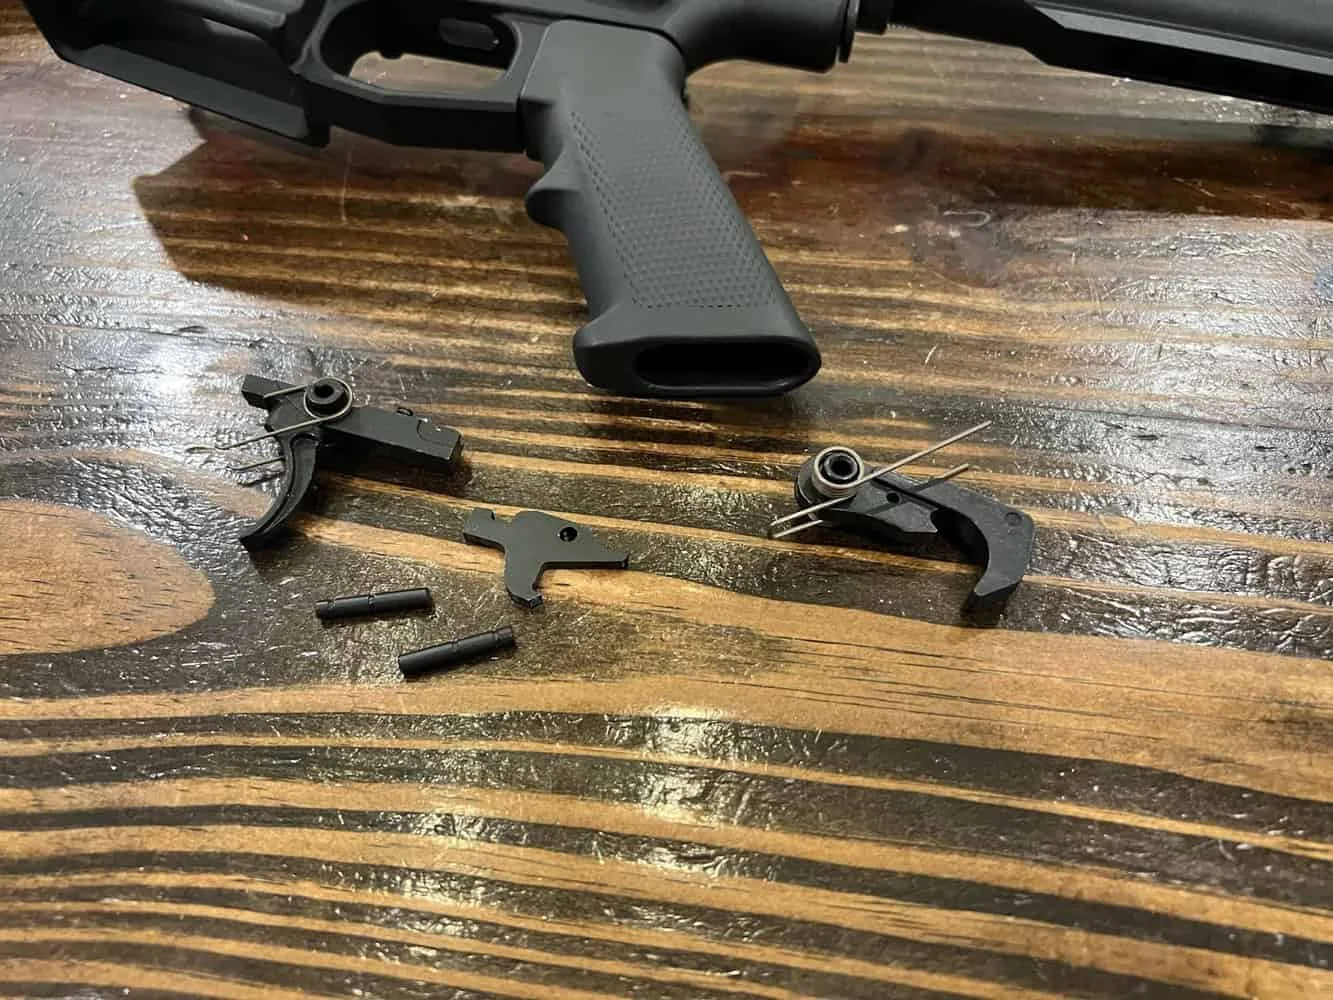
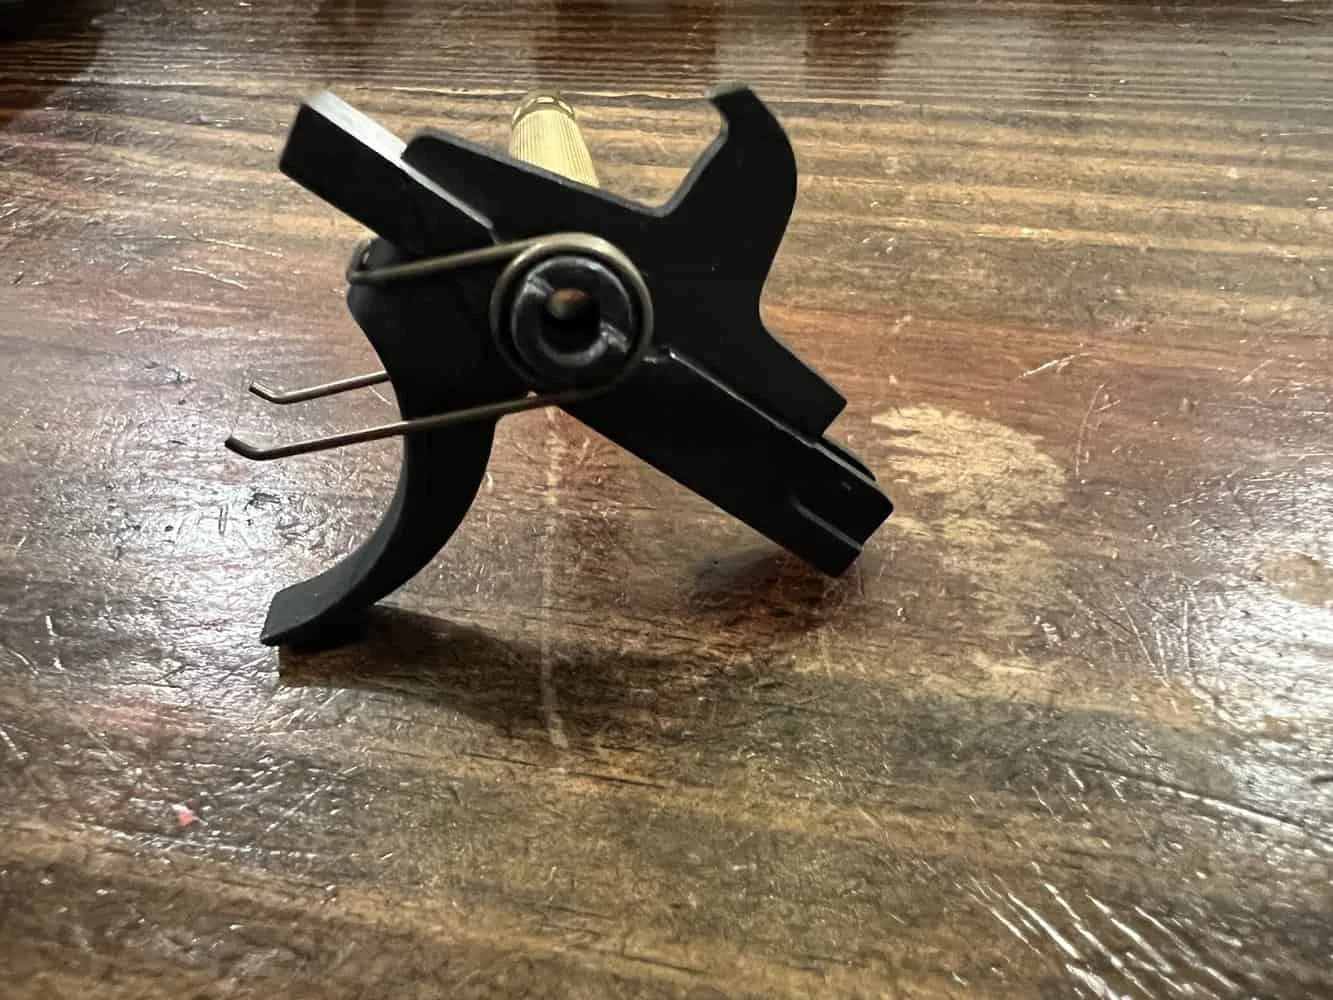
Place the trigger assembly into the receiver and align it with the pinhole that is further back in the receiver. You will need to compress the spring to align the holes for inserting the trigger pin. Using a punch can be helpful for holding the trigger assembly in place while inserting the trigger pin.
The trigger pin can be inserted in either direction. I inserted mine from left to right with the groove on the left side.
Now it is time to install the hammer. The legs of the hammer spring should point downward. The legs of the hammer spring will point toward the rear of the receiver when compressed. Using a punch can be helpful for holding the hammer in place before the pin is inserted.

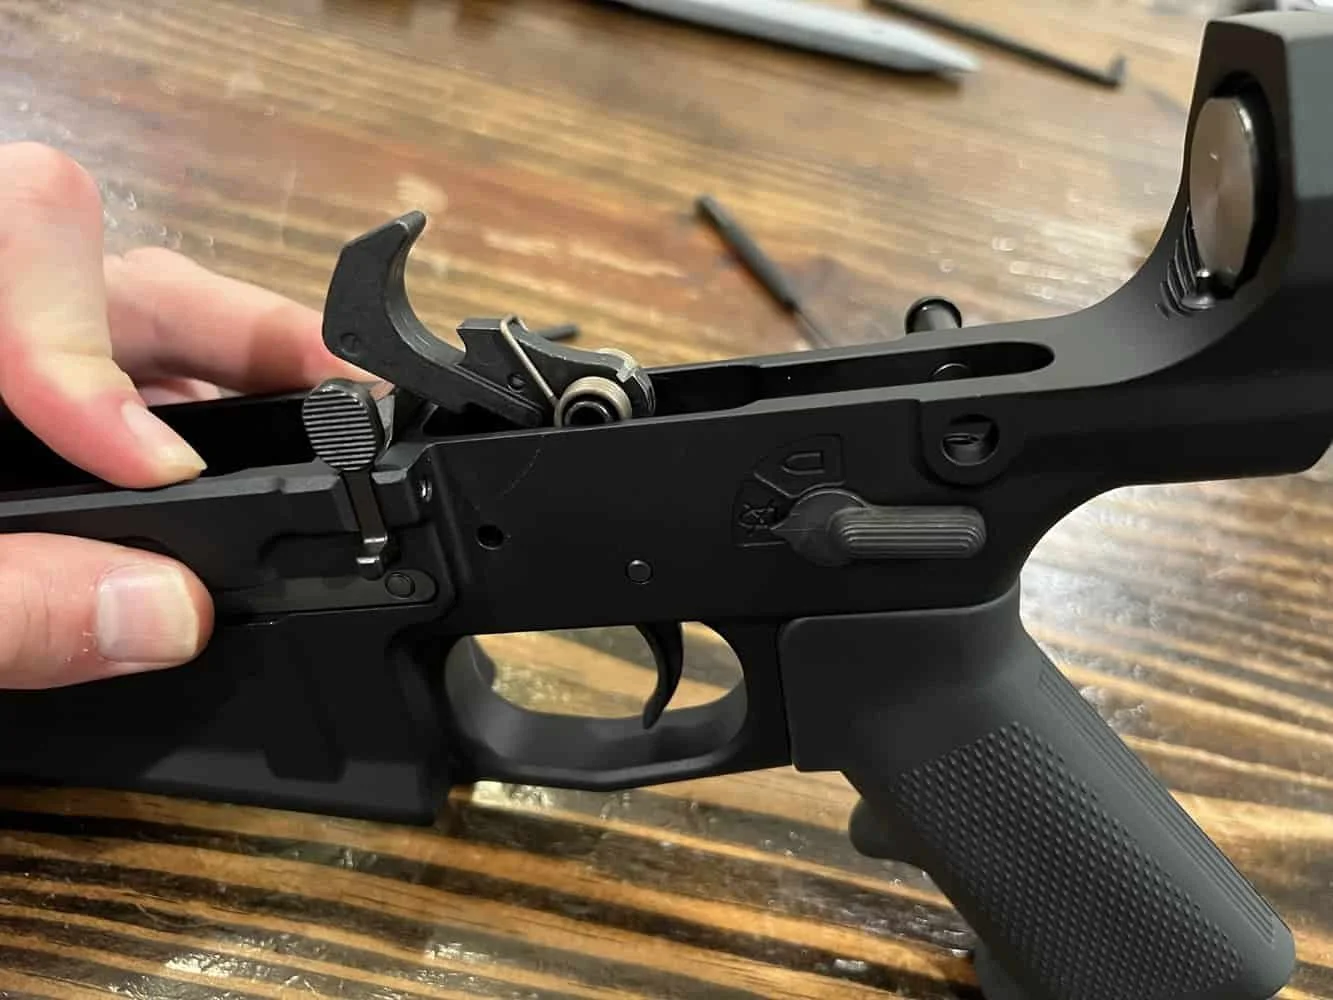
With the hammer installed, it is important to function test the trigger. Make sure that the hammer cocks and releases freely and works properly. When pulling the trigger, stop the hammer from hitting the receiver.
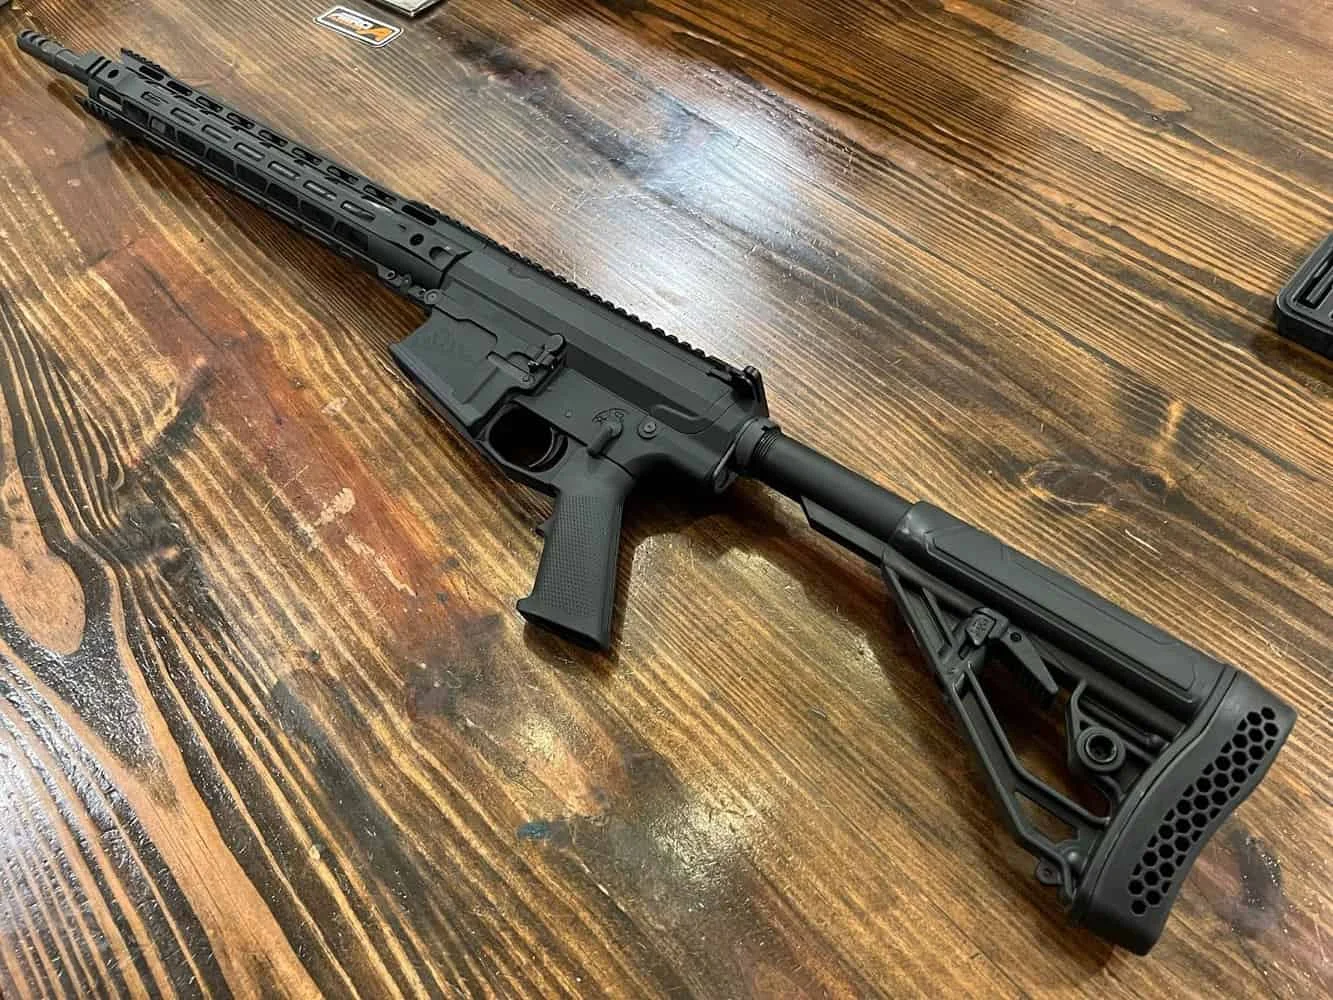
Add the Upper
Finally, put your upper on your completed lower. Push the pins in, and you are finished!
Congratulations, you have just built your AR. If idle hands are the devil’s handiwork, you are staying out of trouble by grabbing this kit and putting together your AR-10. Beyond getting to spend time playing with guns, you are turning boring bits and pieces into a functioning work of art.
Last Words
Davidson Defense ‘Ferrule’ Kit was a fun experience for me. Building the rifle was a ton of fun and something I am looking forward to doing again in the near future. The process was very straightforward.
This is not a $3,000 AR-10 build, though; a good eye can see where components with lower fit and finish were used to save costs and make the kit as affordable as possible.
Don’t take that to mean the kit is junk; just realize that it was made to ensure that as many people as possible can exercise their 2nd Amendment rights.
At the range, the Davidson Defense ‘Ferrule’ AR-10 performed admirably. I plan to upgrade the trigger and the pistol grip, but otherwise, the gun was fantastic. If you’re looking for an entry-level AR-10 and want to put the gun together, check out Davidson Defense and all the available kits.