


So you’ve done your research, purchased a gun, and taken a few classes at your local range. You then caught the bug…the “now I want to shoot all the time” bug. Well, the more you shoot your gun, the more you have to clean it, or at least you should clean it.
If you take the time to familiarize yourself with your gun and have the right cleaning products, the cleaning process should not be overly daunting.
Since there are many, many different types of guns out there, we’ll use a typical semi-automatic handgun for example purposes throughout the article. It’s always recommended to check your specific firearm manual for detailed instructions.
Why it’s Important
I’ve run into my fair share of people at the range that brag about how they NEVER clean their guns. While that may be true, and they may not have had any issues, it’s not a risk I’m willing to take.
Every bullet you put through your gun leaves some lead, carbon, copper, etc., depending on what type of ammunition you’re using. The more rounds you shoot, the more residue starts to build up, and the more fouling can occur.
Not cleaning your gun properly, or at all, can result in a ton of headaches, causing issues from rusting to reduced accuracy to various failures.
When to Clean Your Gun
This answer will vary depending on who you ask, but you’ll likely get answers ranging from never to after every time you shoot. For me, it depends on how many rounds I shoot and the type of gun I’m shooting.
If I’m shooting one of my primary concealed carry guns, you better believe I’m cleaning it after every use, regardless of how many rounds I put through it. However, if I bring my bolt action .22 to the range and put only 30 rounds through it, I’ll not likely be cleaning it after.
It’s always better to be safe than sorry, though. If you have the time to clean your gun(s), it’s not going to hurt cleaning them after every single time you shoot them. But the real world doesn’t always allow for time right after your range session, or you may have just run out of your cleaning products.
That’s understandable; just use your common sense and do your best.
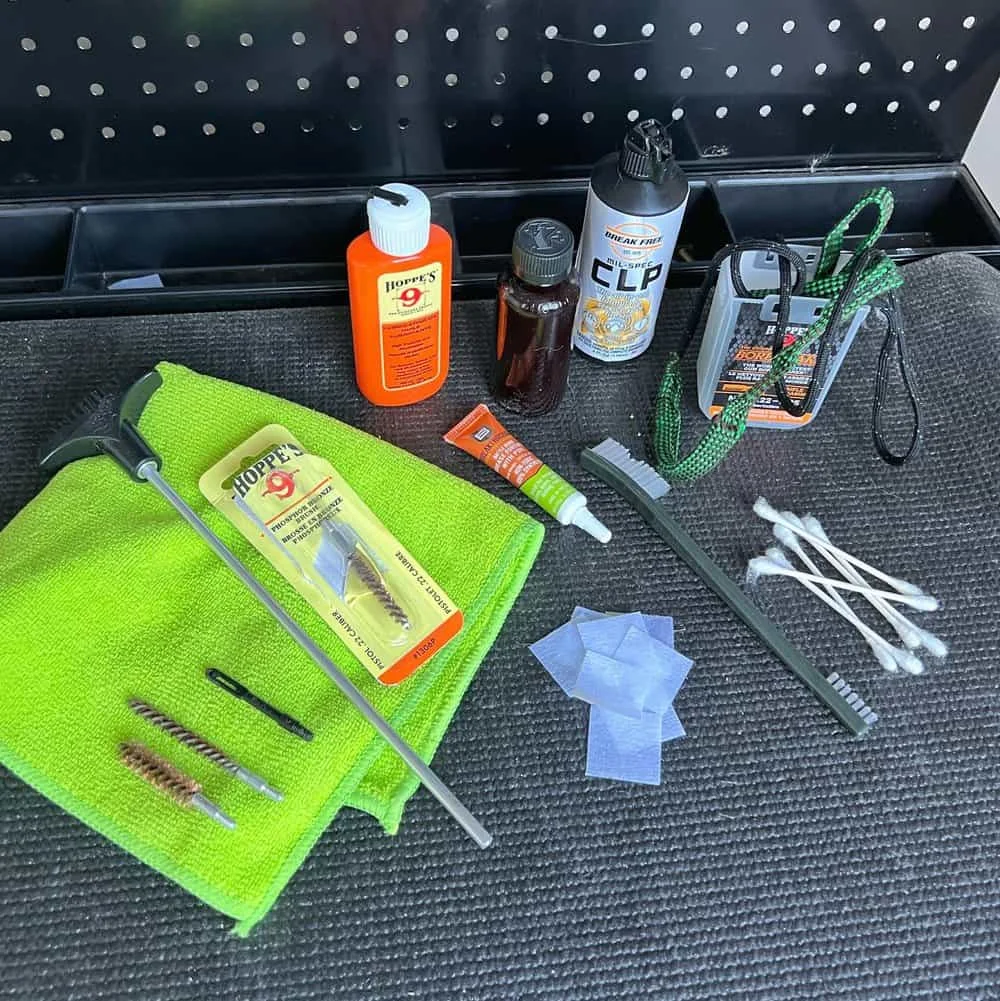
What You’ll Need
The cleaning tools and supplies you’ll need will vary by type of gun and even caliber, but there are some standard products you’ll want to check out. Here’s a list of 10 basic items I suggest having on hand.
- Cleaning rod
- Patches
- Bore brush – ensure you have the correct caliber
- Slotted cleaning rod ends
- Lubricating oil
- Bore cleaner
- Bore snake
- Q-tips
- Utility brushes
- Gun cleaning mat – helps to soak up any spilled solvents or lubricant
There are a million and one products on the market, claiming to be the “best.” Truth is, I’ve found many of them to work well, but none of them have been life-changing over another.
How to Clean Your Gun
Step 1: Safety, Safety, Safety
Without a doubt, this is the most important step. Before you do anything else, you need to ensure that your firearm is unloaded. I typically suggest going as far as unloading your magazine and placing all of the ammo off to the side. It’s better to be safe than sorry.
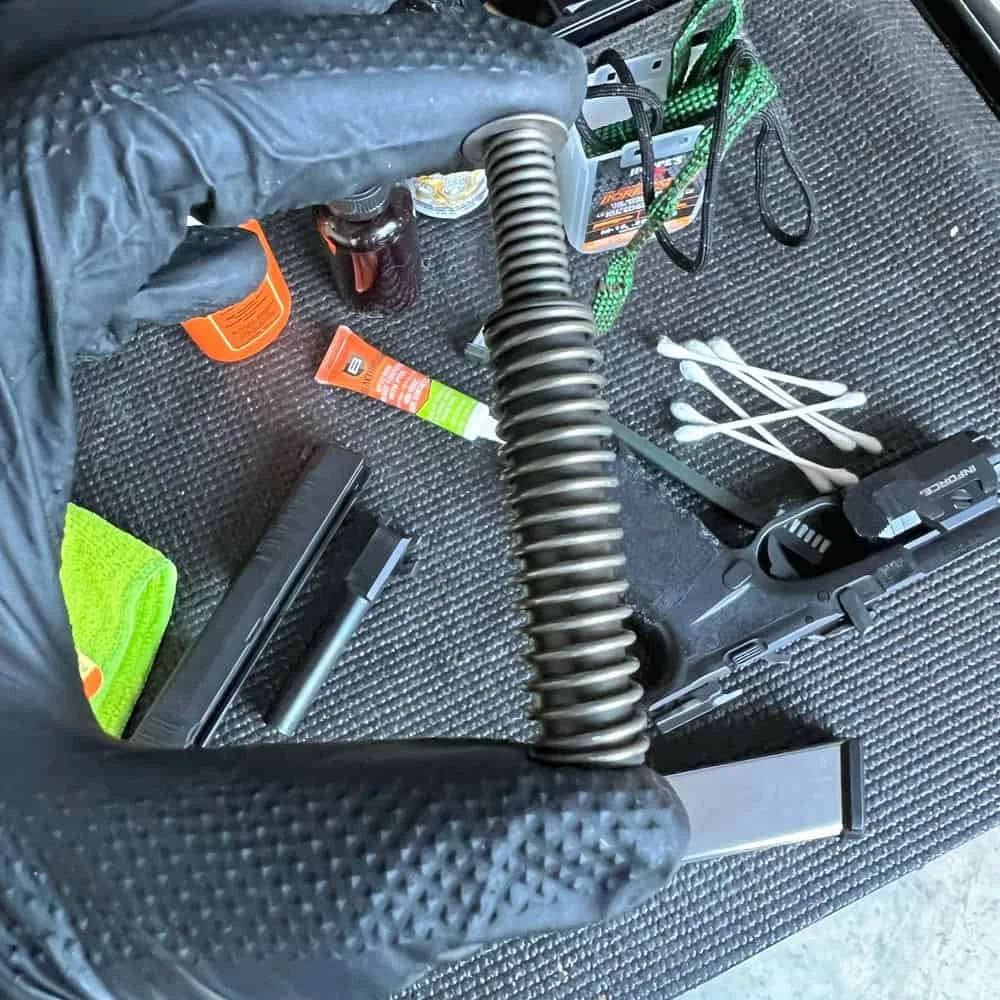
Step 2: Disassemble Your Firearm
Once you’ve made sure that your gun is unloaded, you can begin to disassemble it. If you’re not sure how to do so, check the manual or search the Google machine.
You’d be surprised; many firearms, pistols, and rifles included only require a few steps to field strip them.
Very rarely will you need to completely disassemble your firearm unless you are repairing it or replacing many parts.

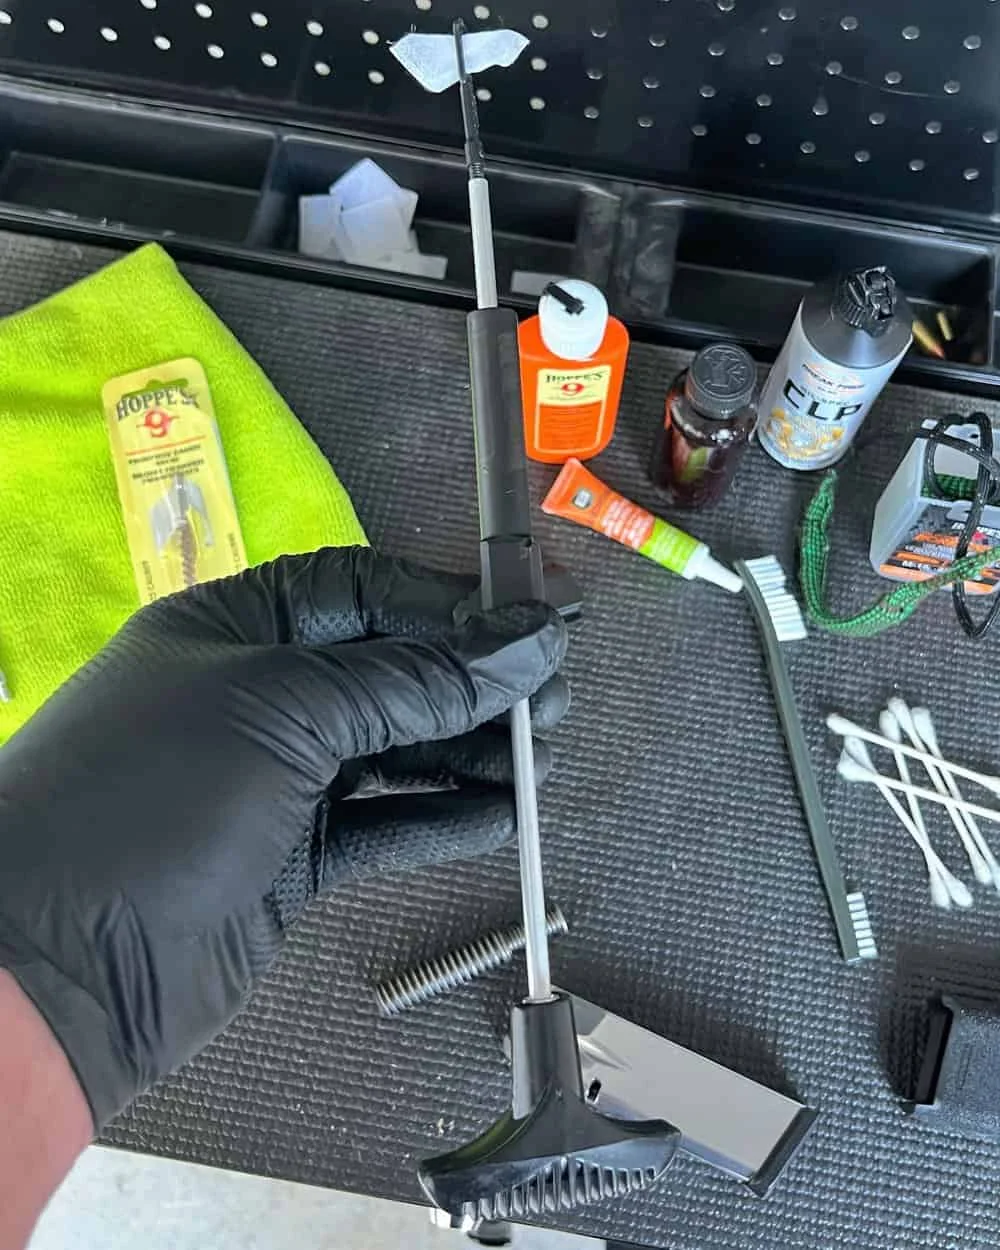
Step 3: Getting Dirty – The Actual Cleaning
The barrel of the gun is one of the first things that people think to clean, and rightfully so. It’s one of the most important parts of your gun.
To start, grab your bore brush, apply some bore cleaning solvent to the brush and run it through your barrel, from back to front. You want to remove the brush after you push it through, then reattach it and repeat from back to front.
Once you’ve run that through the barrel a couple of times, grab one of your slotted cleaning rod ends and insert a patch. Run a few patches through the barrel until you start to see them coming out essentially clean.
Lastly, apply some lubricant to a clean patch and run it through the barrel.
With the barrel clean, you can move on to the rest of the gun. Wipe down any parts that have residue and debris from shooting. These areas could include the slide, frame, and magazine, to name a few.
Wipe down the areas if they seem dirty, apply solvent if necessary and if your patches or cloth continuously wipe dirty, continue and repeat.
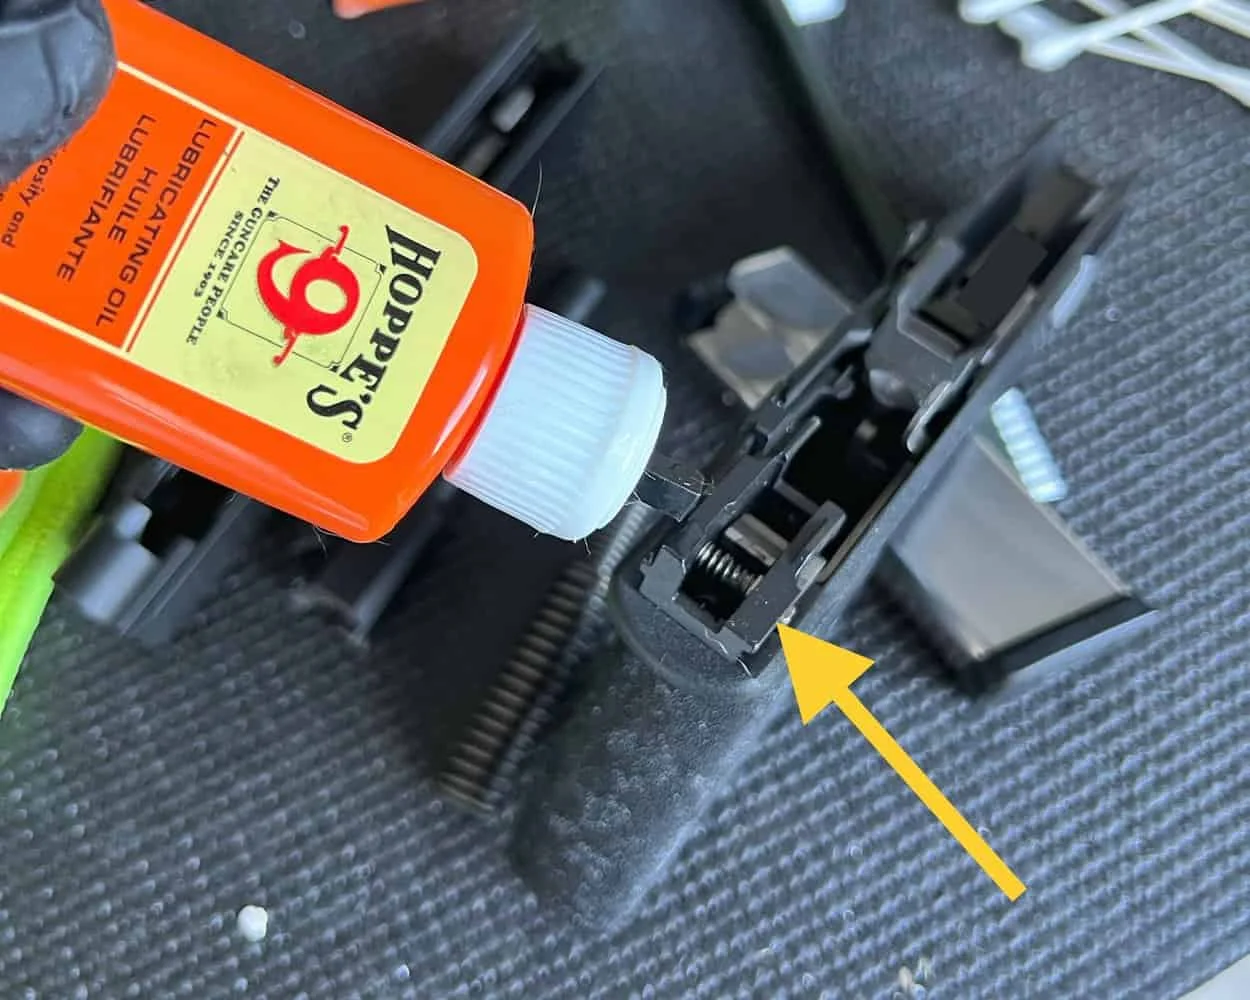
Step 4: Lube It Up
Lubricate in moderation. Where you need to apply lubrication will differ from gun to gun, but it’s usually good to hit any parts that see friction.
You don’t need a TON of lubricant, as if you apply too much, it can attract extra debris and gunk. Certain lubricants come with a needle applicator; if they don’t, you can use something similar to a Q-tip or cotton swab.
Step 5: Reassemble Your Firearm & Function Check
Remember step two when you disassembled your gun? Yeah, go ahead and reverse that. Once your gun is back in one piece, make sure to perform a function check. Double-check that it’s unloaded and proceed to check that the various operations are working properly, including the trigger, slide, safety (if applicable), etc.
Step 6: Final Wipe Down
During the cleaning process, there is a good chance that you got some solvent or lubrication on the exterior of the gun. I typically will wipe down the gun’s exterior to remove any of it before storing it.
FAQs
How long does it take to clean a firearm?
Once you get the hang of it, a single firearm can take as little as several minutes to clean if you’re simply field stripping it.
Do you have to clean a gun every time you shoot?
Technically, you don’t HAVE to. With that being said, if you have the time and patience, it’s not a bad idea.
Should you let the gun dry after cleaning?
Well, the gun shouldn’t be “wet” or oversaturated with solvent/lubricant. The lubricant will remain and help with the functionality of the gun, but it’s good to wipe down any excess.
What happens to a gun if you don’t clean it?
Something as simple as a reduction in accuracy can occur to various failures in the gun’s actual working condition.
What parts of a gun should be cleaned?
Any part that seems dirty! That seems like an obvious answer, but it’s really that simple. If you can see dirt and grime, clean it.
Conclusion
Part of being a responsible gun owner is taking proper care of it. It’s fun to shoot and accessorize your gun, but you also need to clean it. It’s not the most exciting part of gun ownership, but it is necessary.
So, take your time while cleaning, be safe while cleaning and try to be consistent with your cleaning. Whether you decide to do frequent and quick cleanings or lengthy and sporadic deep cleans, CLEAN YOUR GUN!