


There’s no shortage of awesome-looking, perfectly painted ARs on the Internet, and many guys think that achieving perfection in gun art requires a great deal of time, expertise, and money. This is partly why folks fret over painting their gun. “Oh, mine will look bad…” or “I don’t know how…”
Forget that. You can do it. Buy the paint, have a beverage if necessary, and just do it.
The fact of the matter is you can get an awesome finish with less than $50 in supplies and a few hours’ time. It’s worth repeating: The best way to paint an AR-15 is simply to grab a can and just do it. Just start somewhere, and see where you go.
The worst-case scenario, if you don’t like the result, is you simply go back to square 1 with a fresh solid coat and start over. Plus, each time you paint a gun, you’ll get better and learn the subtle nuances that come with experience.

That said, you want to get your kit assembled and sorted before taking the plunge, and we’ll walk you through the two most popular ways of painting and AR-15: spraying and sponging.
Regarding why you’d want to paint your gun, the two most common reasons are to camouflage it for hunting, or finishing off a clone rifle build. Many cloners use pics of Navy SEALs or other Special Forces (SF) units in action and replicate their hardware as closely as possible. More often than not, these Tier 1 operators have paint on their guns, and they don’t stress out about the finish.
In the field, they’re using whatever’s available to them, which is usually a rattle can similar to what’s in your local hardware store. A lot of the desert-themed spray jobs are not only for camouflage but to reduce how hot the guns get in the field. A black rifle in sunny 110-degree heat gets hot in a hurry, so light tans and browns keep things cooler.
Gather Your Kit
Spraying painting is the easiest, most accessible way to get a custom Krylon touch on your blaster. It can be as simple as leaning your gun against a tree and spraying to your heart’s content. Although if you’re going after a more polished finish, get the following things together:
- Wire hanger
- Gun cleaning solvent
- Blue painter’s tape
- Stencils (optional)
- Paint
Sure, the paint’s a given, but what kind? The best spray paint for painting an AR-15 is Krylon’s Ultimate Camo paint. It’s the best because for a few reasons, not the least of which is cost and availability. It costs about $7 a can, and can be had at your local Walmart, hardware store, or on Amazon.
It comes in Khaki, Olive, Woodland Light Green, Brown, Black, and Sand. Among all the colors in this palette, you can make your gun disappear in any environment, from coastal marshes to high desert sierras. The paint dries quickly, is decently durable, and has a great flat or matte finish. Plus, for hunters, its smell completely disappears in about a week.
If you’re less concerned with price and more concerned with getting a primo finish, look into Aervoe spray paint. It’s more expensive, available in a wider variety of colors, and is the gold standard for rugged spray paint. Some of the camo colors can be hard to find, but scour the web and you’ll come across some.
The Spray ‘n’ Pray Method
Now that you’ve got your paint and gear, it’s time to get started. What follows is a general guideline because there are myriad ways to spray a gun, but they all follow the same general process. None of it is difficult, you just need to focus on doing a bang-up job preparing your rifle.
Like painting a house or car, the end result is highly dependent on the amount of prep you put into it. If your gun is dirty or has gun lube or oil on it, paint won’t adhere well.
Close the ejection port cover and thoroughly clean the outer surfaces of the gun. Now is the time to remove any accessories that you don’t want painted, like lights and optics.
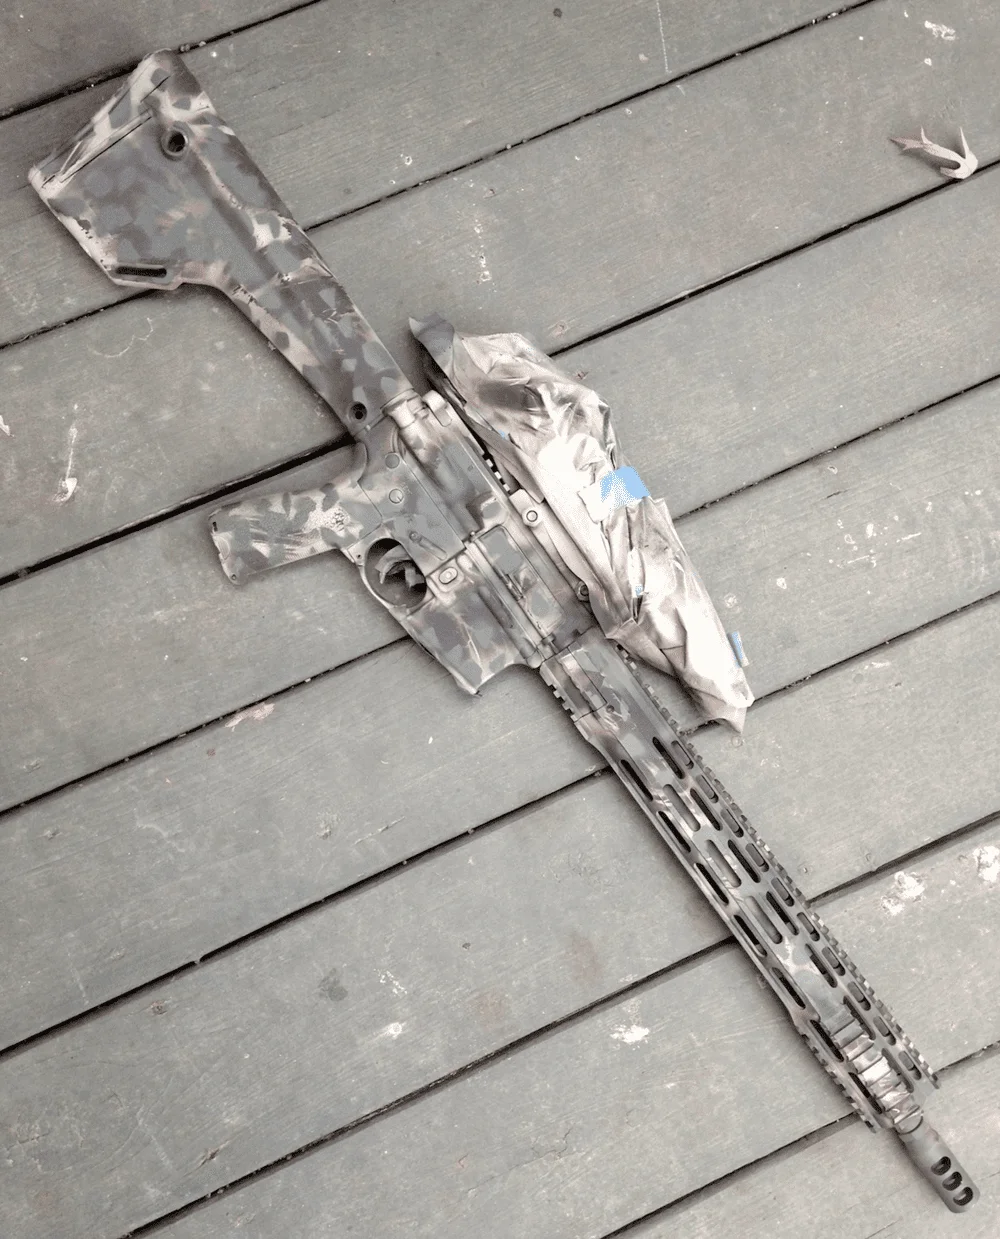
Tape & Protect
Now it’s time to cover up sensitive areas you don’t want the paint to get in or on. These include the muzzle and magwell if you’re not painting a mag in the gun, the trigger, so no paint gets into the lower receiver, and the objectives and power dial of your optic if you’re keeping it on the gun.
You don’t want paint on your glass or on the magnification dial, which will obscure the magnification readings and make twisting it gritty and more difficult.
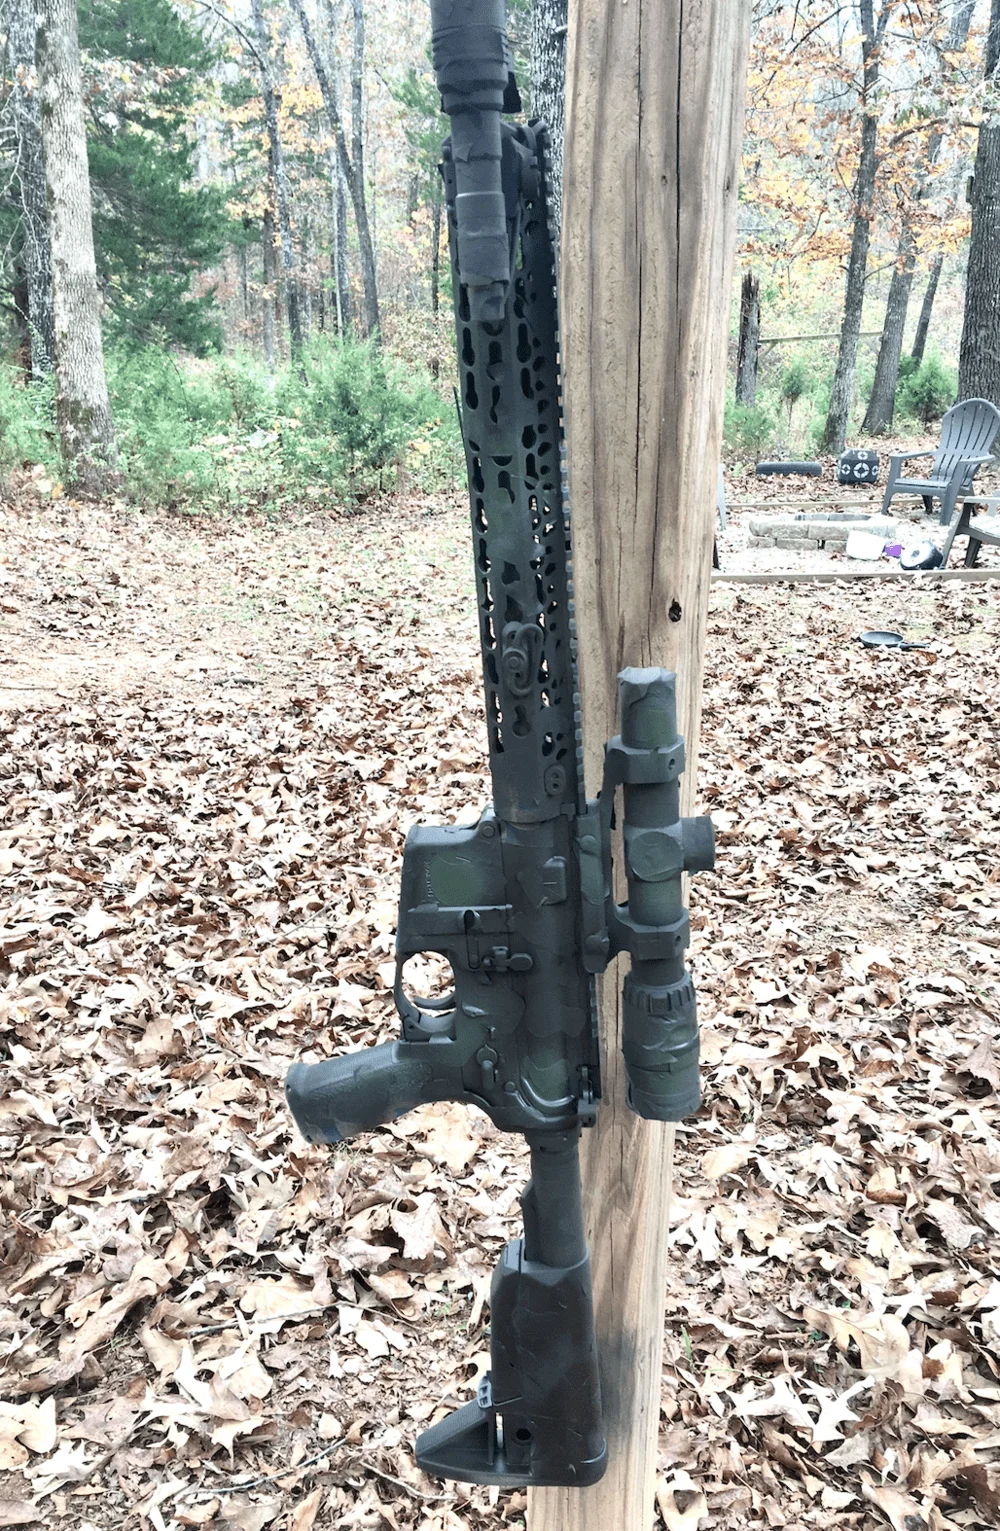
Ideally, you’ll suspend your rifle in the air rather than lay it on its side. This prevents you from handling and smudging the pattern, which is especially important if you’re making a detailed stencil pattern. Plus, hanging is quicker and lets you walk around the gun, getting greater coverage by letting you spray from all angles.
The best way to hang it is to straighten out a wire clothes hanger and thread it through the muzzle device, then loop the other end around a support. The best place to hang and spray is in an empty garage, so it’s protected from the outside elements. But a tree limb works well, too.
Make/Prepare Stencils
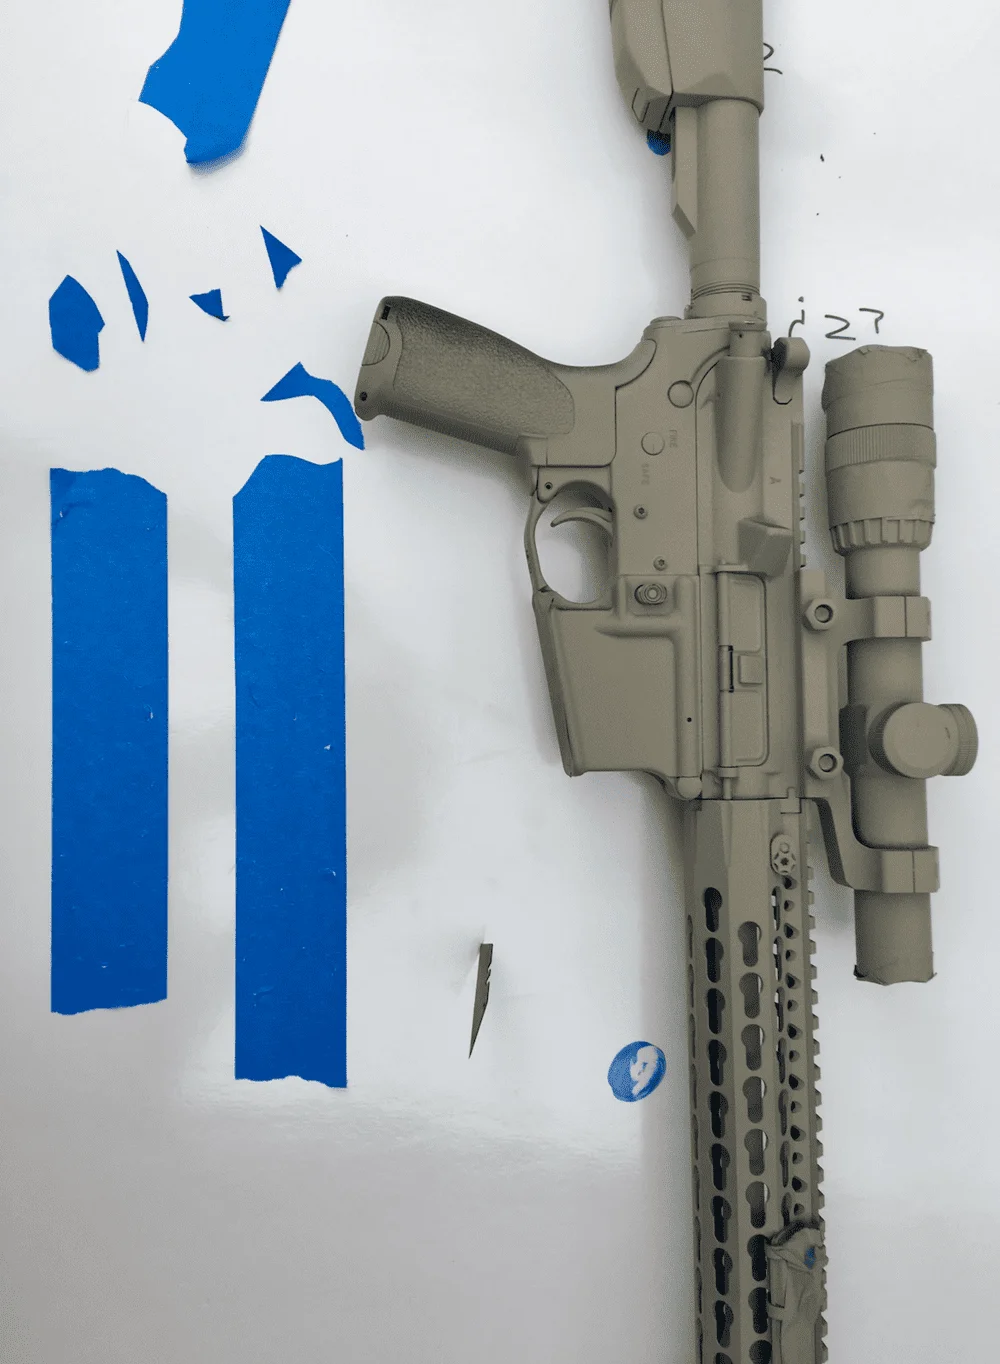
This can be done before you put down a base layer if you want elements of black in your pattern. But most folks put a base coat down before adding stencils. If this is you, skip down to the next section and come back here after you’ve laid down a base coat.
Stencils are a great option to give your gun a great-looking pattern and design. There are lots of famous camo patterns, from military BDU/M81 (God’s Plaid), ACU, MARPAT, German Flecktarn, Vietnam-era Tiger Stripe, modern hexagonal patterns to hunting patterns like Bottomland, tree bark replicas, and ones at home in a duck blind.
These all look great and deliver a professional finish, but in general, the more complex and smaller or finer the pattern is, the more it’ll look like a “blob” at a distance. In other words, big swathes of browns, tans, blacks, and greens with less of a definite pattern tend to have a greater camouflage effect than a highly intricate design that looks great in photos.
But it’s your gun, and you know your needs better than anyone, so plan accordingly.
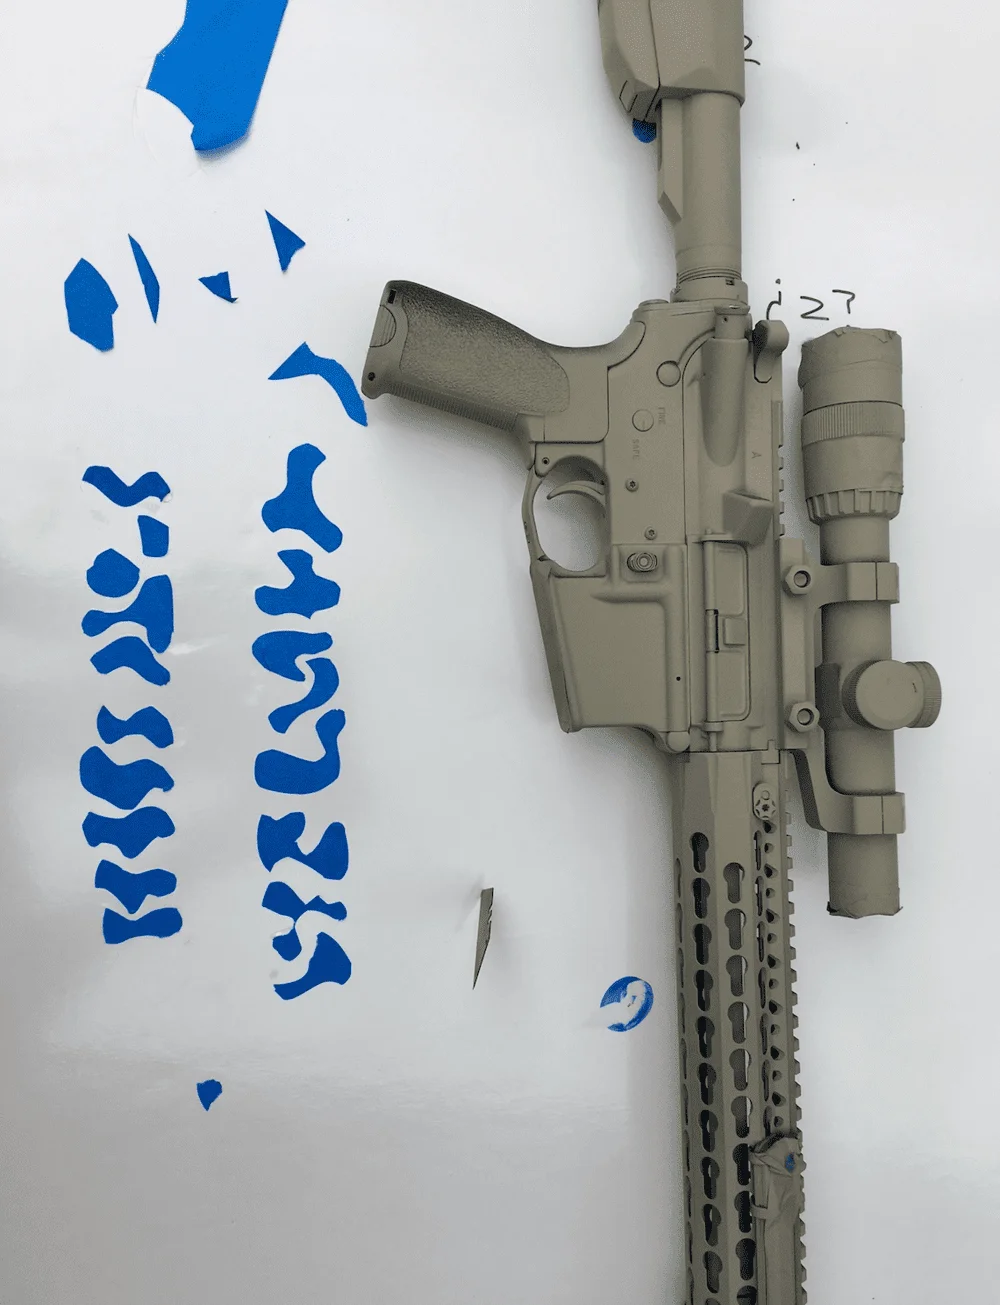
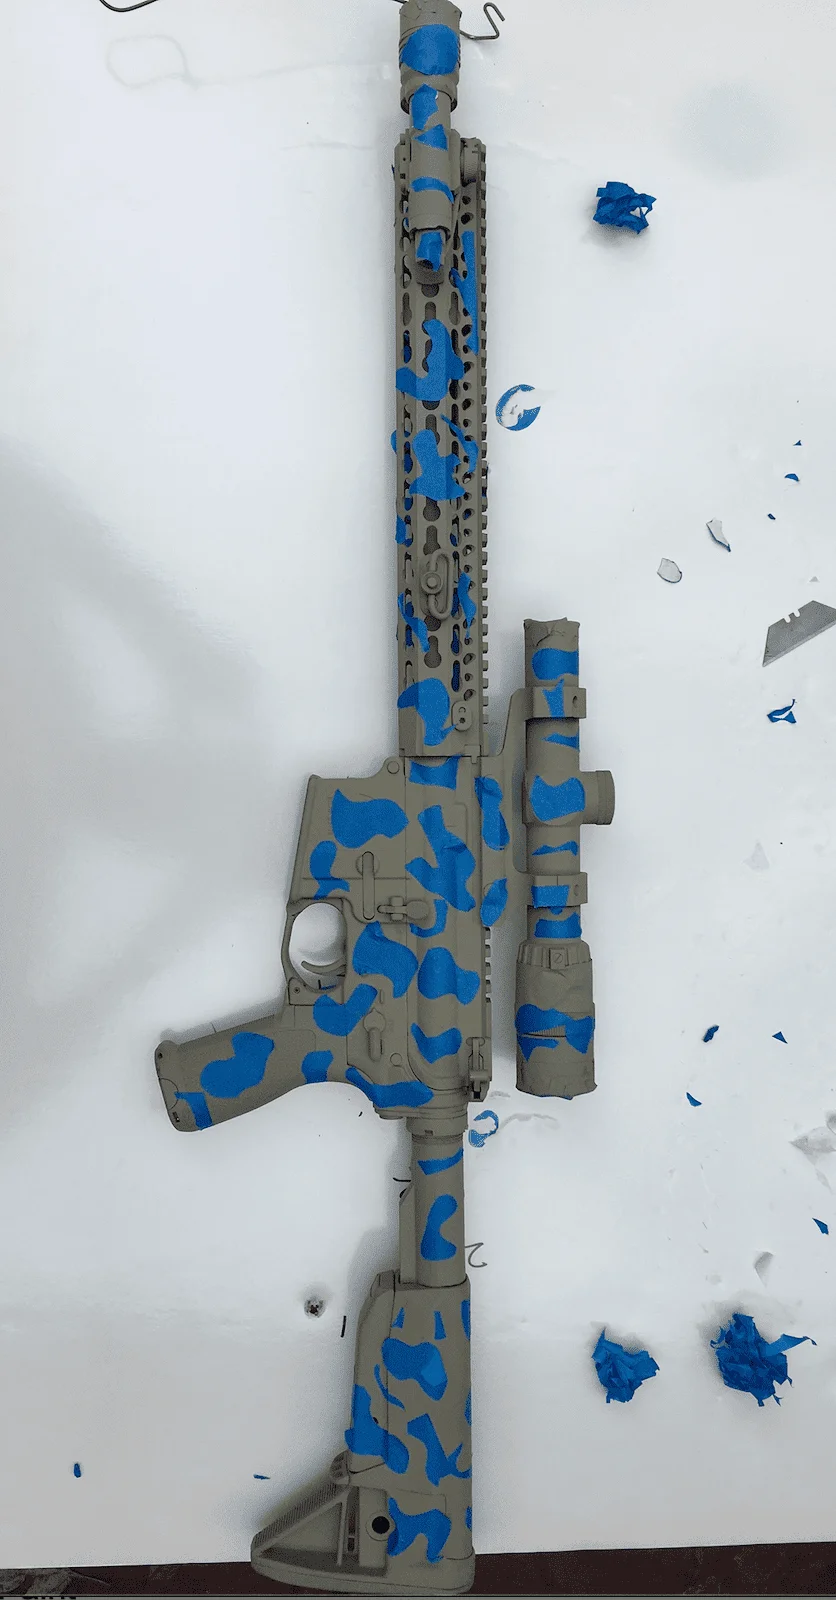
The budget stencil solution lies in your painter’s tape. Plus, it’s a way to get a totally custom look on your rifle. Stick strips of painter’s tape to a flat surface, and cut out the designs with a sharp knife. Once you’re done, peel them up and apply them to the rifle at different intervals.
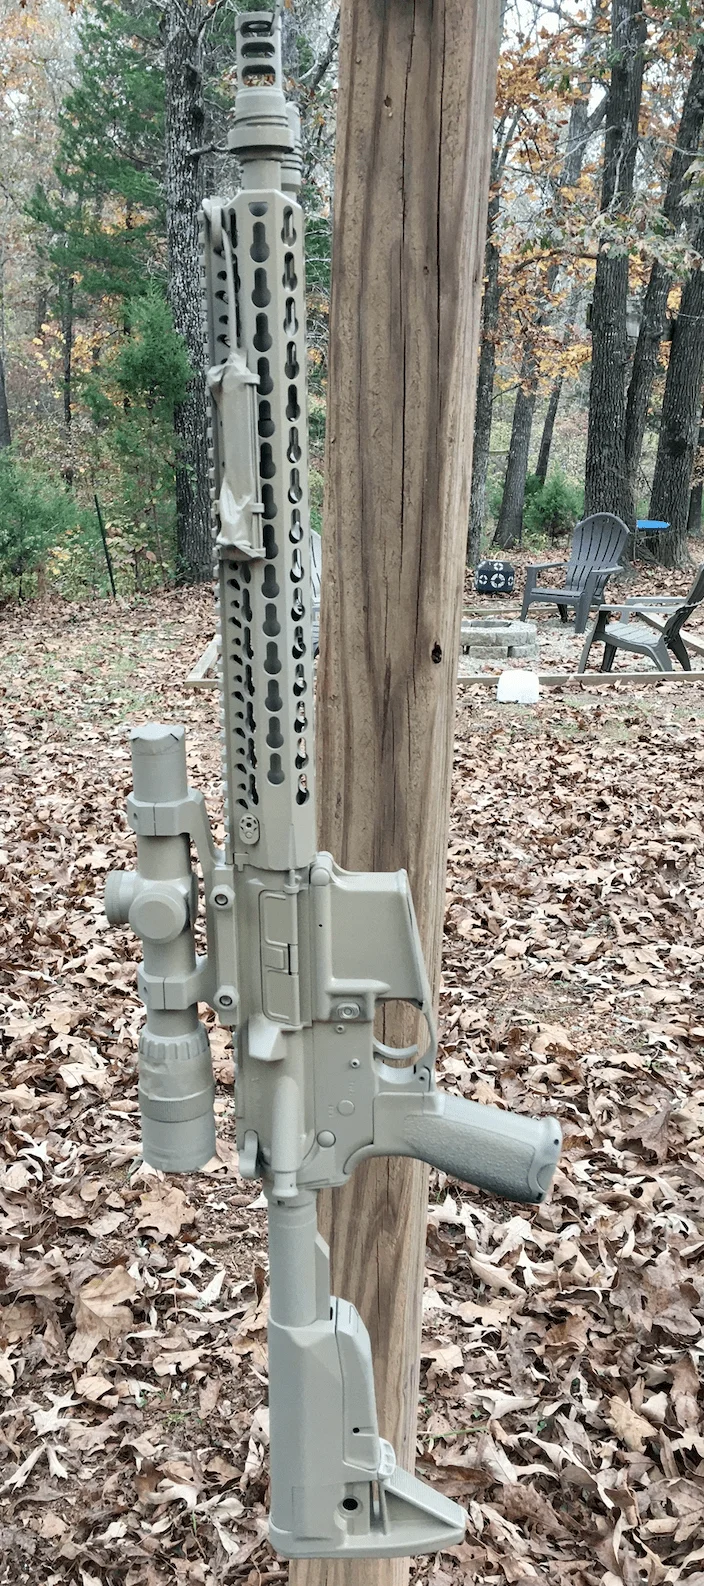
Base Coat
Depending on how many colors you use, this will either be the bulk of the color on your finished gun or just a few accents that are revealed once you take your stencils off. If you plan on doing three or four colors, there will be less of this (and every color) in the finished product. Consider using a lighter color for a base, like tan or light green. This might look odd initially, but it’s best to go from lightest to darkest.
Each kind of spray paint has instructions on the can, but in general, use a broad, sweeping action as you add layers. Don’t get closer than 12”, or you risk the paint running and clumping. Follow the can’s recommendations for application of subsequent coats.
Again, depending on how you’re doing your gun, you’ll either add stencils after this base coat (if so, go to the previous section) or you’ll have some that are on the bare rifle and get sprayed with this first coat.
The Home Stretch
Congratulations, you’ve now reached the easy part. Your prep work has paid off, you’ve gotten past the nerves of spraying a perfectly good gun, and things are looking good.
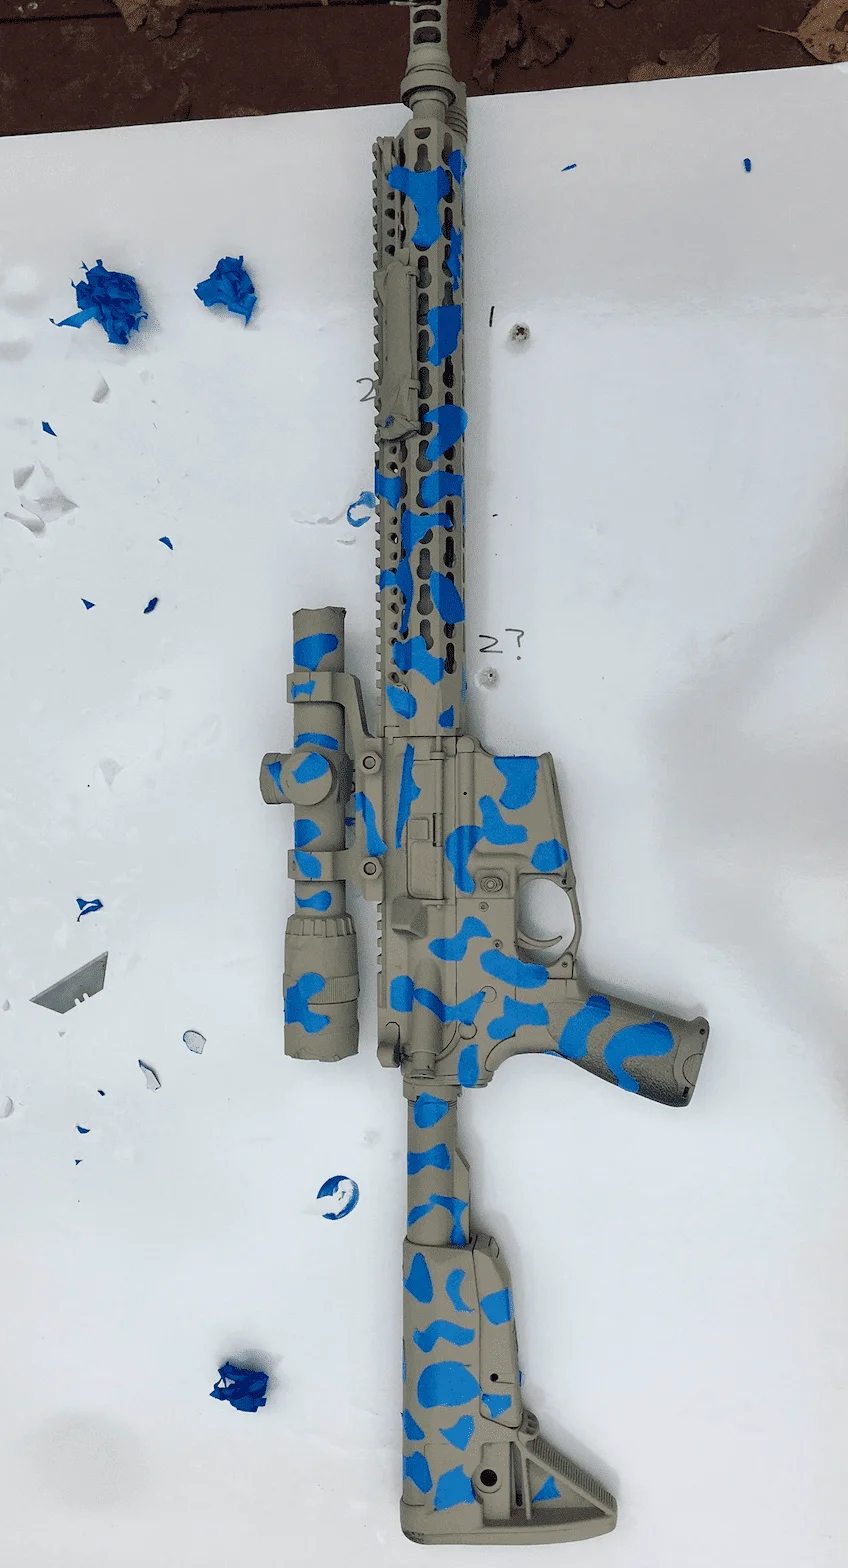
If you’re using stencils, add some more. Once you’re happy with where they are, add a second coat of paint in a different color. From here, it’s rinse and repeat until you’re satisfied with the result. Just be sure to keep that can moving as you’re spraying, so you don’t get too much build-up.
Sponge Painting
An alternative to spray painting is sponging. Sponging or dabbing paint gives you a built-in pattern as a result of the natural texture of the sponge. You’ll need:
- Sponges (cheapies with no soap/chemicals built-in)
- Scissors
- Spray paint
- Paper plates
Your prep will be the same as with spray painting.
Clean the rifle thoroughly and use painter’s tape to cover the magwell (unless you’re painting a mag with it), your optics, trigger, and muzzle. Extend the stock fully.
Base Coat
You’re probably going to want to put a base coat down with sponging as you do when spraying. If this is the case, go ahead and hang it up to spray, then put it on a table or flat surface when you start to sponge, so it doesn’t move as you press down on it.
You’ll see more of the base coat with sponging, so it’s less important to use a lighter color first. In fact, dramatic results can be derived from putting down a dark brown or green, and then sponging tans and grays on top of it.
But again, it’s your gun, so do as you please! And if you don’t like it, just hose it down with a new base coat to start over.
Besides the texture found on a sponge, you can give the gun some pattern by cutting the sponge into different shapes to create a “stencil” of sorts.
Dab It Up
It’s time for the sponge to hit the gun! Grab your first color and spray a puddle onto a paper plate. Dab the sponge into the paint, then onto the gun and repeat. Make sure to keep the puddle fresh with wet pain,t so it doesn’t get tacky; otherwise it won’t adhere well.
It’s best to use one sponge and plate per color. And make sure to let each color dry before you add the next.
Helpful Videos
FAQs
Can you paint an AR-15 with acrylic paint?
No! Avoid acrylic paint when painting your AR-15. There are much better options. Lacquer or enamel paints will do a significantly better job. Look for Rust-Oleum, Brownells’ Aluma-Hyda or Krylon paint for your AR-15.
What spray paint is good for guns?
When talking about spray paint, we would suggest: Rust-Oleum, Brownells’ Aluma-Hyde, Krylon
What is the most durable gun coating?
Between Duracoat, Cerakote, hydro-dipping, and spray painting, the most durable is going to be Cerakote. That being said it is also going to be the most difficult coating to apply.
How do you remove spray paint off a gun?
Pure acetone should be your first option to remove spray paint from your AR-15. If you want to remove Duracoat or Cerakote your best option is to use sandblasting.
What coating option do you feel provides the best protection for the DIYer?
Duracoat hits a sweet spot between the protection of your AR-15 and ease of application. It will hold up better than spray paint to the heat of firing and abuse of use that comes with using your AR-15 while at the same time being much easier for the regular end user to apply.
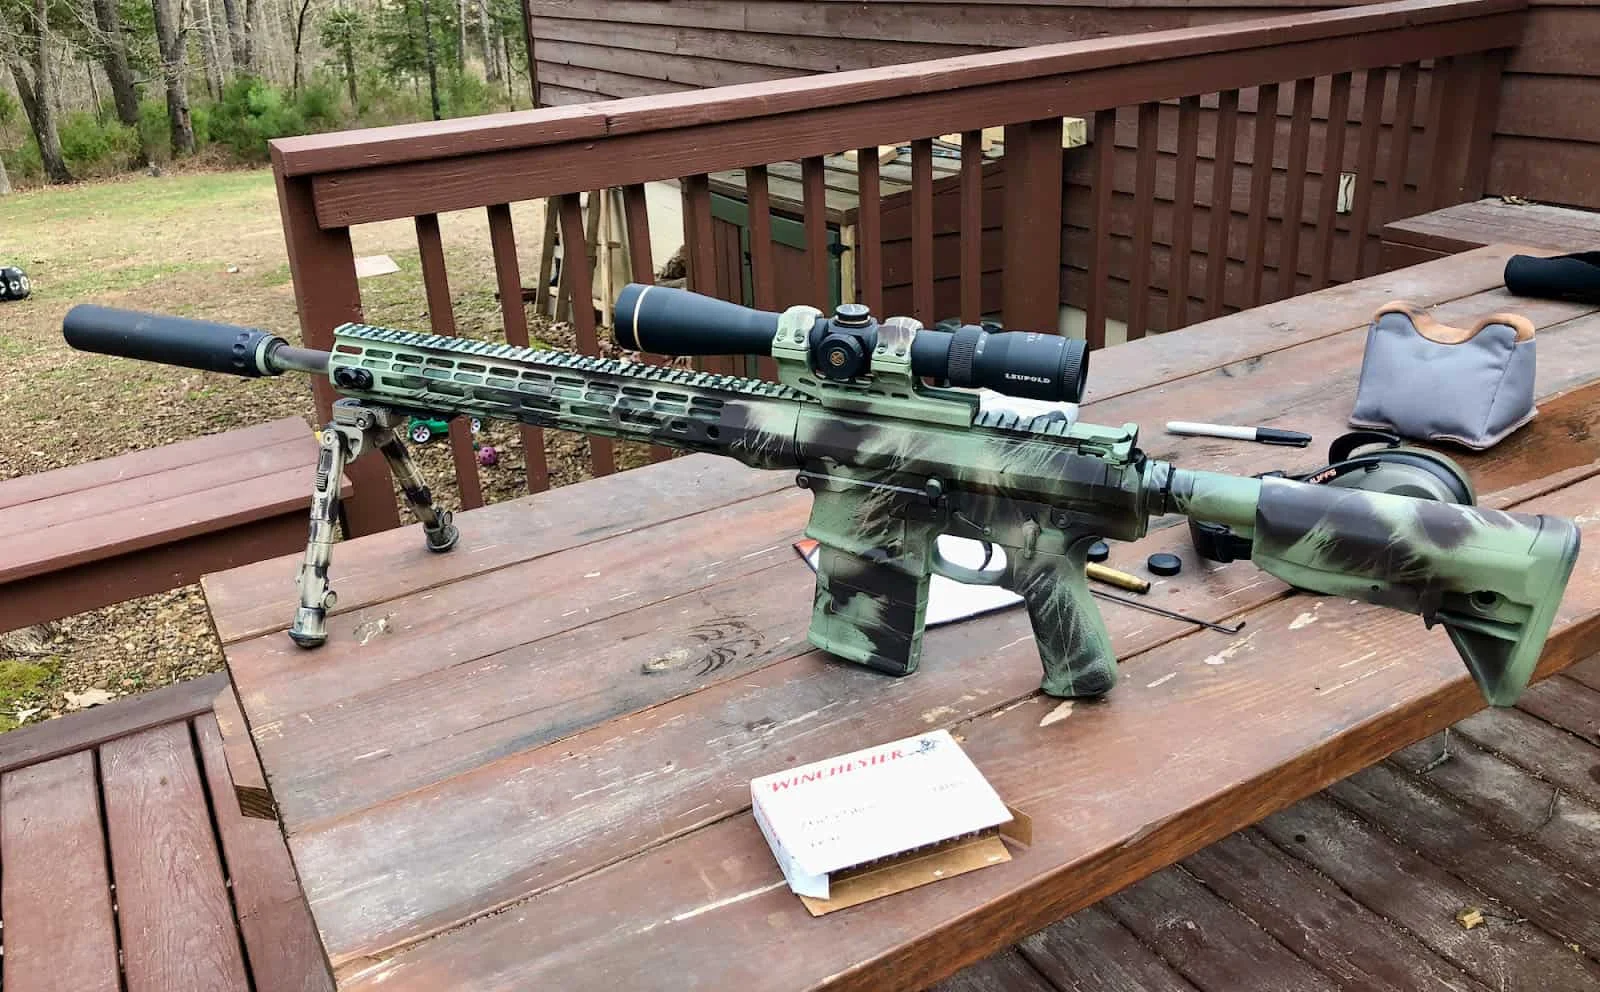
Final Thoughts
Painting your AR-15 is the best way to make it stand out in the sea of cookie-cutter black rifles. Plus, it’s cheap, easy, and lots of fun. The hardest part is getting up the nerve to spray your gun, but once you overcome this, you’ll be looking to paint everything in your safe.