


If you’ve ever felt the itch to build an AR-15 that’s as unique as you are, you’ve stumbled upon the right guide. Today, we’re diving into AR-15s, where barrels meet bolts and dreams take shape in aluminum and steel.
So, you might be wondering, “Why build when I can buy?” Well, my friend, it’s all about customizability, plus the sweet satisfaction of knowing (and bragging to your friends) that you built it yourself.
I’ve been “around the block” of AR assembly a few times, so I’m excited to share the process with you. Whether you’re a seasoned gunsmith or a curious newcomer, we will review everything you need to know to take your turn building your next AR-15.
Now, let’s explore the exciting world of AR-15 assembly!
Deciding Which AR-15 to Build
AR-15 A1
The original AR-15 design features a triangular handguard, fixed carry handle, and rear sight. It has a nostalgic appeal and is great for those who appreciate historical firearms, like me.
AR-15 A2
This model also features a carry handle but typically includes improvements like a rear sight adjustable for windage and elevation, a round handguard, and a fixed buttstock. The A2 is known for its durability and reliability.
AR-15 A3
The A3 is an evolution with a flat top upper receiver, providing a Picatinny rail for mounting optics. This design offers greater versatility for adding various scopes, red dot sights, or other accessories.
AR-15 Flattop
Similar to the A3, a flattop AR-15 features a flat Picatinny rail on top of the receiver but might have other variations in terms of handguards, barrel lengths, and sights. This design is highly customizable for different shooting preferences.
Before You Build Your AR-15
Building an AR-15 can be a rewarding and educational experience, but it’s essential to approach it with careful consideration and attention to detail. Here are some key aspects to be aware of before building an AR-15:
Legal Regulations
Familiarize yourself with federal, state, and local laws regarding the purchase, assembly, and ownership of firearms. Regulations can vary, so it’s crucial to be in compliance with all applicable laws.
Skill Level
Assess your mechanical aptitude and skills. While building an AR-15 doesn’t require advanced engineering knowledge, a basic understanding of firearm components, tools, and assembly procedures is essential. Do not be afraid to ask for help!
Research and Knowledge
Invest time in researching the components, manufacturers, and various options available. Understand the purpose of your AR-15 build (e.g., target shooting, home defense, competition) to make informed decisions about your chosen components.
Budget
Establish a budget for your build and stick to it. Getting carried away with high-end components is easy, but balancing quality with cost is essential. You’ll also want to save some money for ammo and training.
Component Selection
Choose components from reputable manufacturers, such as the lower receiver, upper receiver, barrel, bolt carrier group, trigger assembly, and handguard. Look for reviews and feedback from experienced builders and professionals.
Tools and Workspace
Ensure you have the necessary tools for assembly, such as armorer’s wrenches, vise blocks, roll pin punches, and screwdrivers. A clean and well-lit workspace is also essential and can save many headaches.
Quality Control
Pay close attention to details during assembly. Perform function checks at each stage to ensure everything is working correctly. Follow recommended torque specifications and guidelines provided by component manufacturers. This process is not one you want to rush through.
Safety
Prioritize safety throughout the building process. Treat the firearm with the same respect and caution as a fully assembled one. Keep all safety rules in mind, and follow the recommended procedures. To be extra cautious, remove any live ammo from the room in which you’re building your AR-15.
Testing and Troubleshooting
After assembly, test your AR-15 at a suitable range. Ensure it functions reliably and accurately. If you encounter any issues, be prepared to troubleshoot and, if necessary, seek advice from experienced builders or gunsmiths.
Documentation
Keep records of the components used, their specifications, and any modifications made. This information can be valuable for maintenance, upgrades, or legal purposes.
How to Build an AR-15
Get Set Up
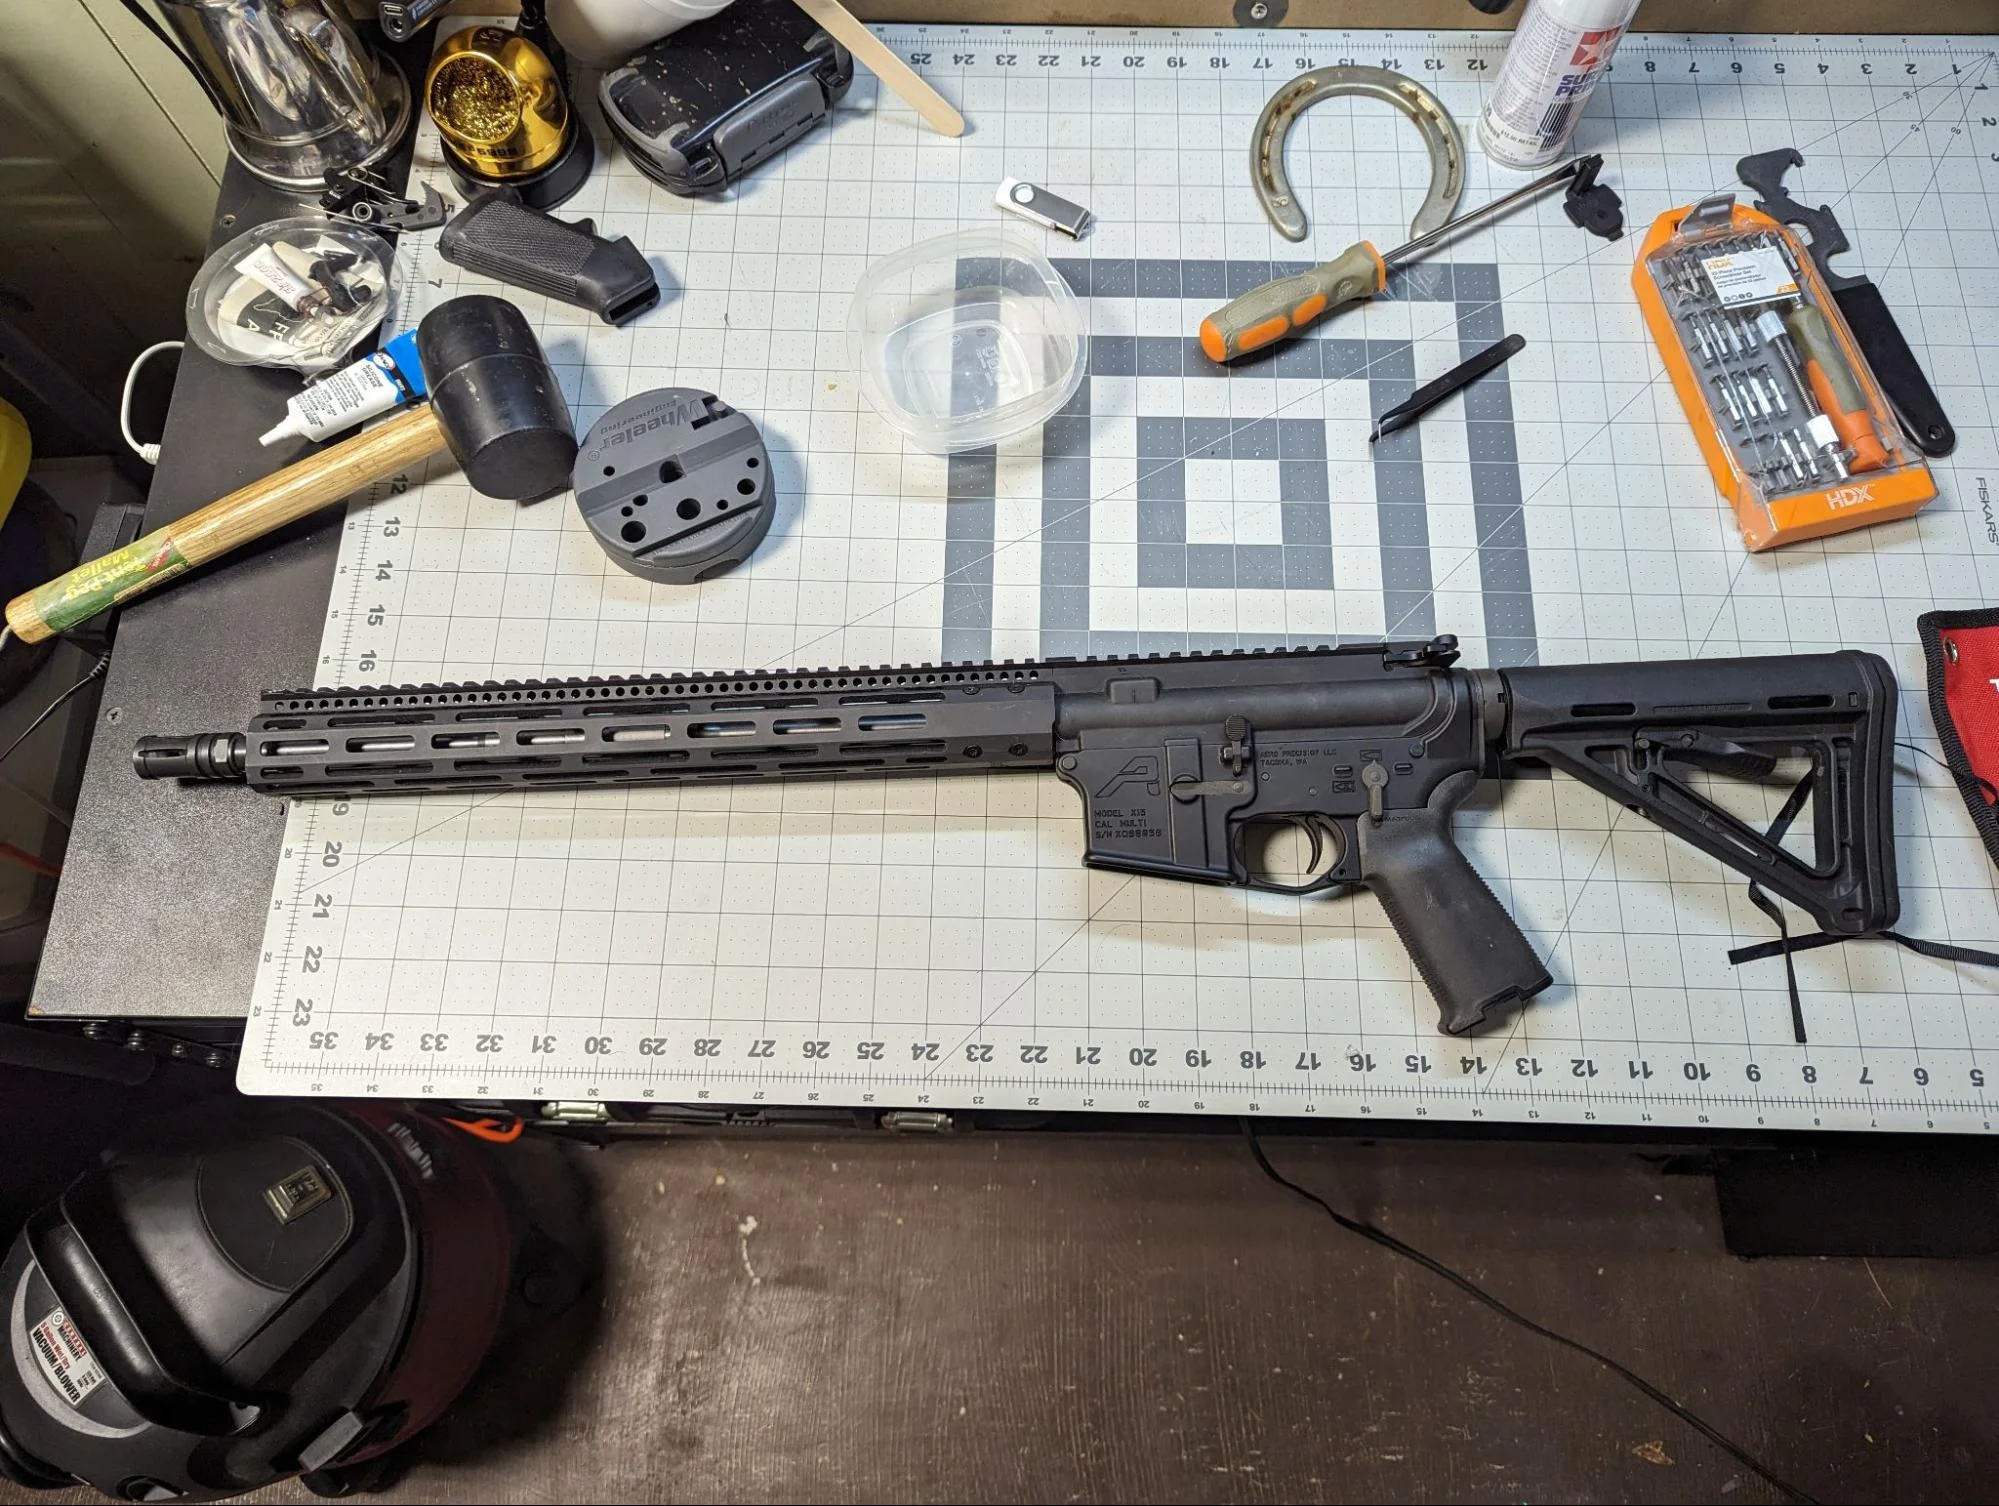
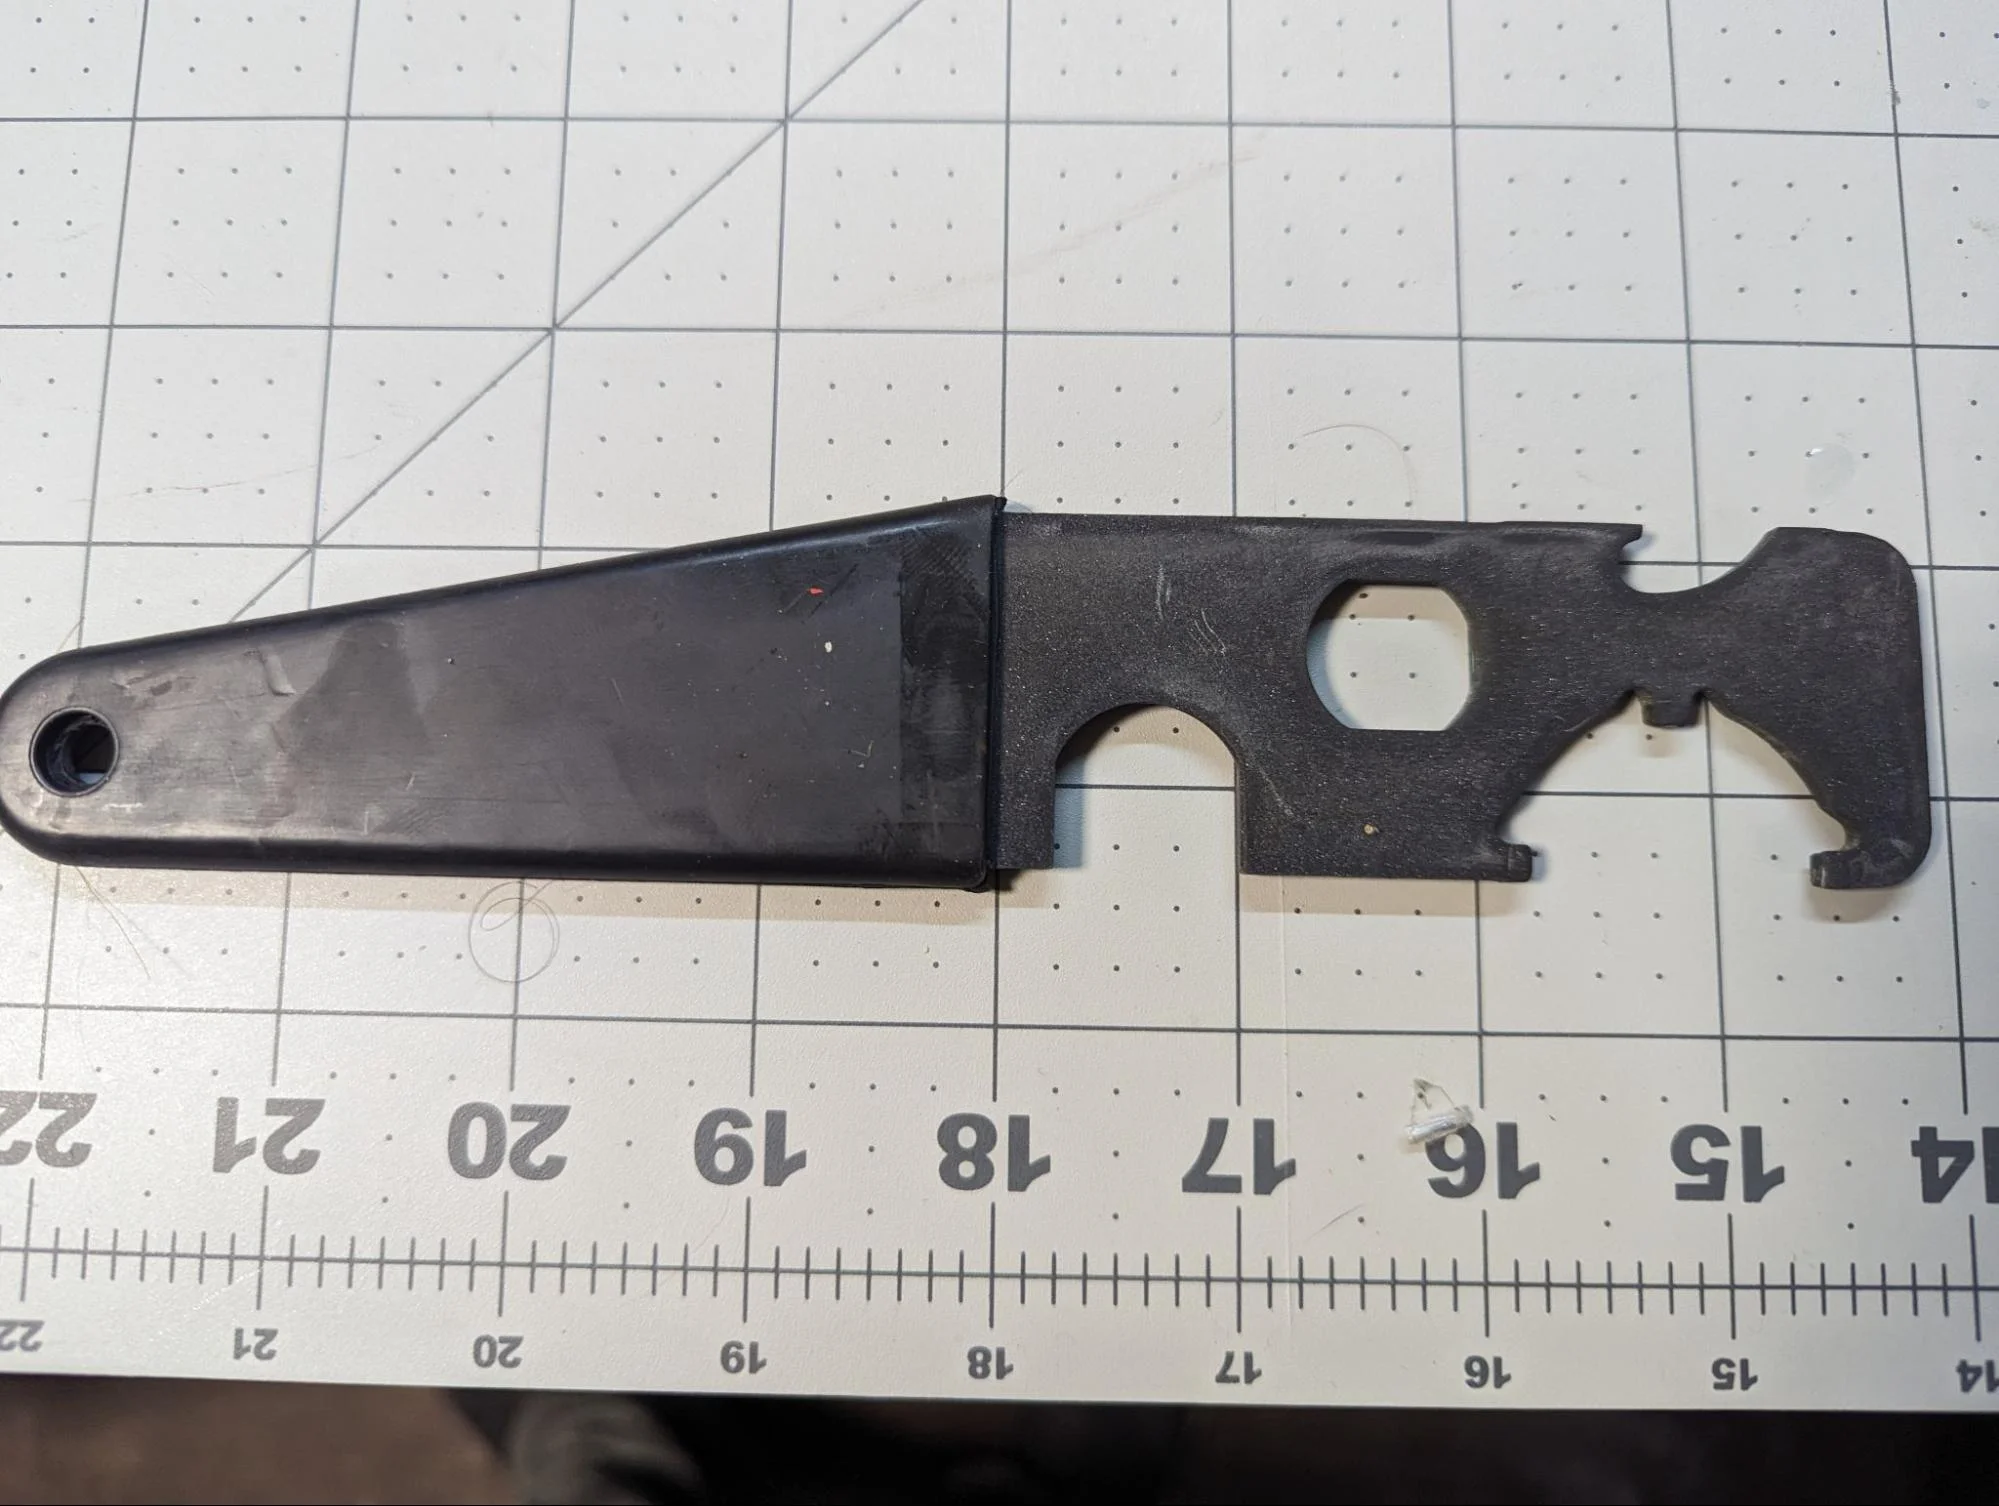
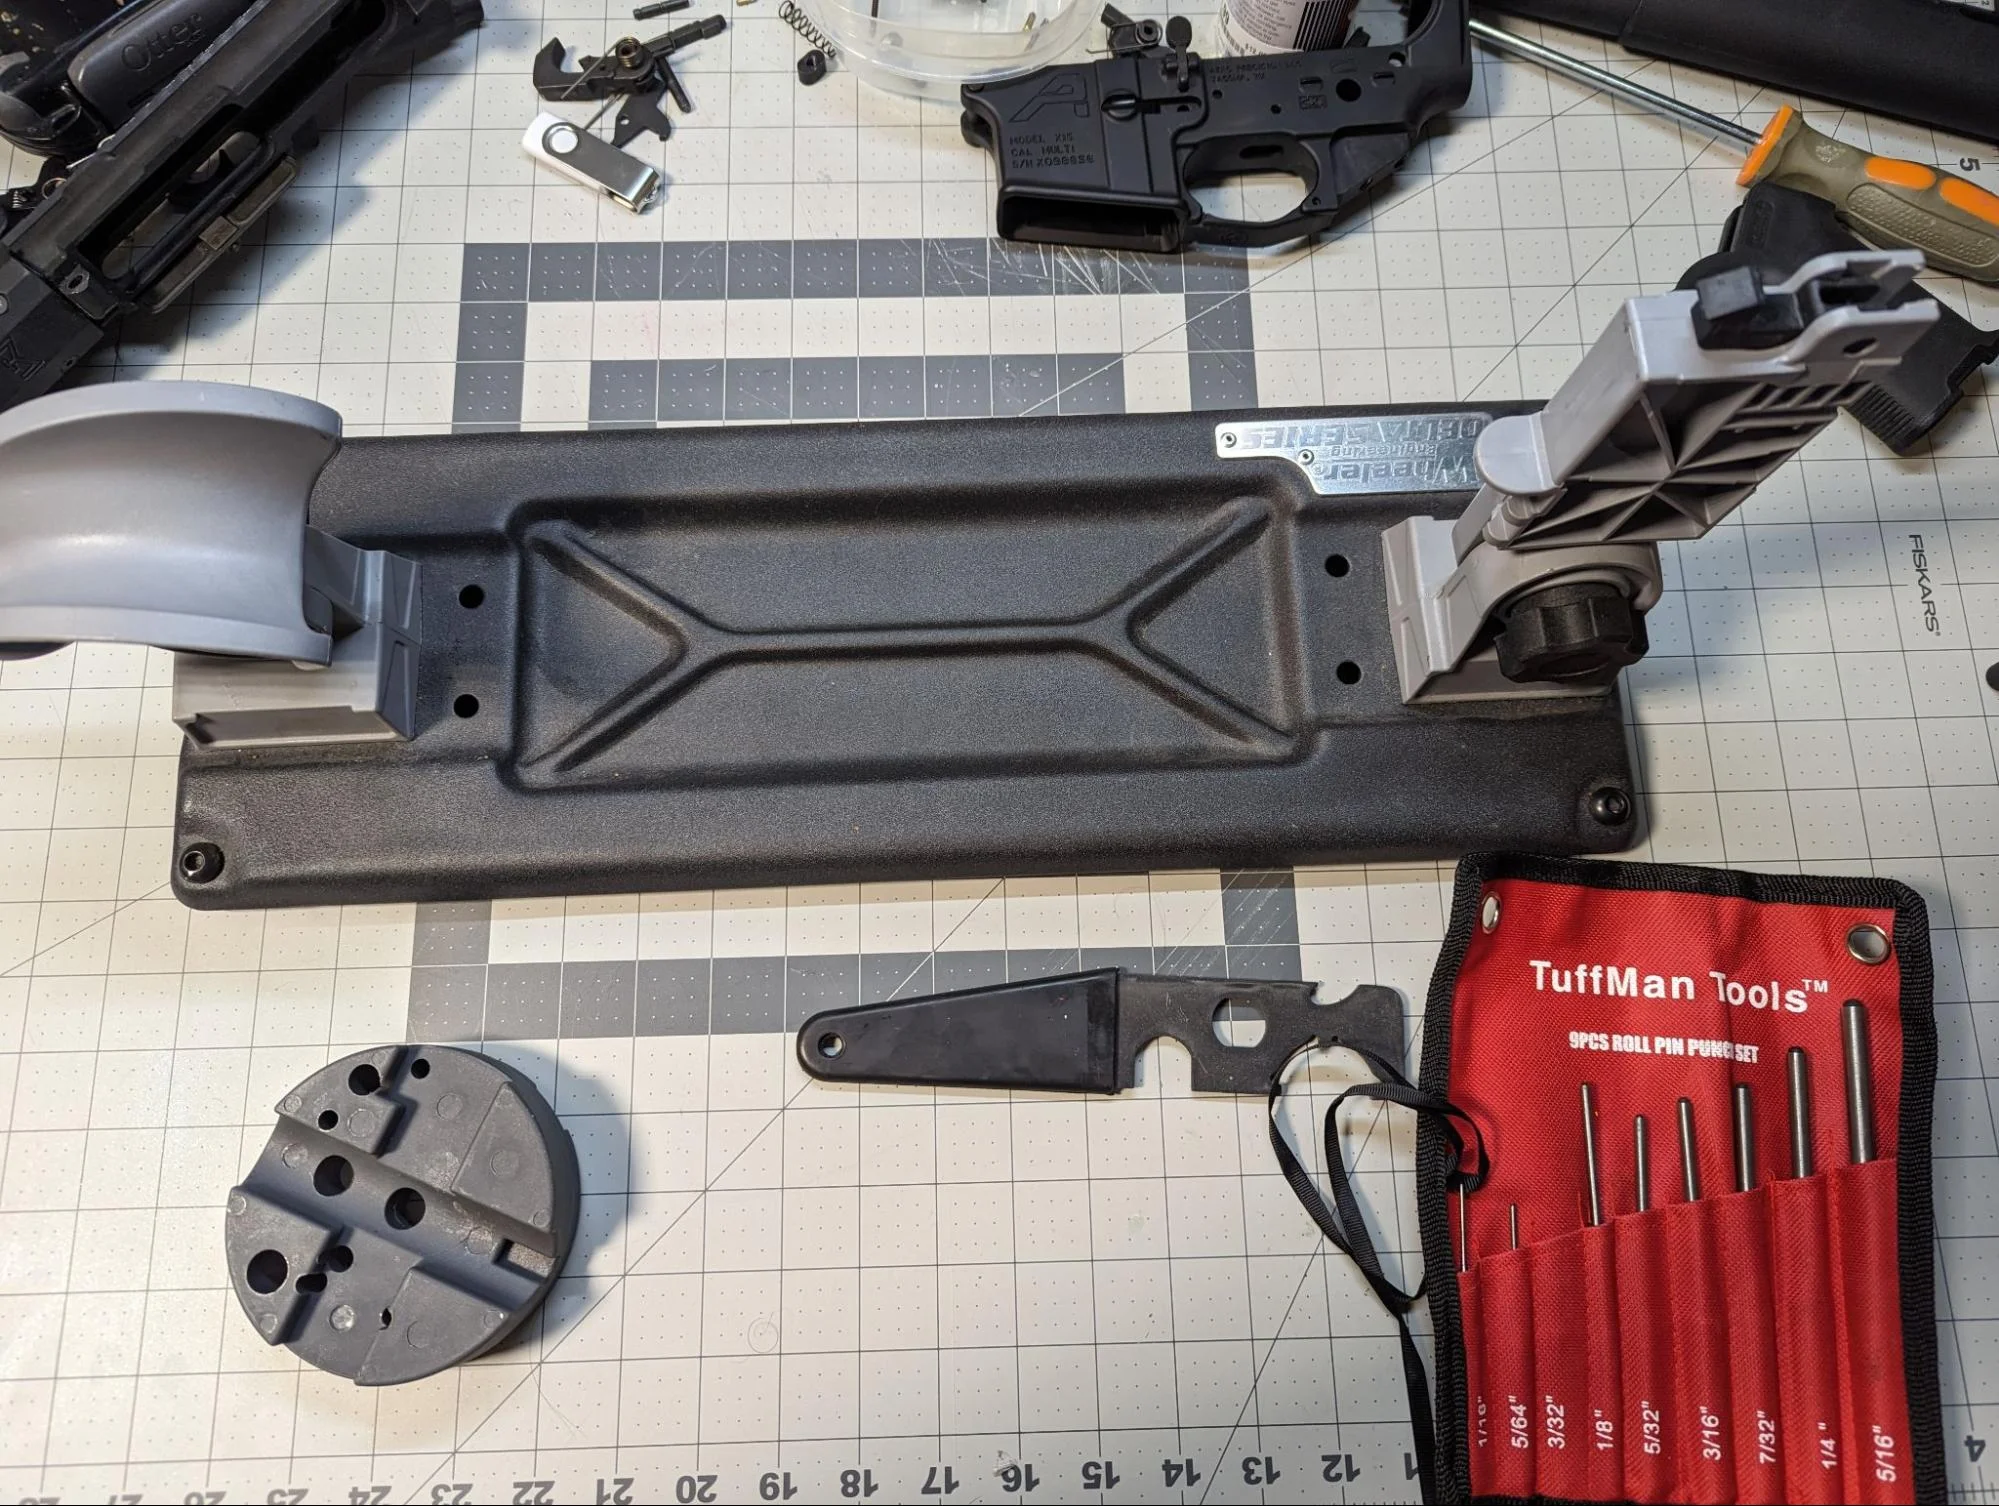
Set up a dedicated, well-lit, and well-ventilated workspace. Consider using a sturdy workbench with ample space to lay out your tools and components. Gather all the necessary tools for assembly, such as an armorer’s wrench, torque wrench, punches, vise block, and a reliable set of screwdrivers.
Once you have all your parts, organize them systematically—sort components based on assembly steps to streamline the process. Small containers to help you keep track of screws and other small components are very helpful.
If you don’t already have them, consider investing in a good pair of gloves.
Install the Mag Release and Catch Assembly
From the right side of the lower receiver, insert the mag release through the mag release button hole, ensuring the threaded end passes through the receiver. The mag release button should be on the left side. On the left side of the receiver, thread the catch assembly onto the mag release until snug. Be cautious not to overtighten, as it may affect the functionality.
Test function with an empty magazine. If everything works properly, tighten the screw or securing mechanism. Again, be careful to avoid overtightening.
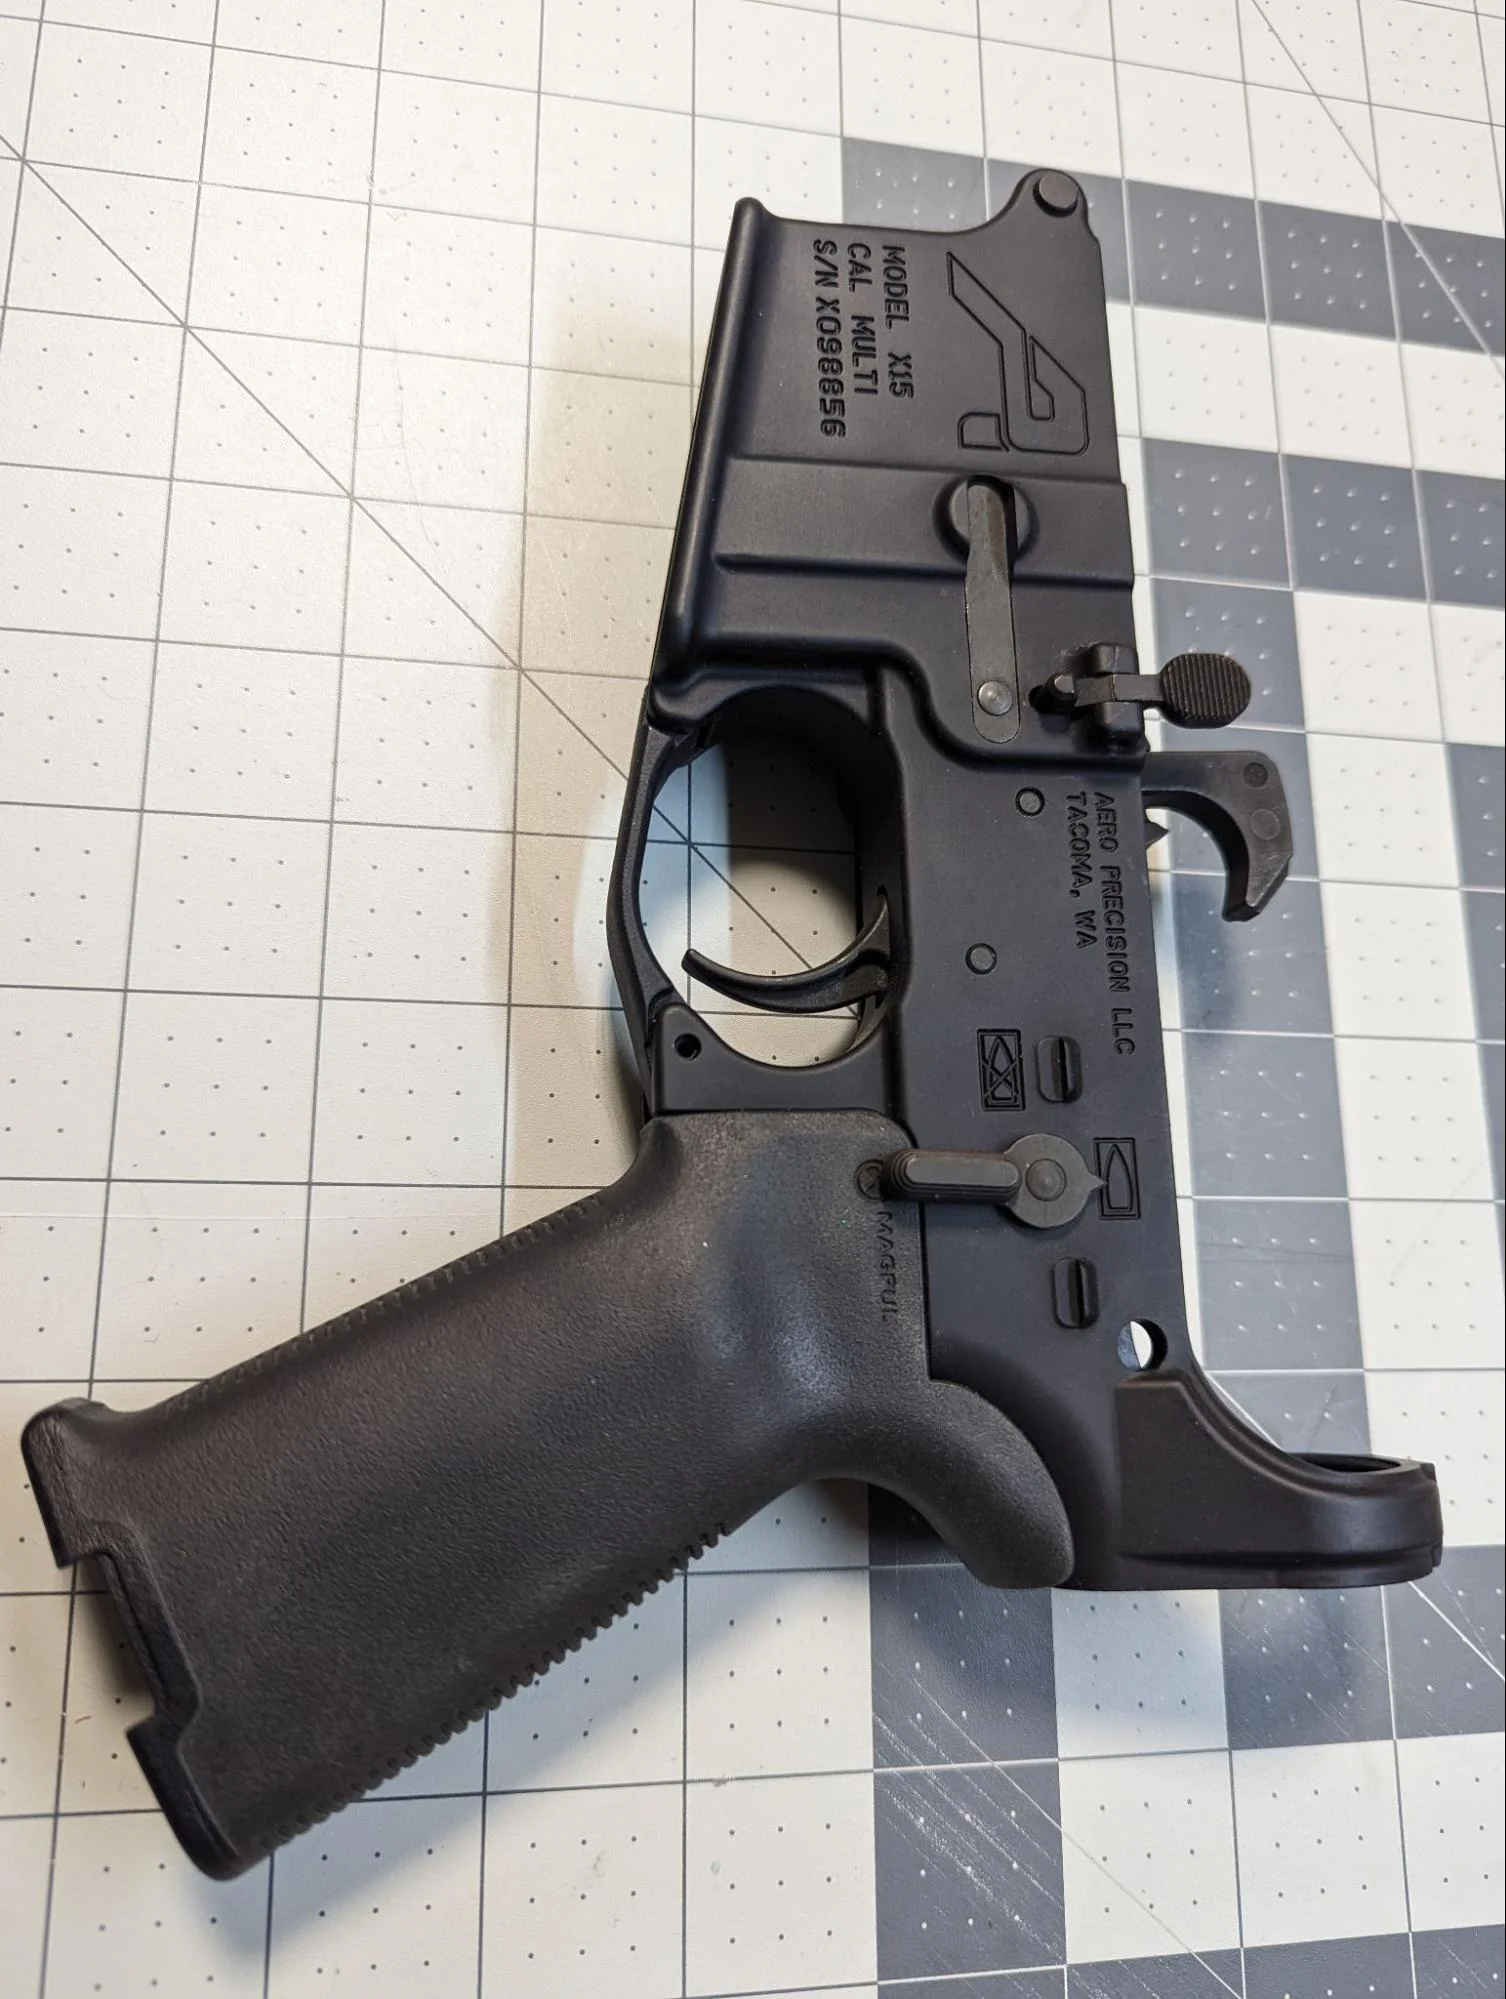
Install the Trigger Guard Assembly
Position the trigger guard over the lower receiver, aligning the holes in the trigger guard with the corresponding holes in the receiver.
Insert the roll pin through the holes in the trigger guard and the lower receiver. Using a roll pin punch is recommended to drive the roll pin through. Ensure the trigger guard is securely held in place.
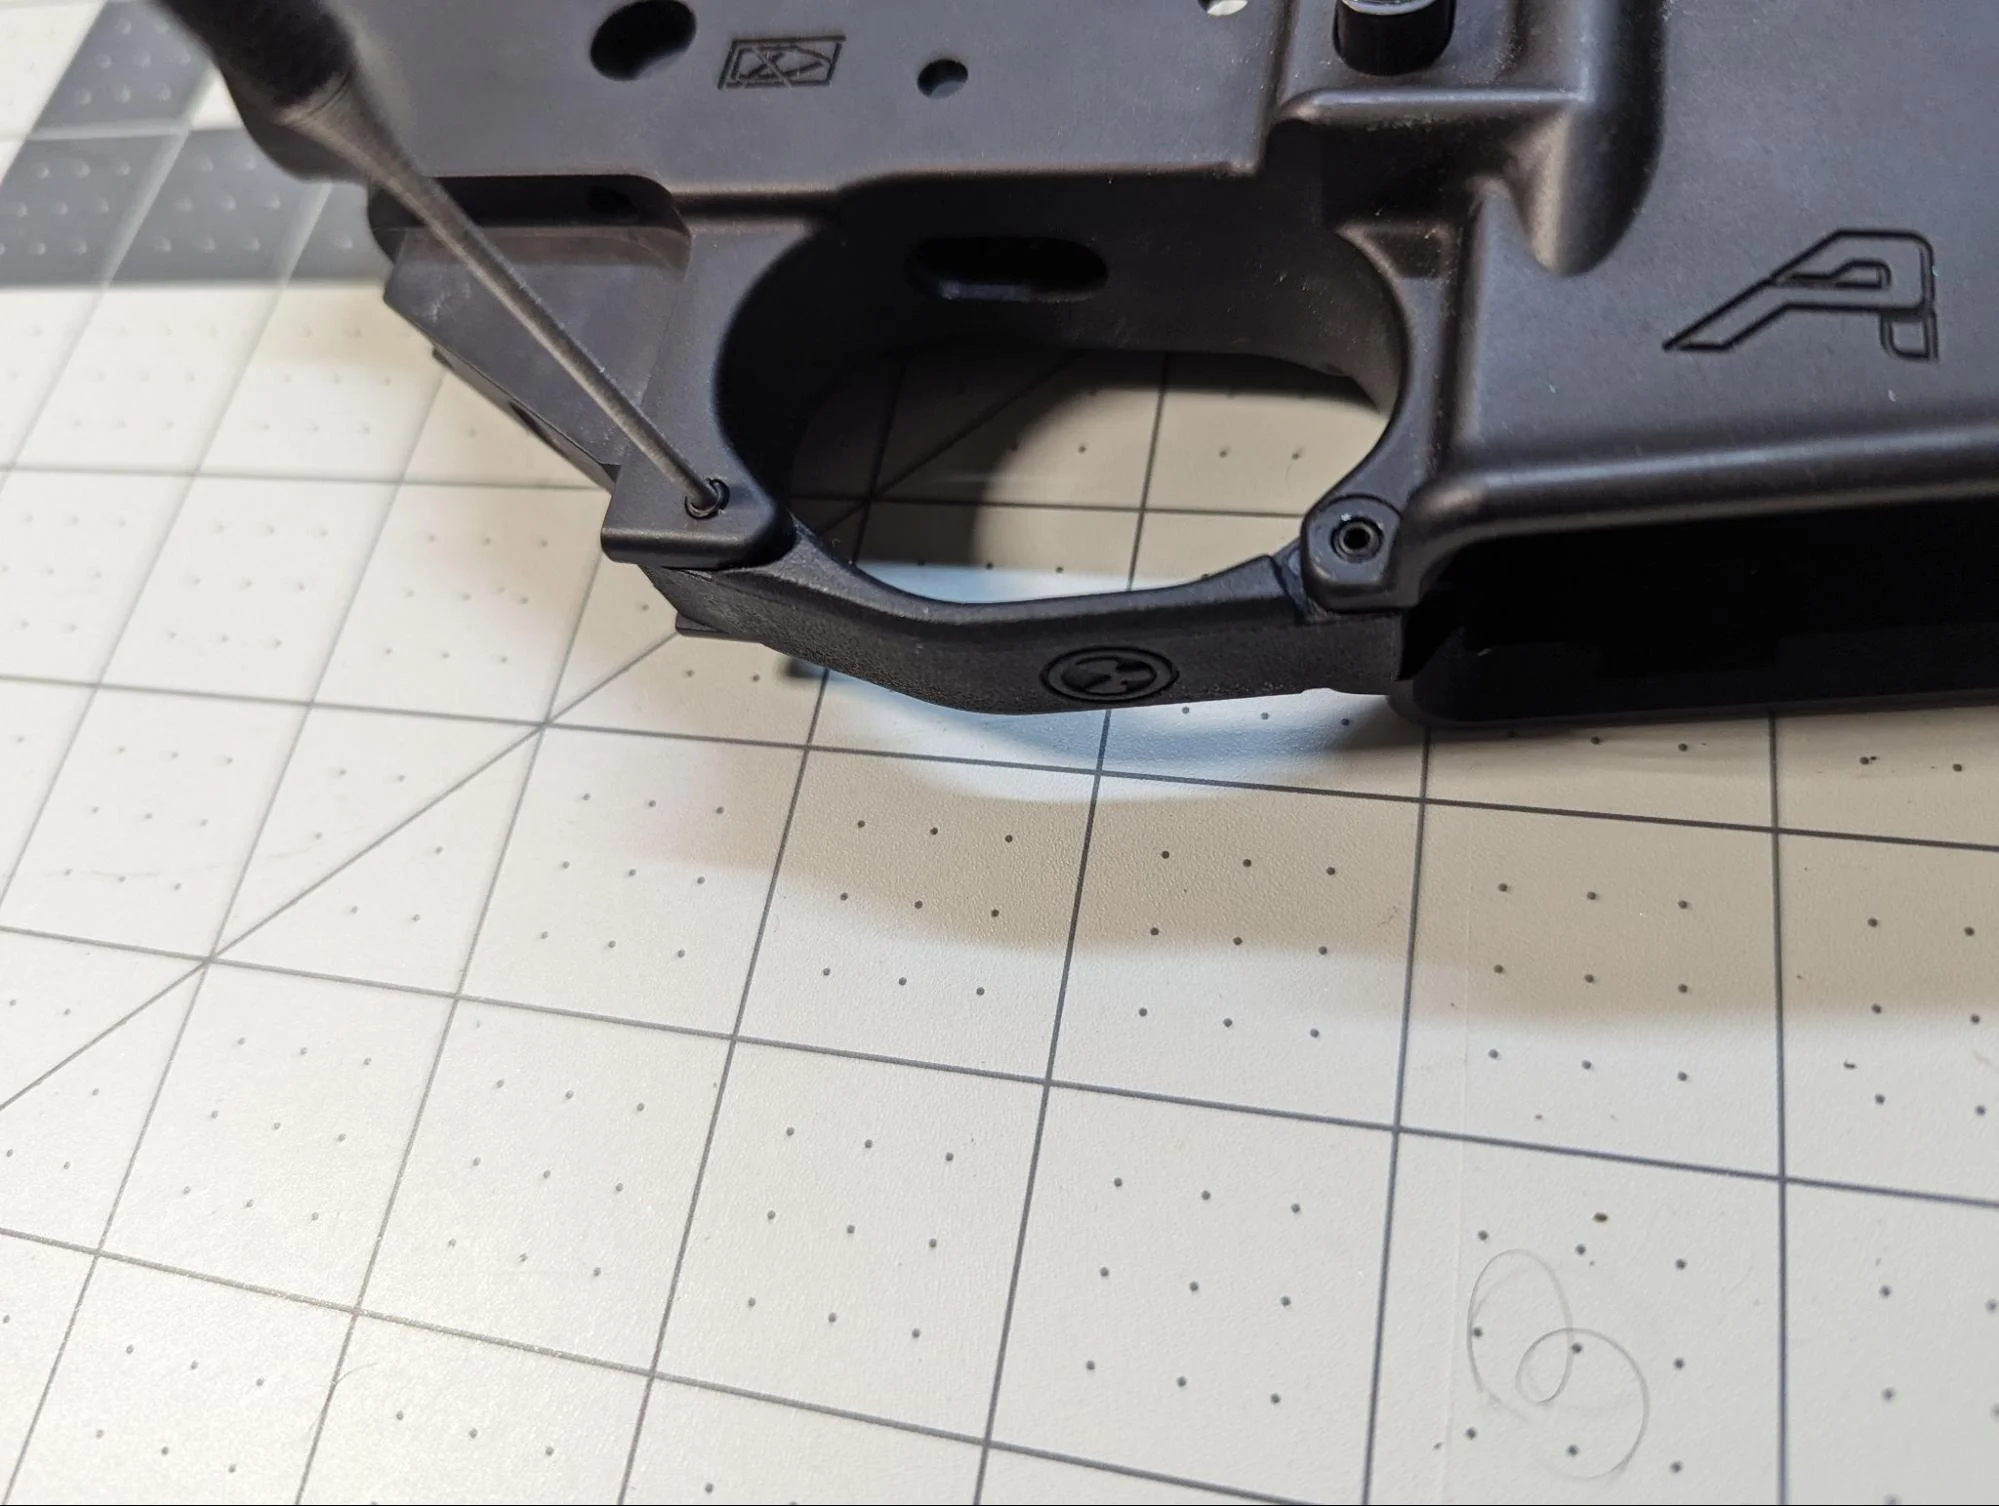
If your trigger guard assembly includes a screw, start threading it into the lower receiver. Be cautious not to cross-thread the screw; it should turn easily.
Once the screw is started, use the appropriate tool to tighten it securely. Once again, be careful not to overtighten, as this could damage the threads or the lower receiver.
In fact, just consider “be careful not to overtighten” as advice whenever we talk about putting in screws and save me from having to repeat myself throughout this guide.
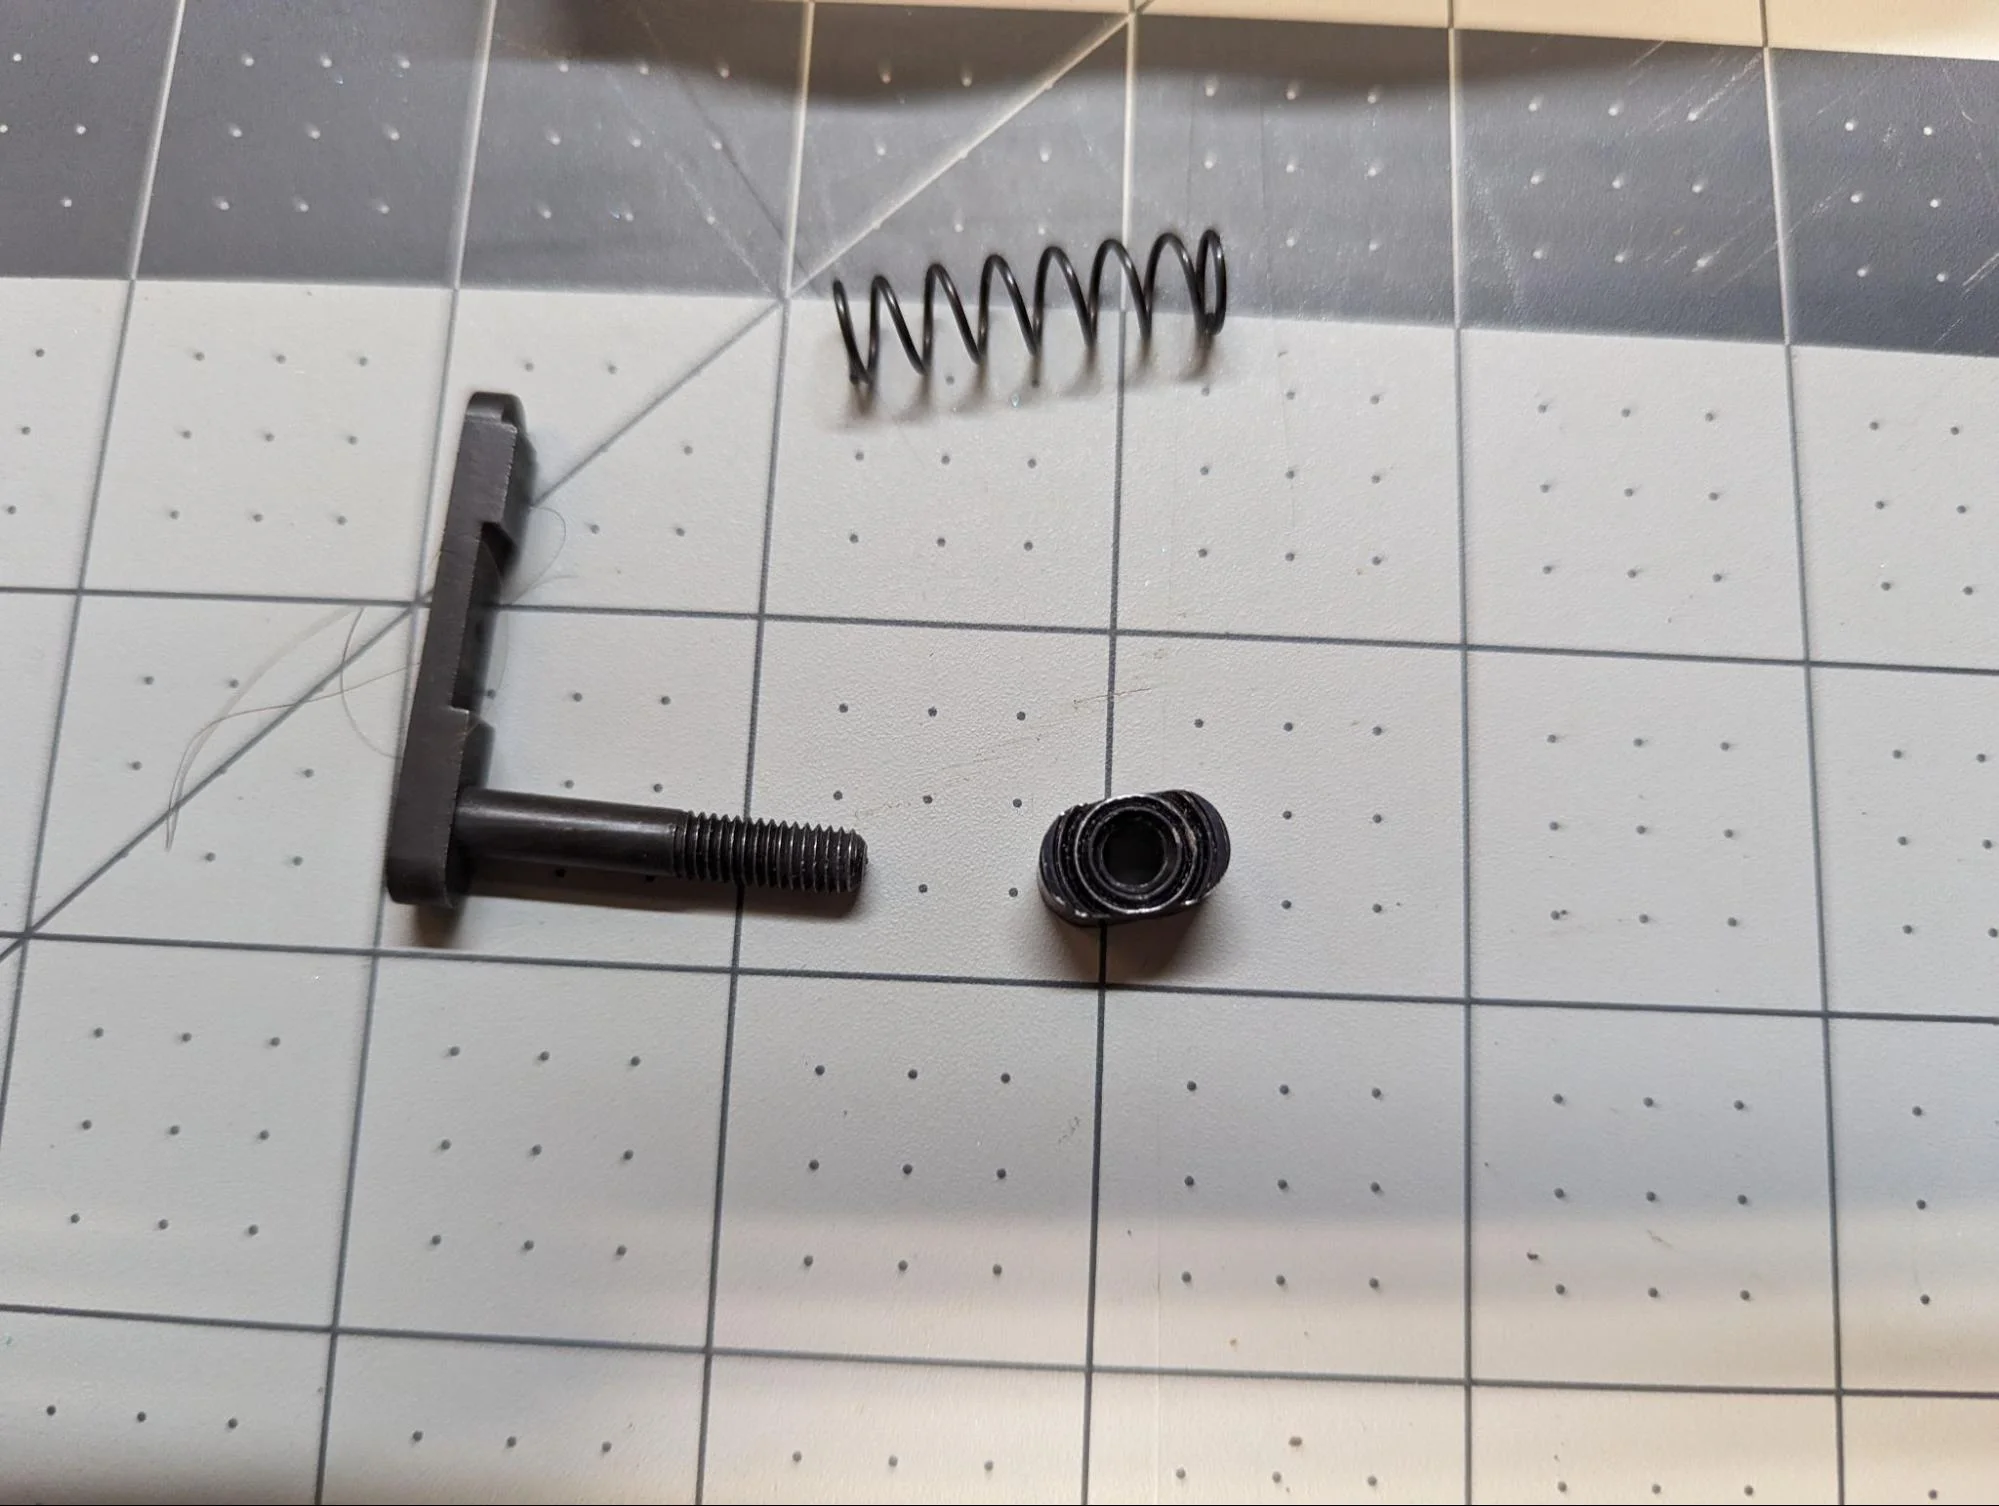
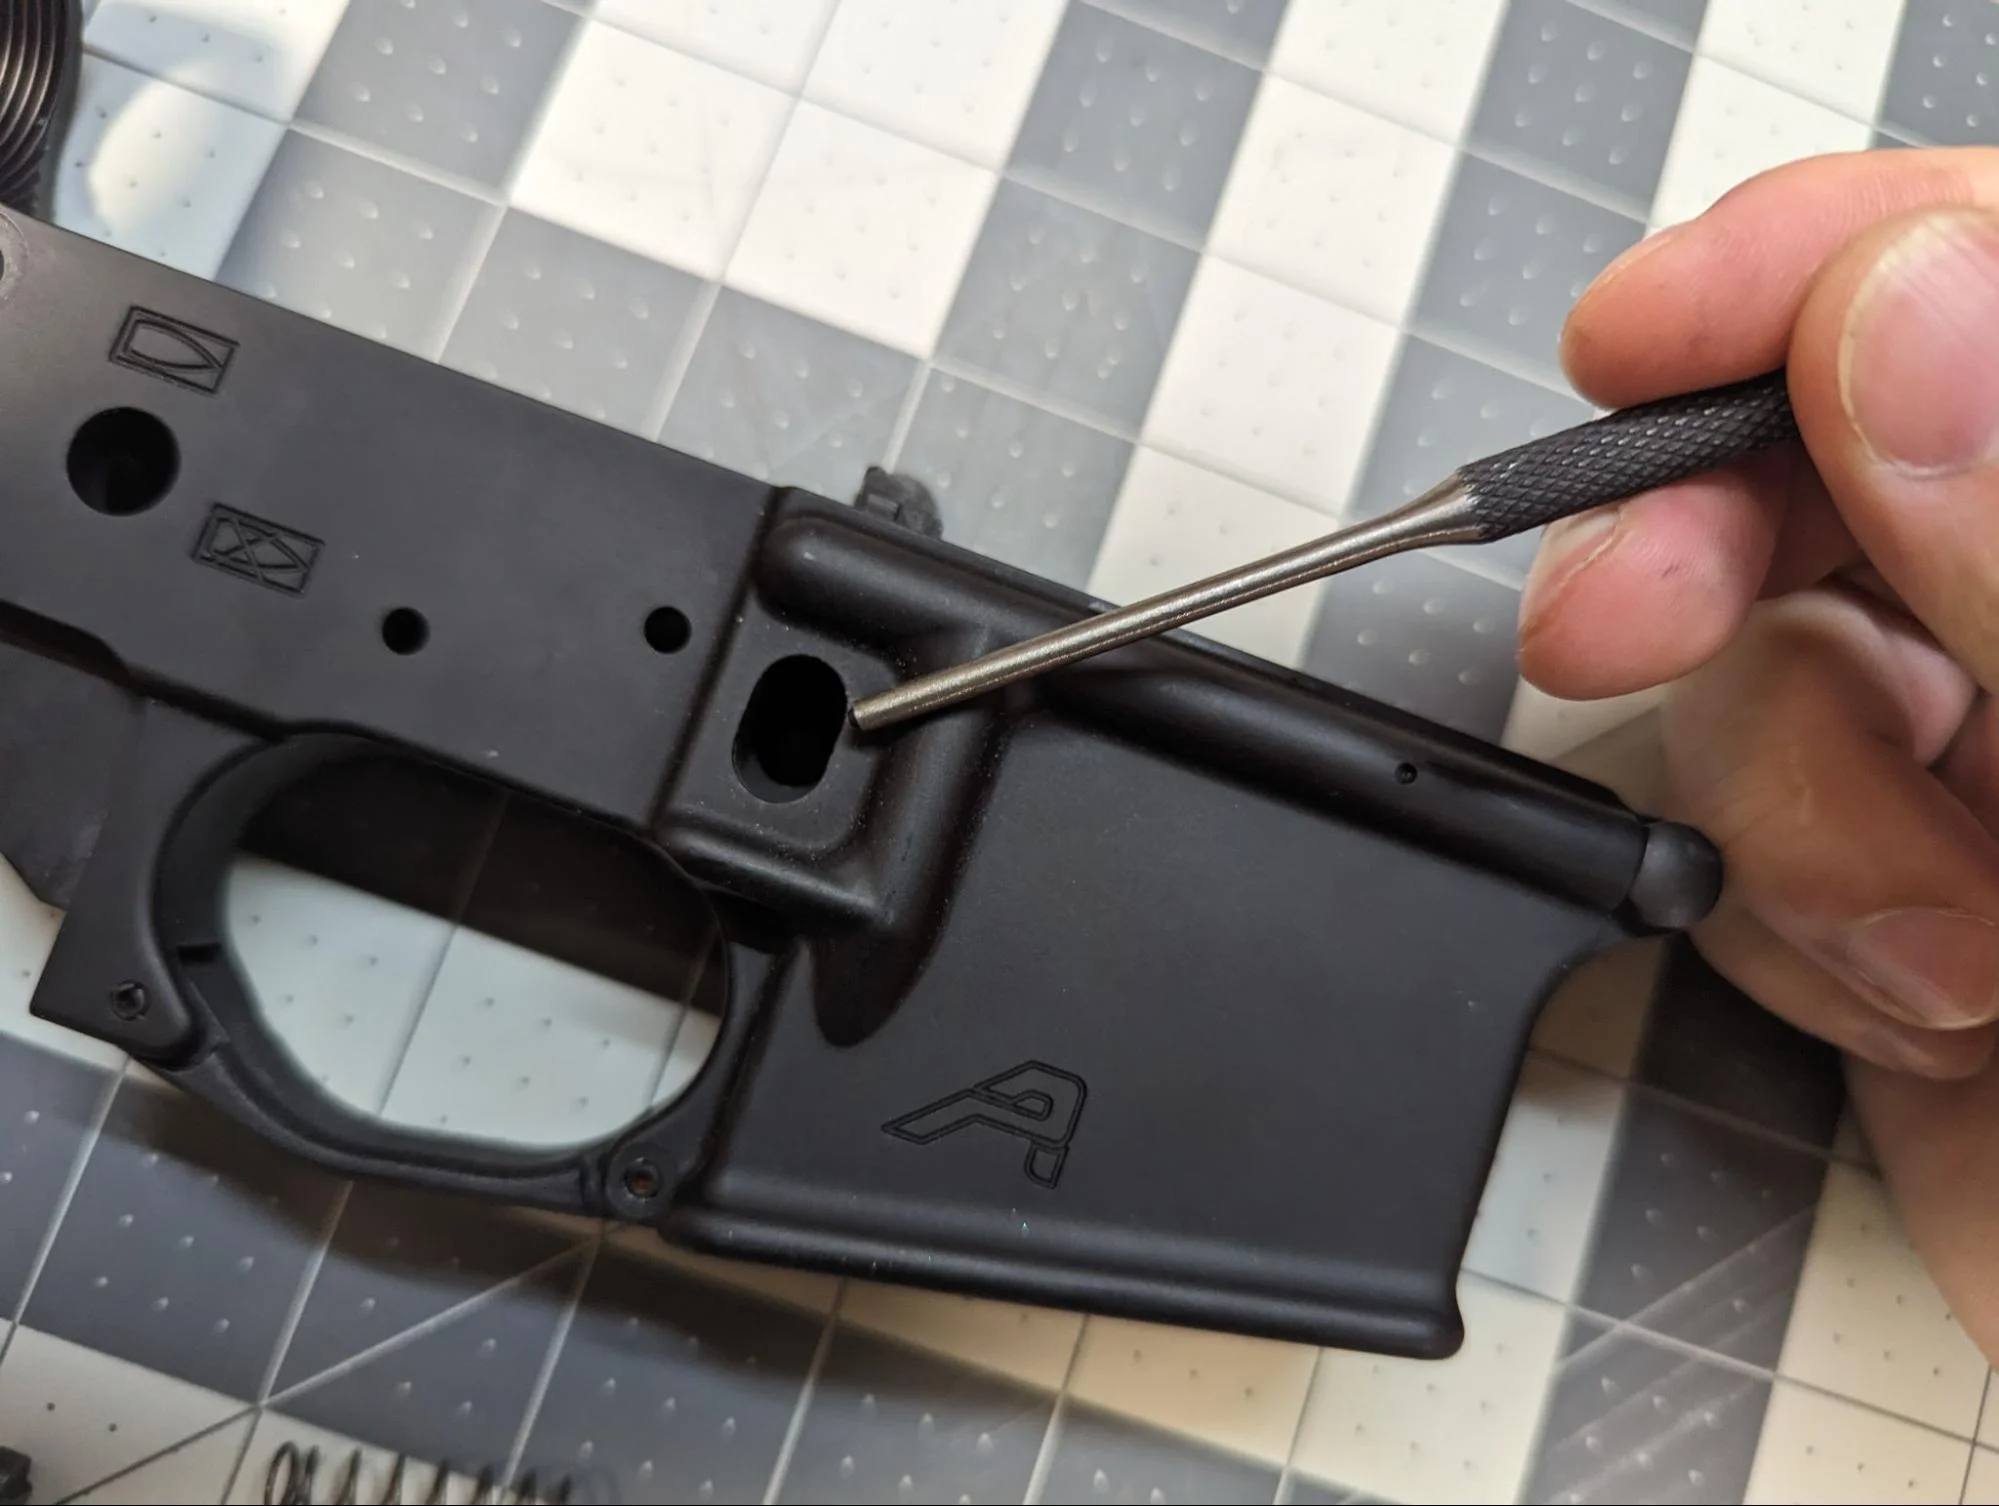
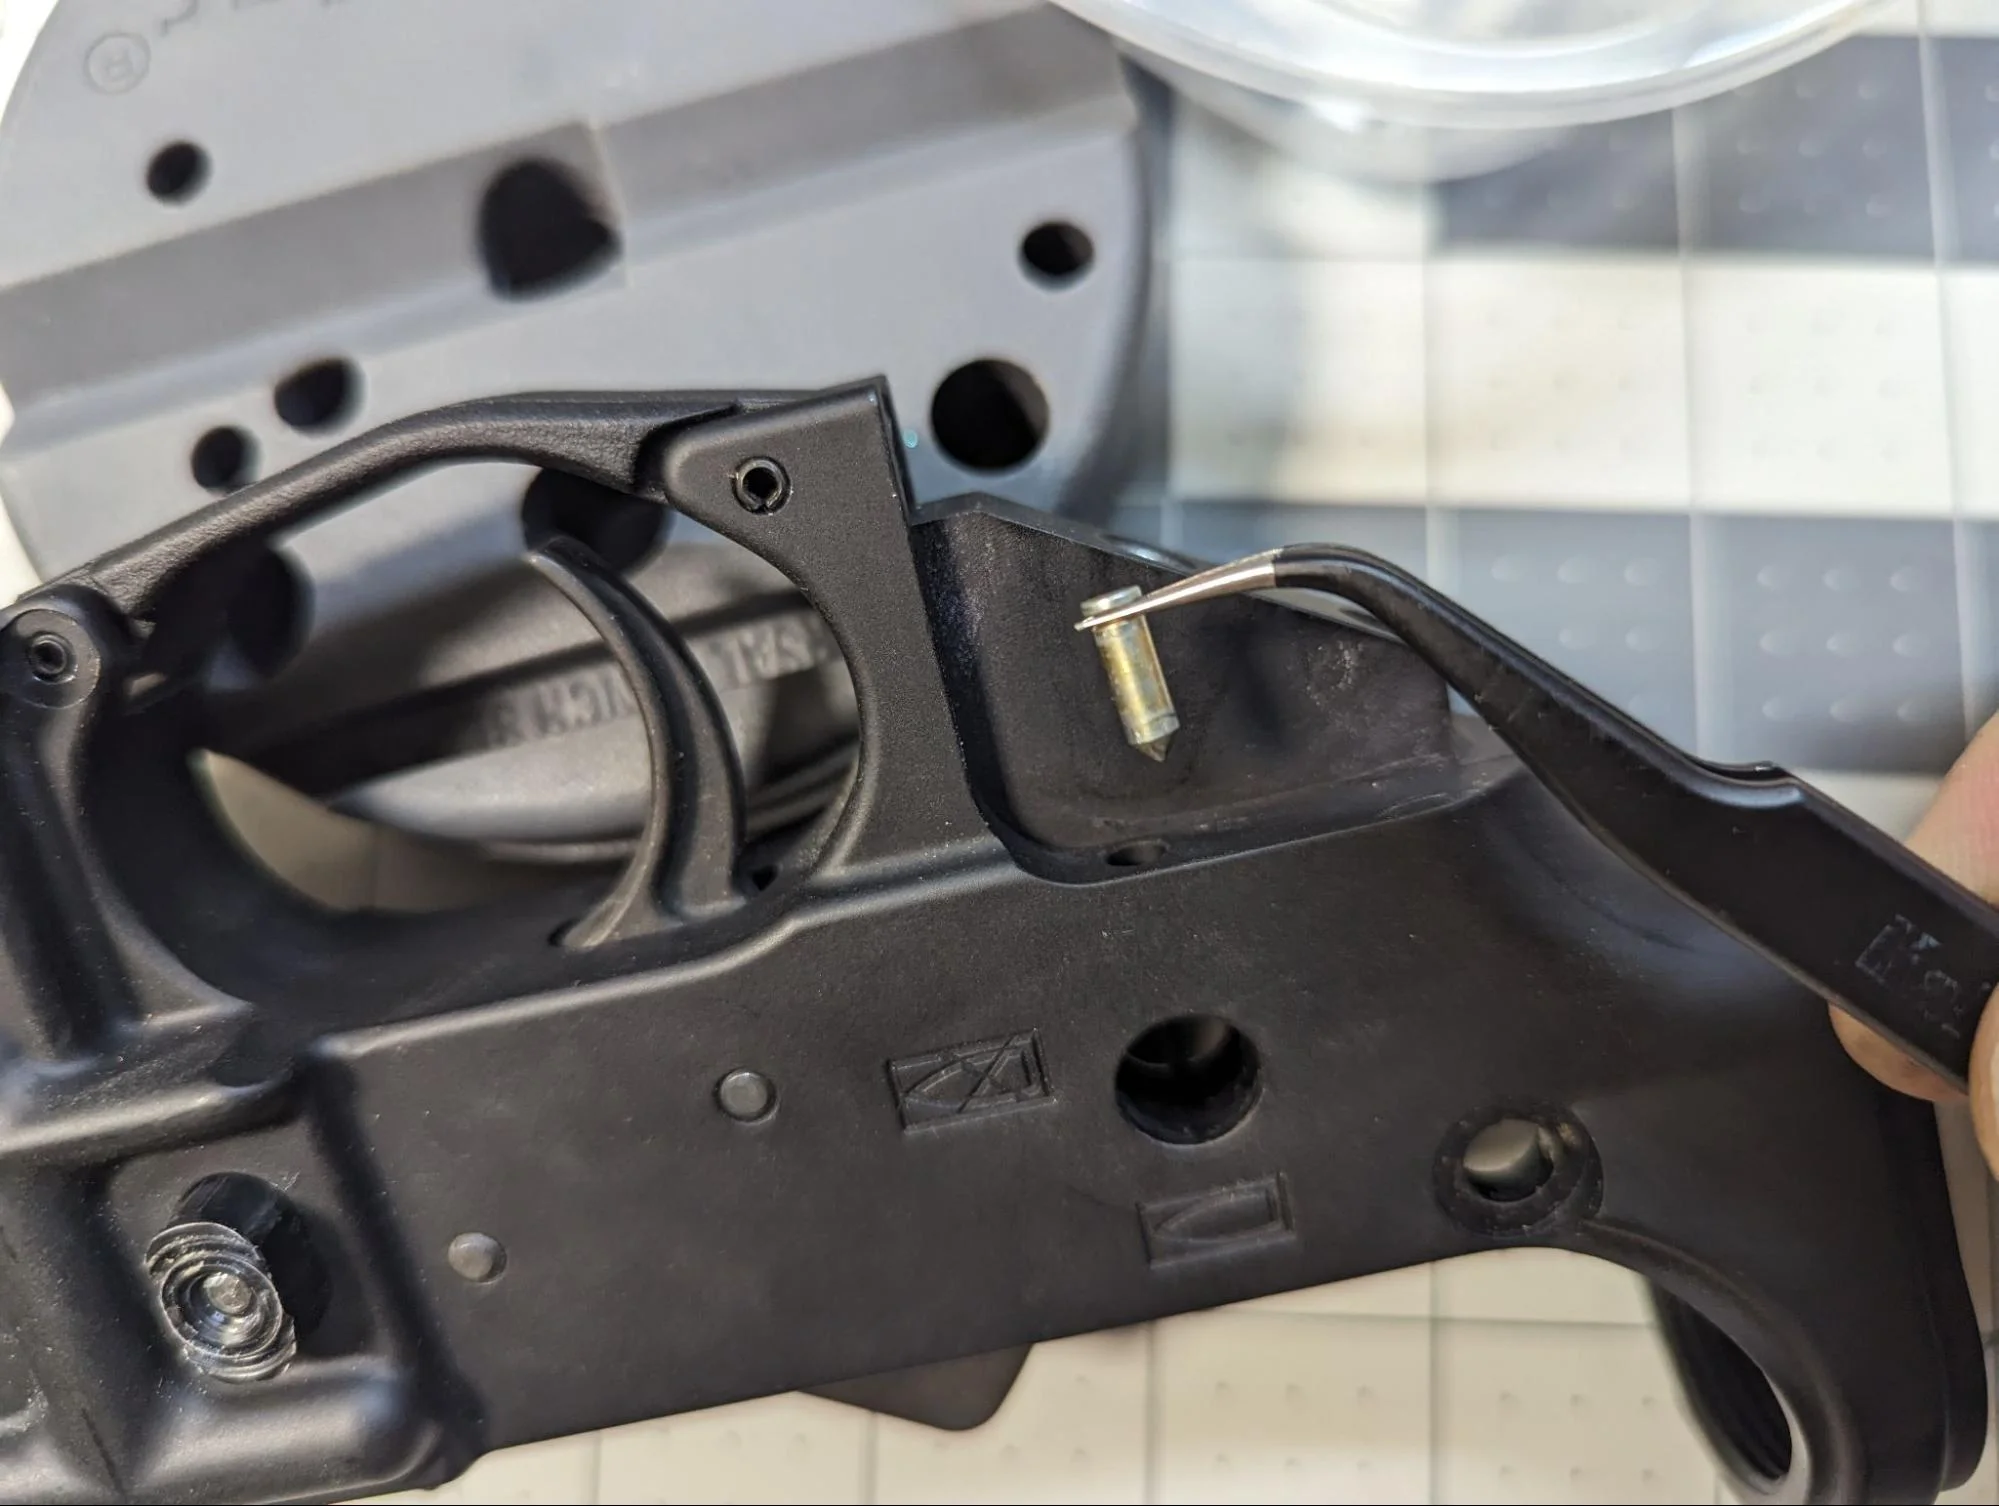
Install the Bolt Catch Assembly
Place the plunger into the hole on the left side of the lower receiver, followed by the spring. Ensure the plunger moves freely within the hole.
Insert the bolt catch from the left side of the lower receiver, ensuring it engages with the plunger and spring. Align the holes in the bolt catch with the corresponding holes in the receiver.
Next, insert the bolt catch roll pin through the holes in the bolt catch and the lower receiver. Use a punch to drive the roll pin through, ensuring it is centered and flush on both sides.
Use a punch and hammer to secure the roll pin entirely if needed. The bolt catch should move freely without any excess play.
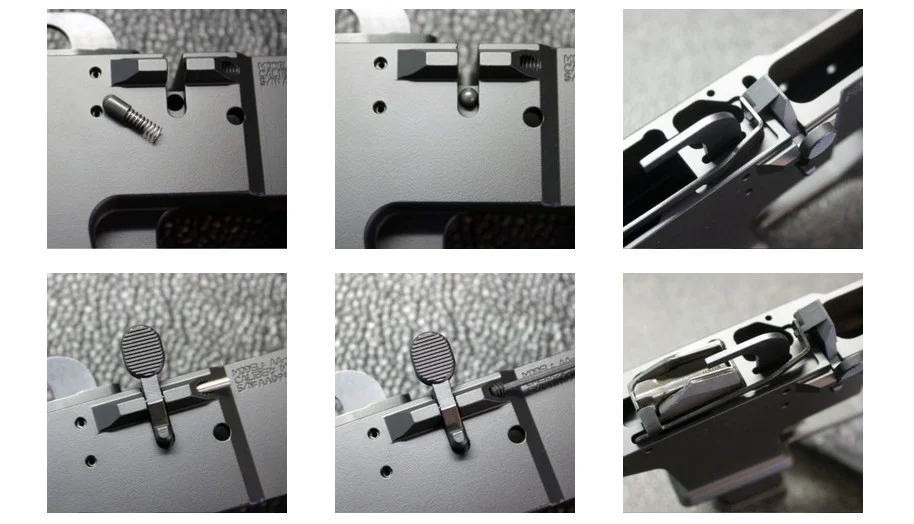
Install the Trigger Assembly
Place the trigger and disconnector into their respective slots in the lower receiver. Ensure the disconnector spring is positioned correctly.
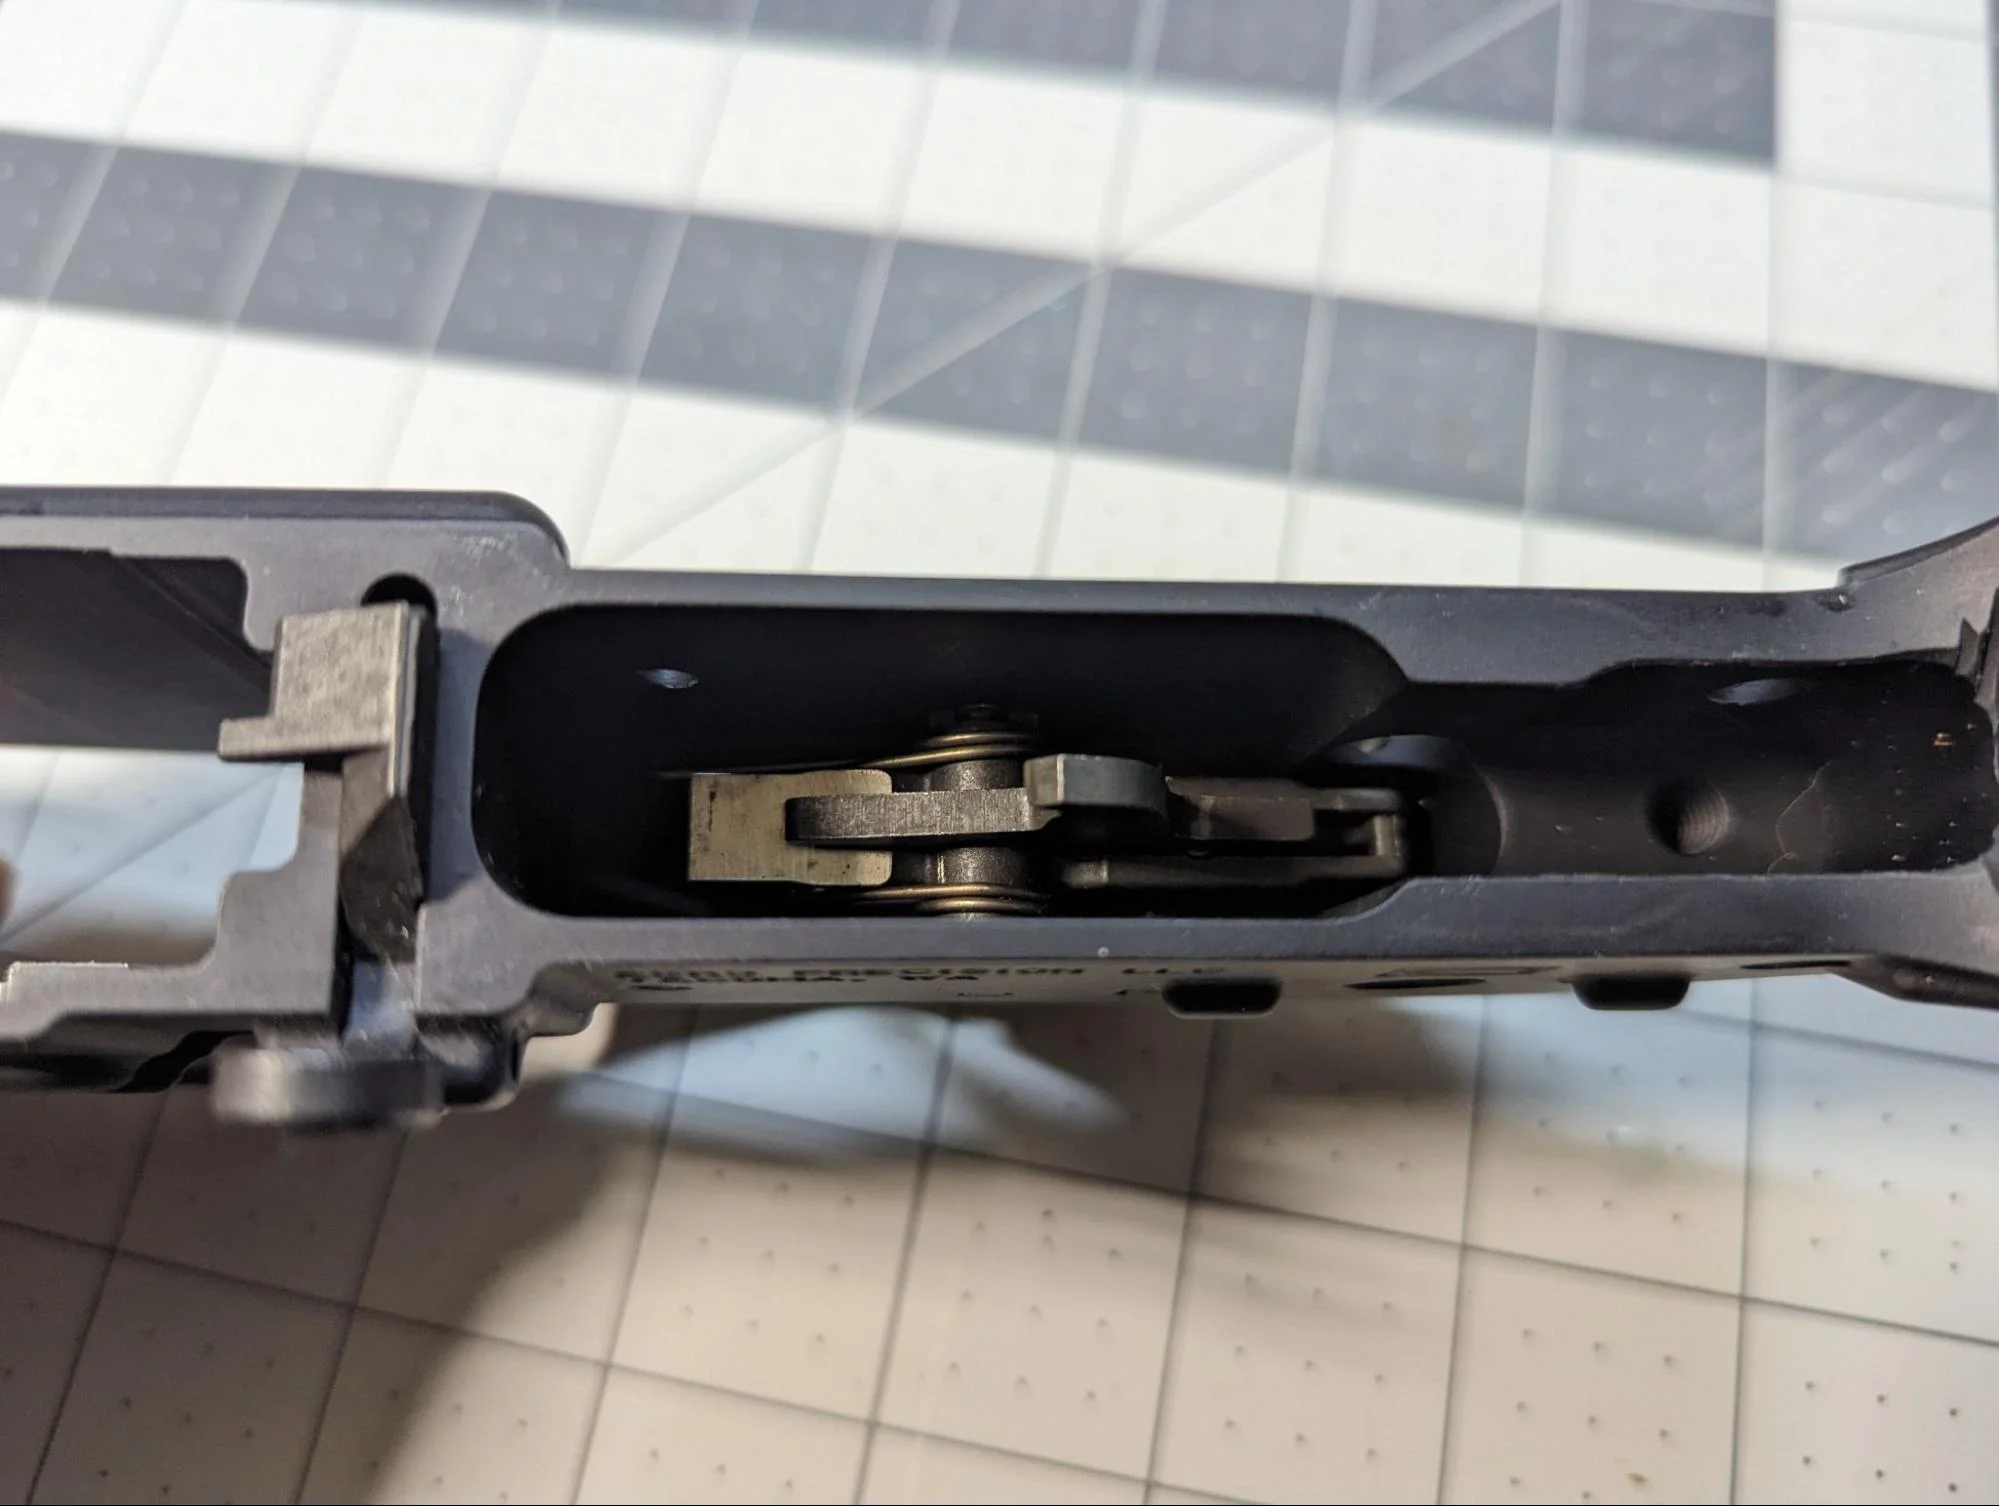
Insert the trigger pin through the holes in the trigger and the lower receiver. Use a punch to drive the pin through, ensuring it is centered and flush on both sides.
Place the hammer into its slot in the lower receiver. Ensure the hammer spring is positioned correctly.
Insert the hammer pin through the holes in the hammer and the lower receiver. Use a punch to drive the pin through, ensuring it is centered and flush on both sides.
If your trigger assembly has adjustable features, follow the manufacturer’s instructions for adjustments. This may include adjusting the pull weight or overtravel.
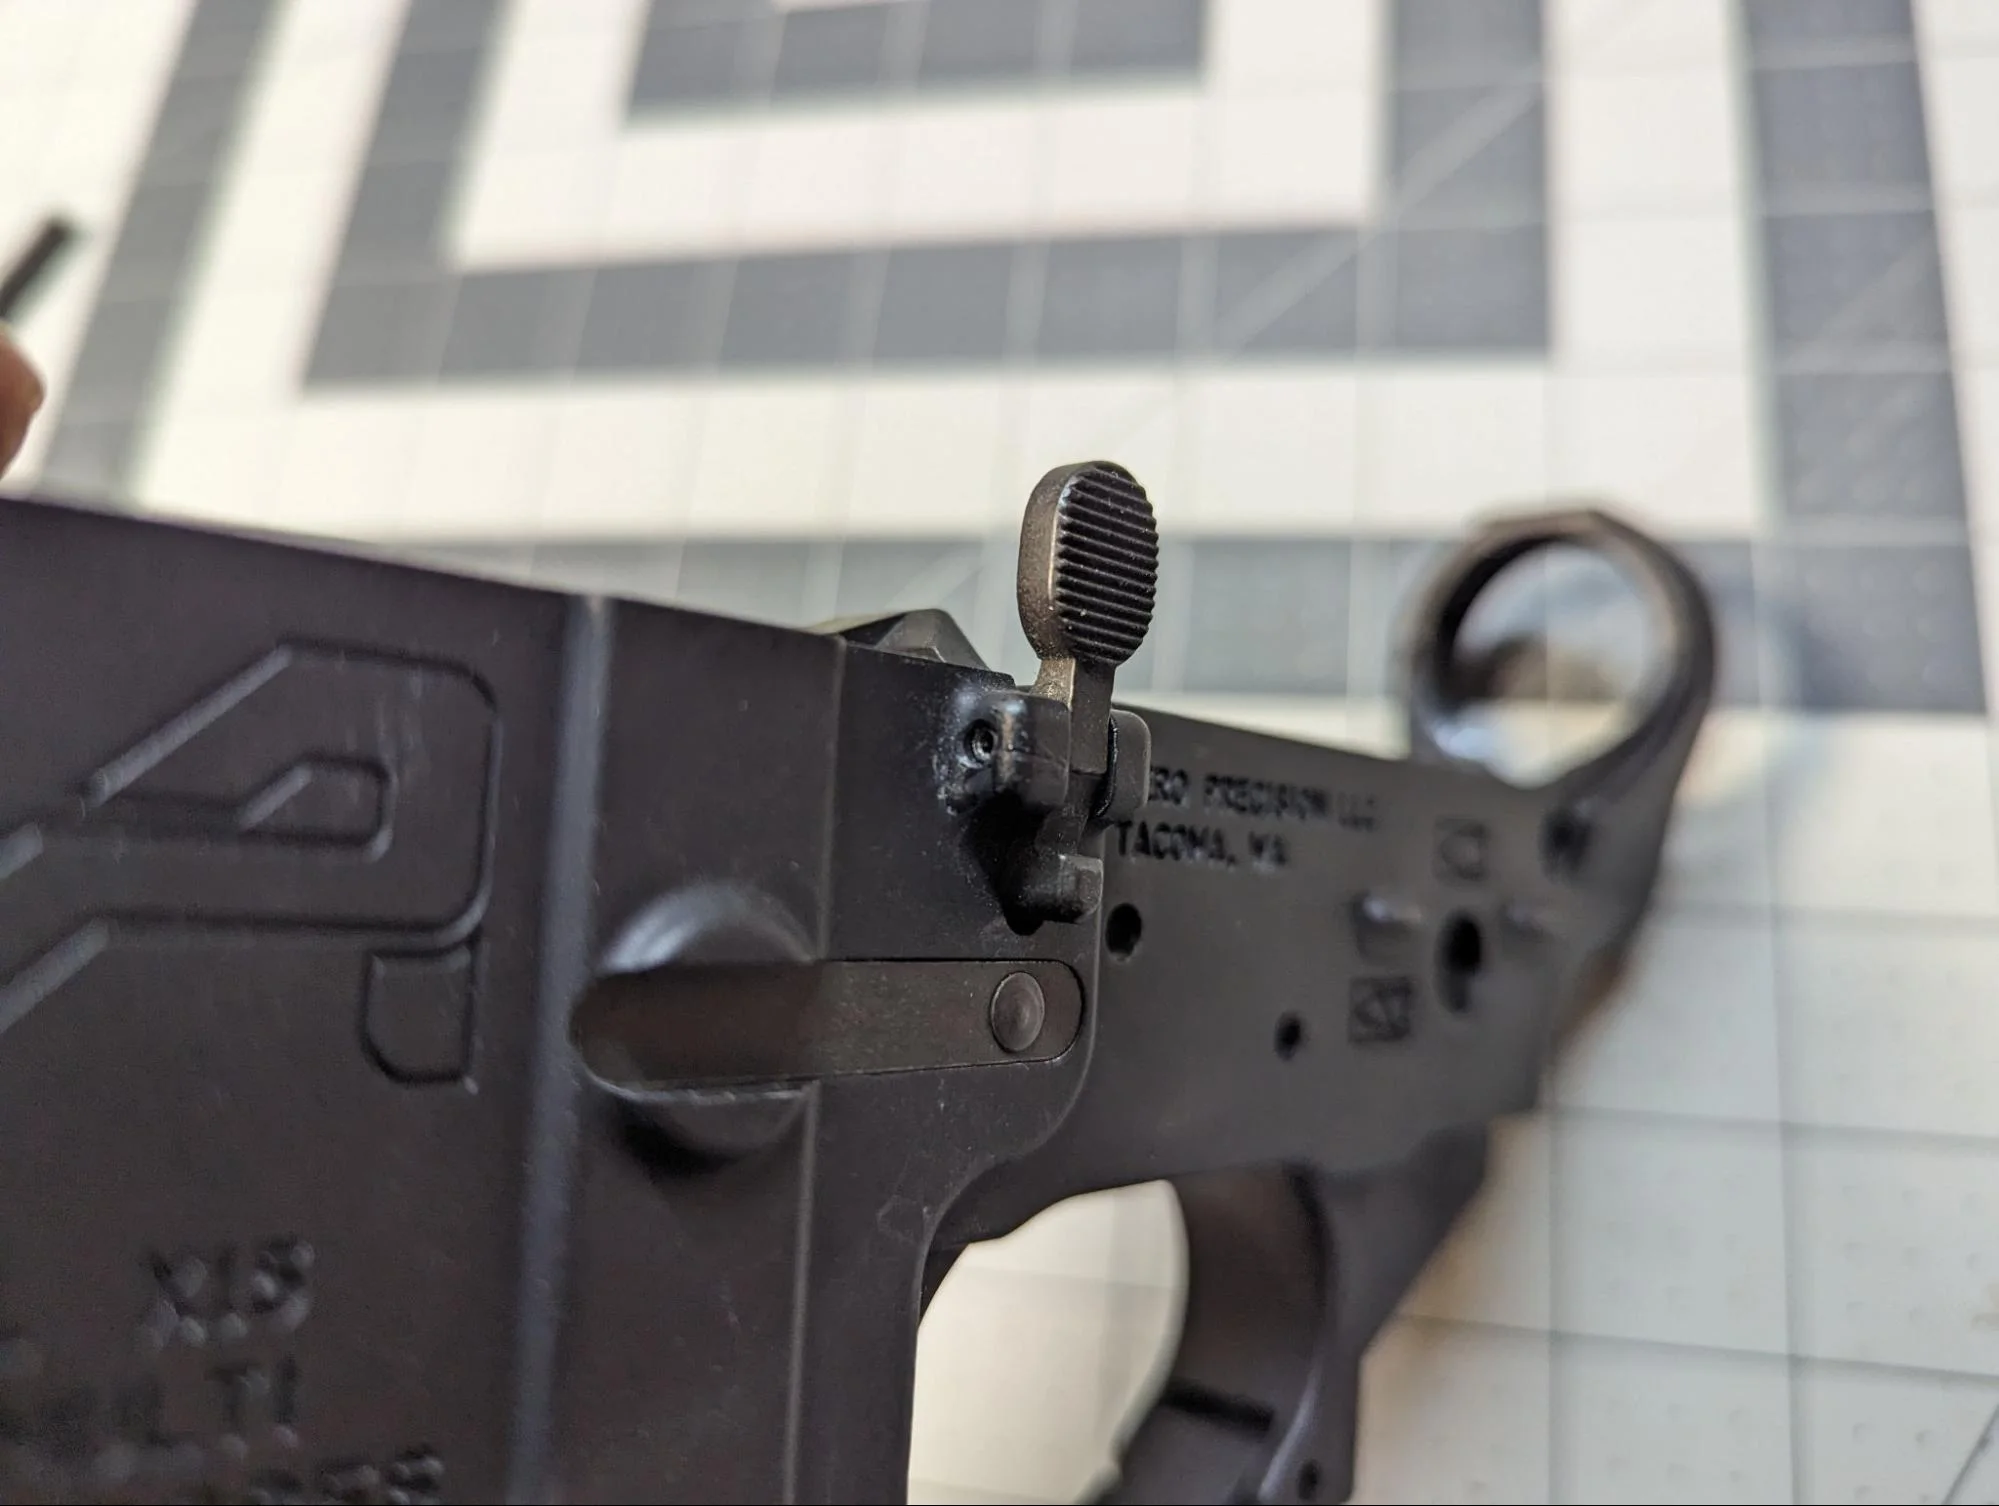
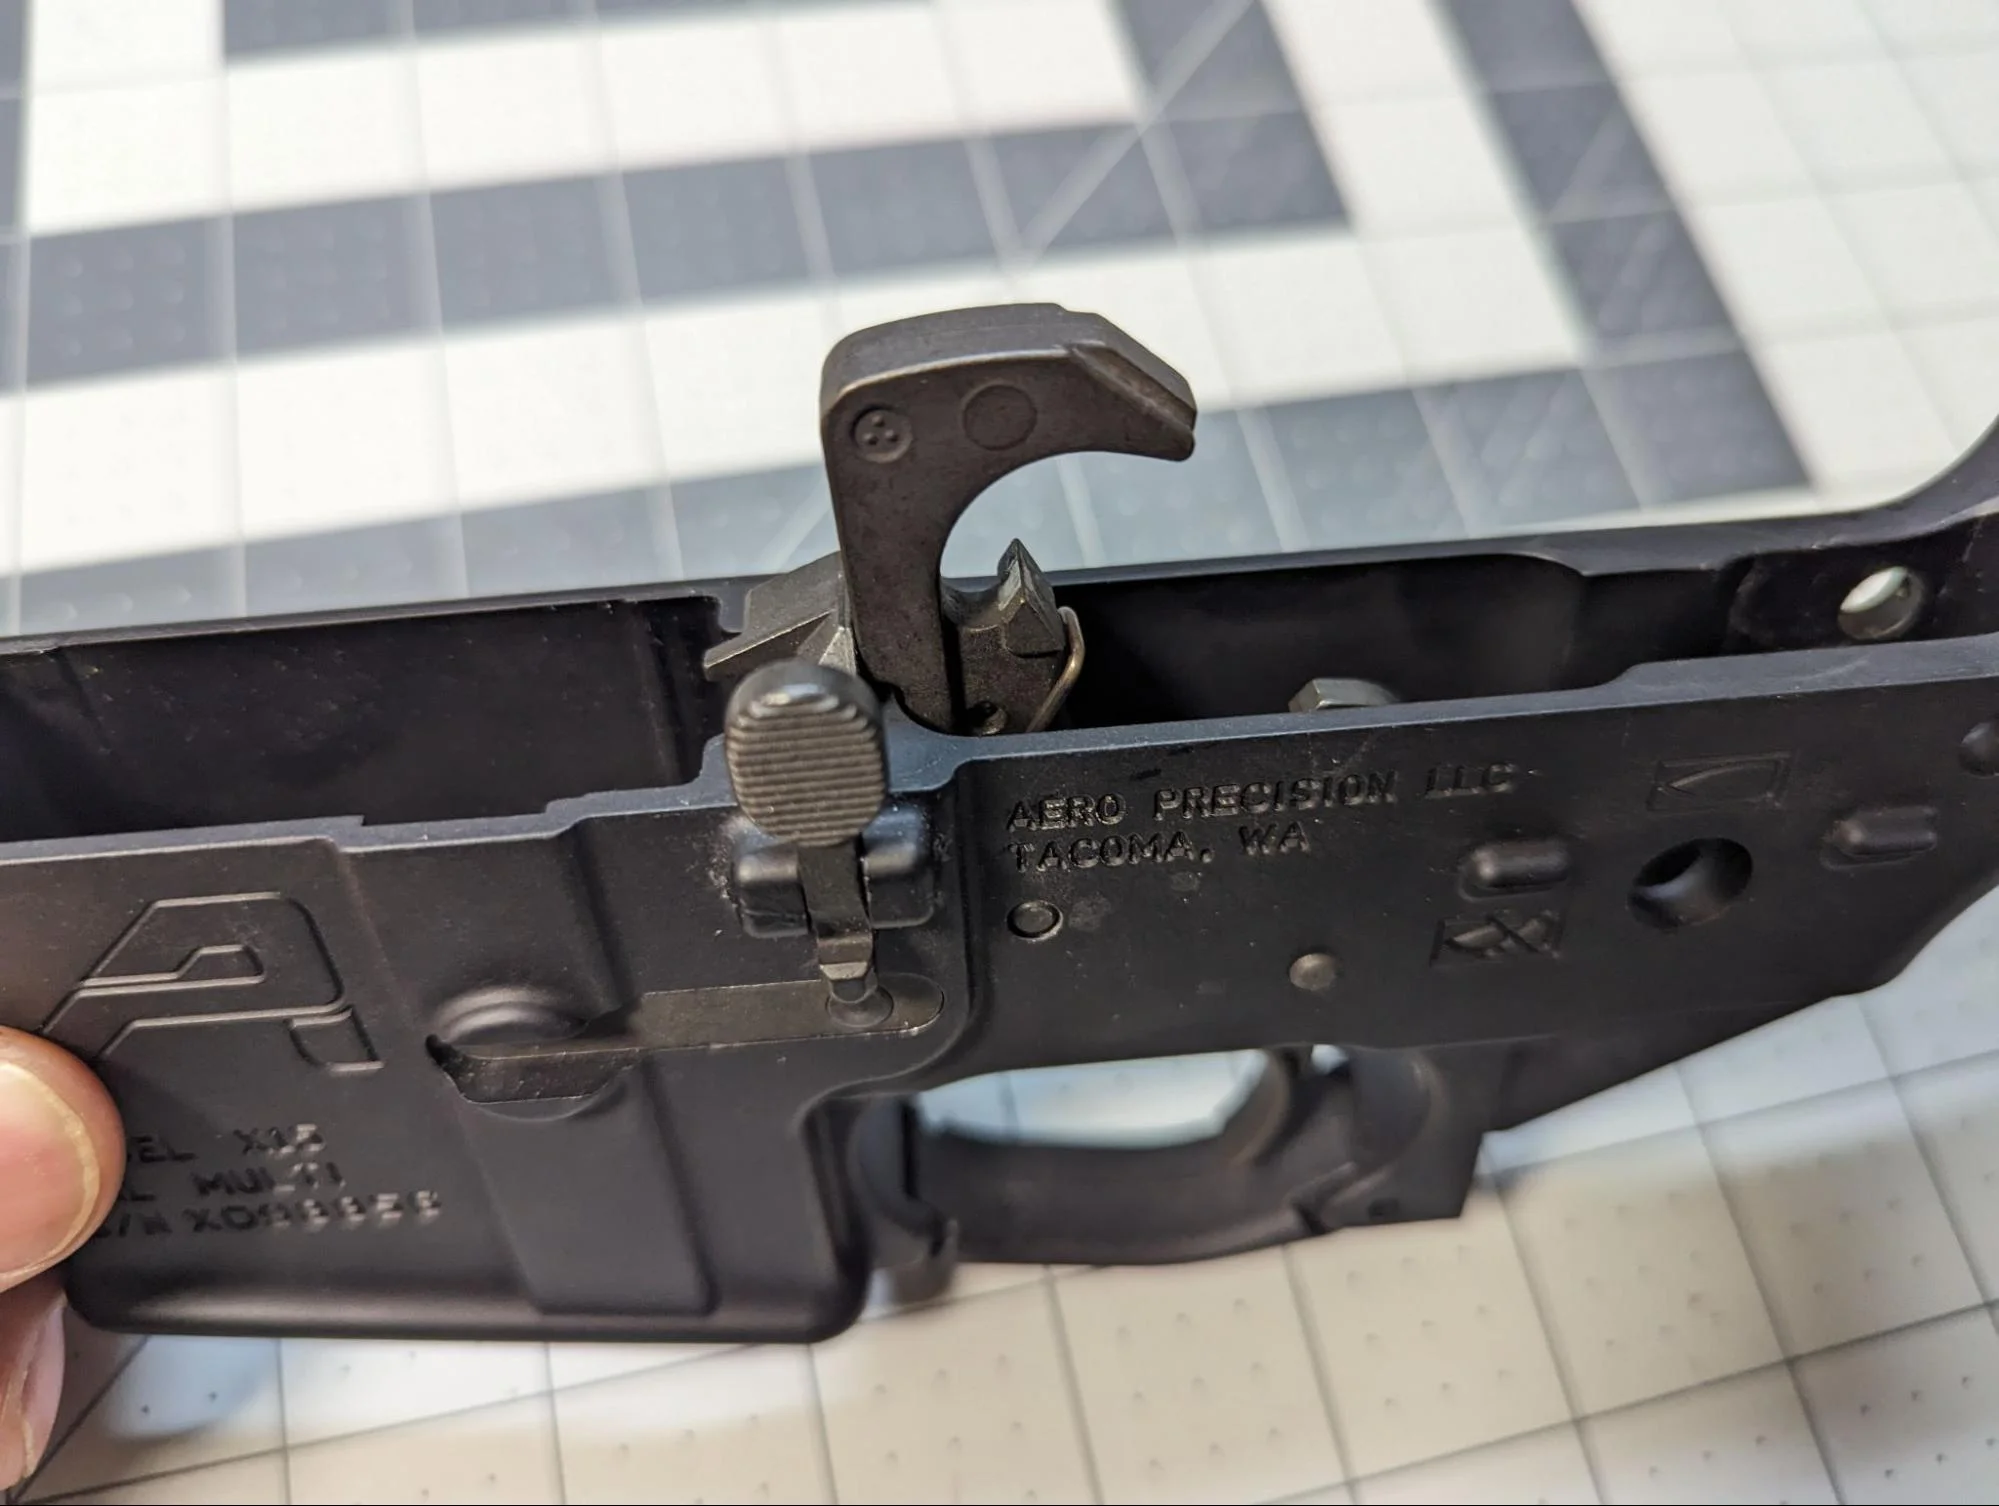
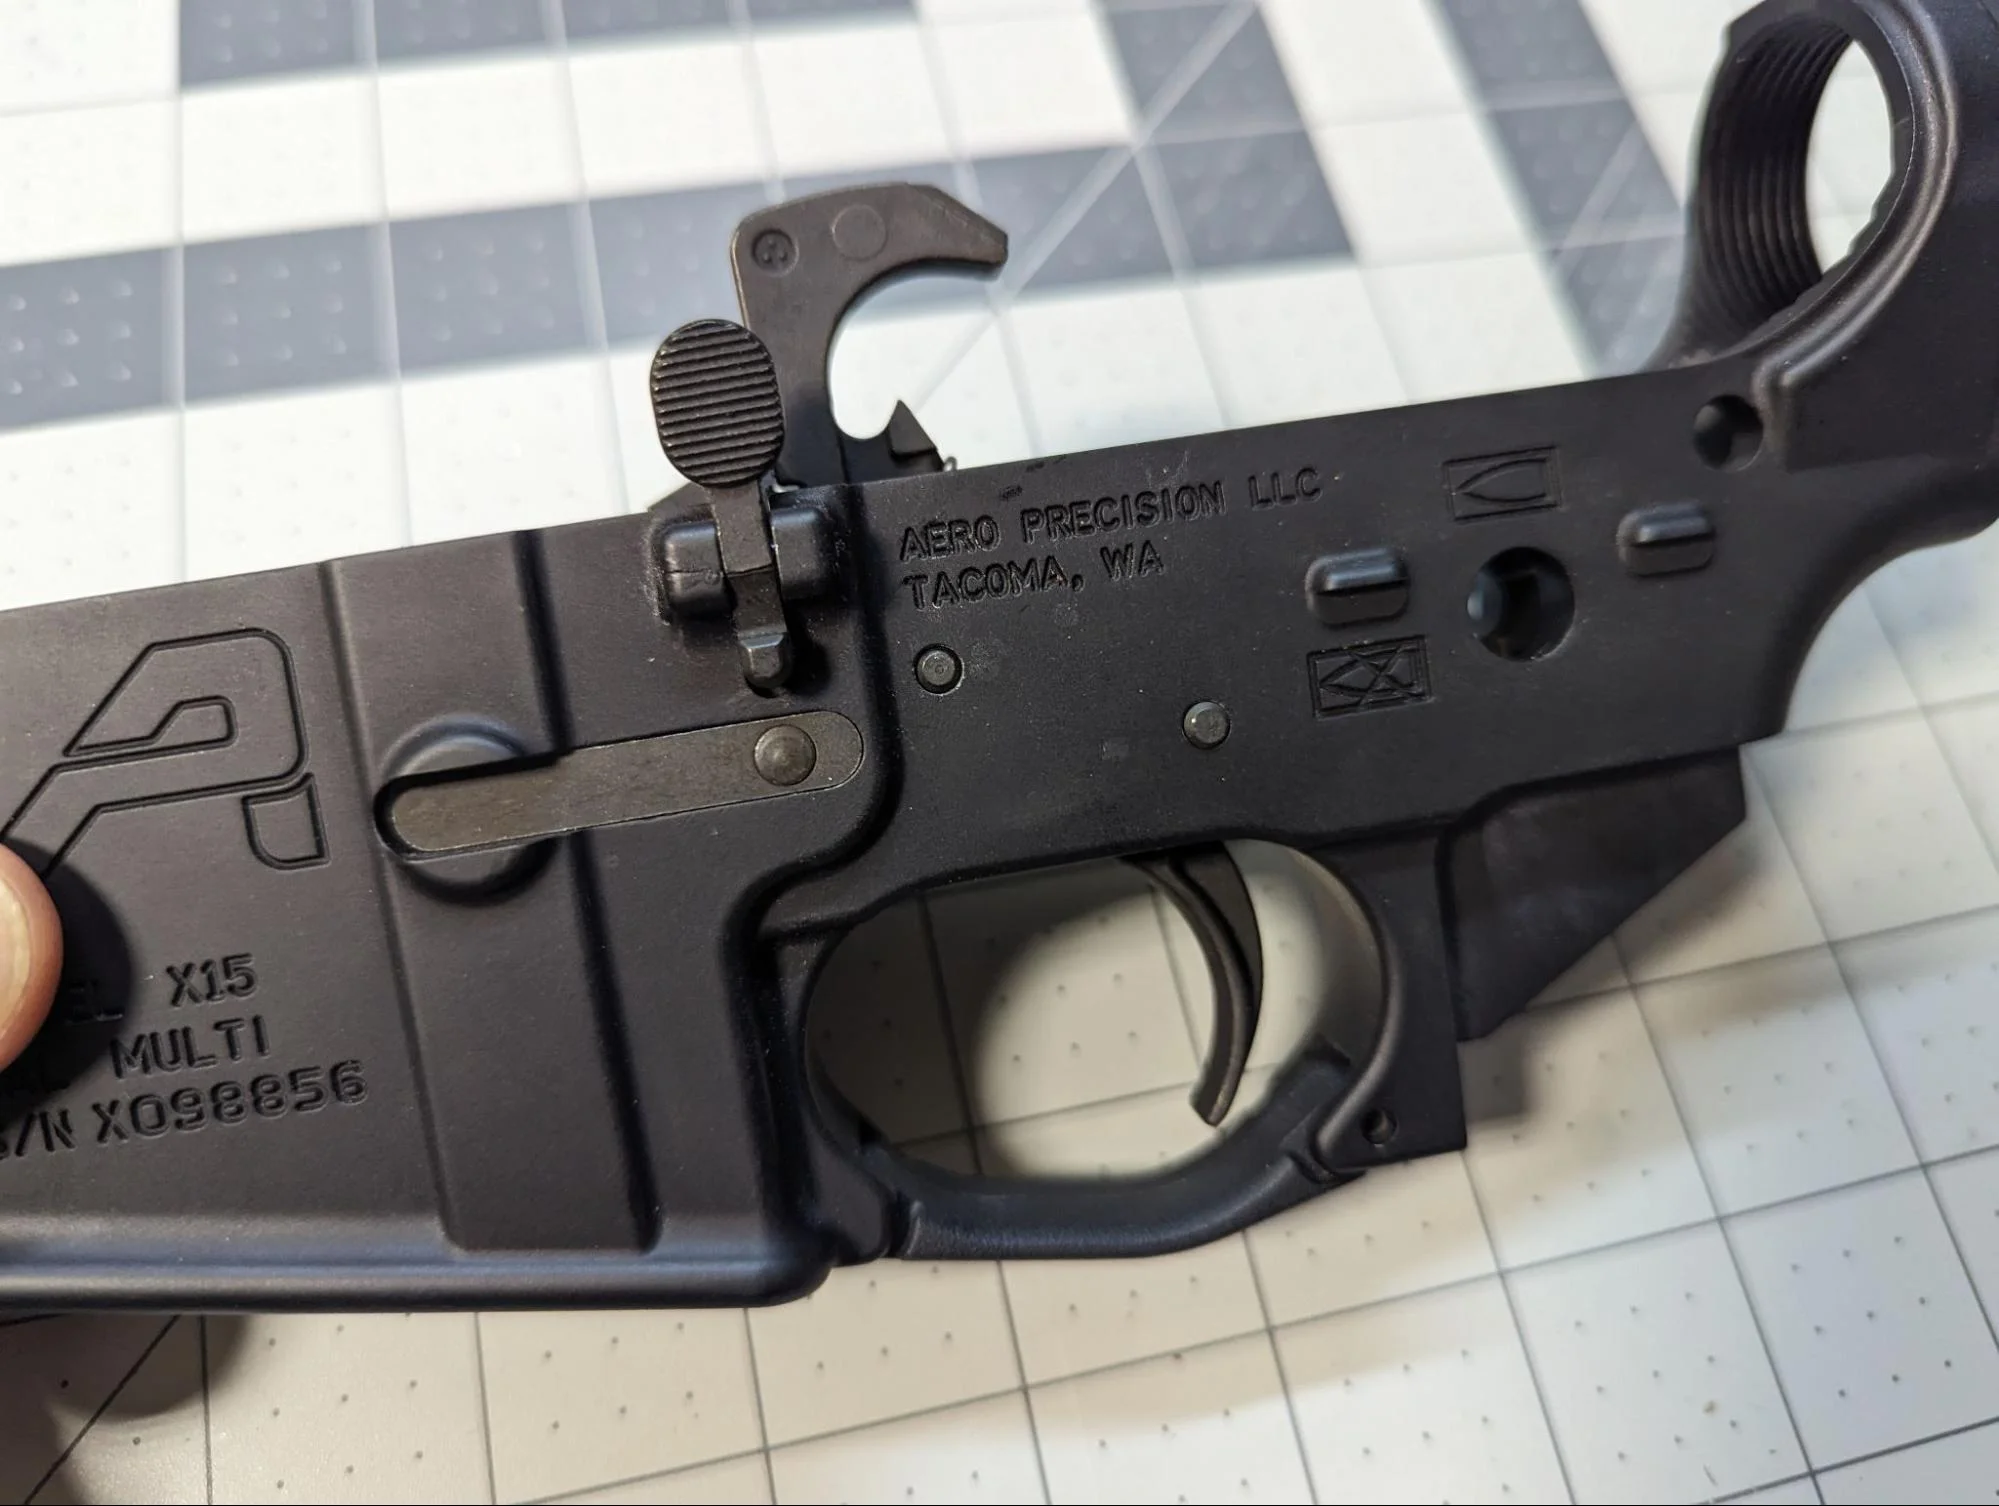
Install the Safety, Takedown Pins, Grip, and Stock
Insert the safety selector into the hole on the left side of the lower receiver. Ensure the flat side of the selector is parallel to the lower receiver.
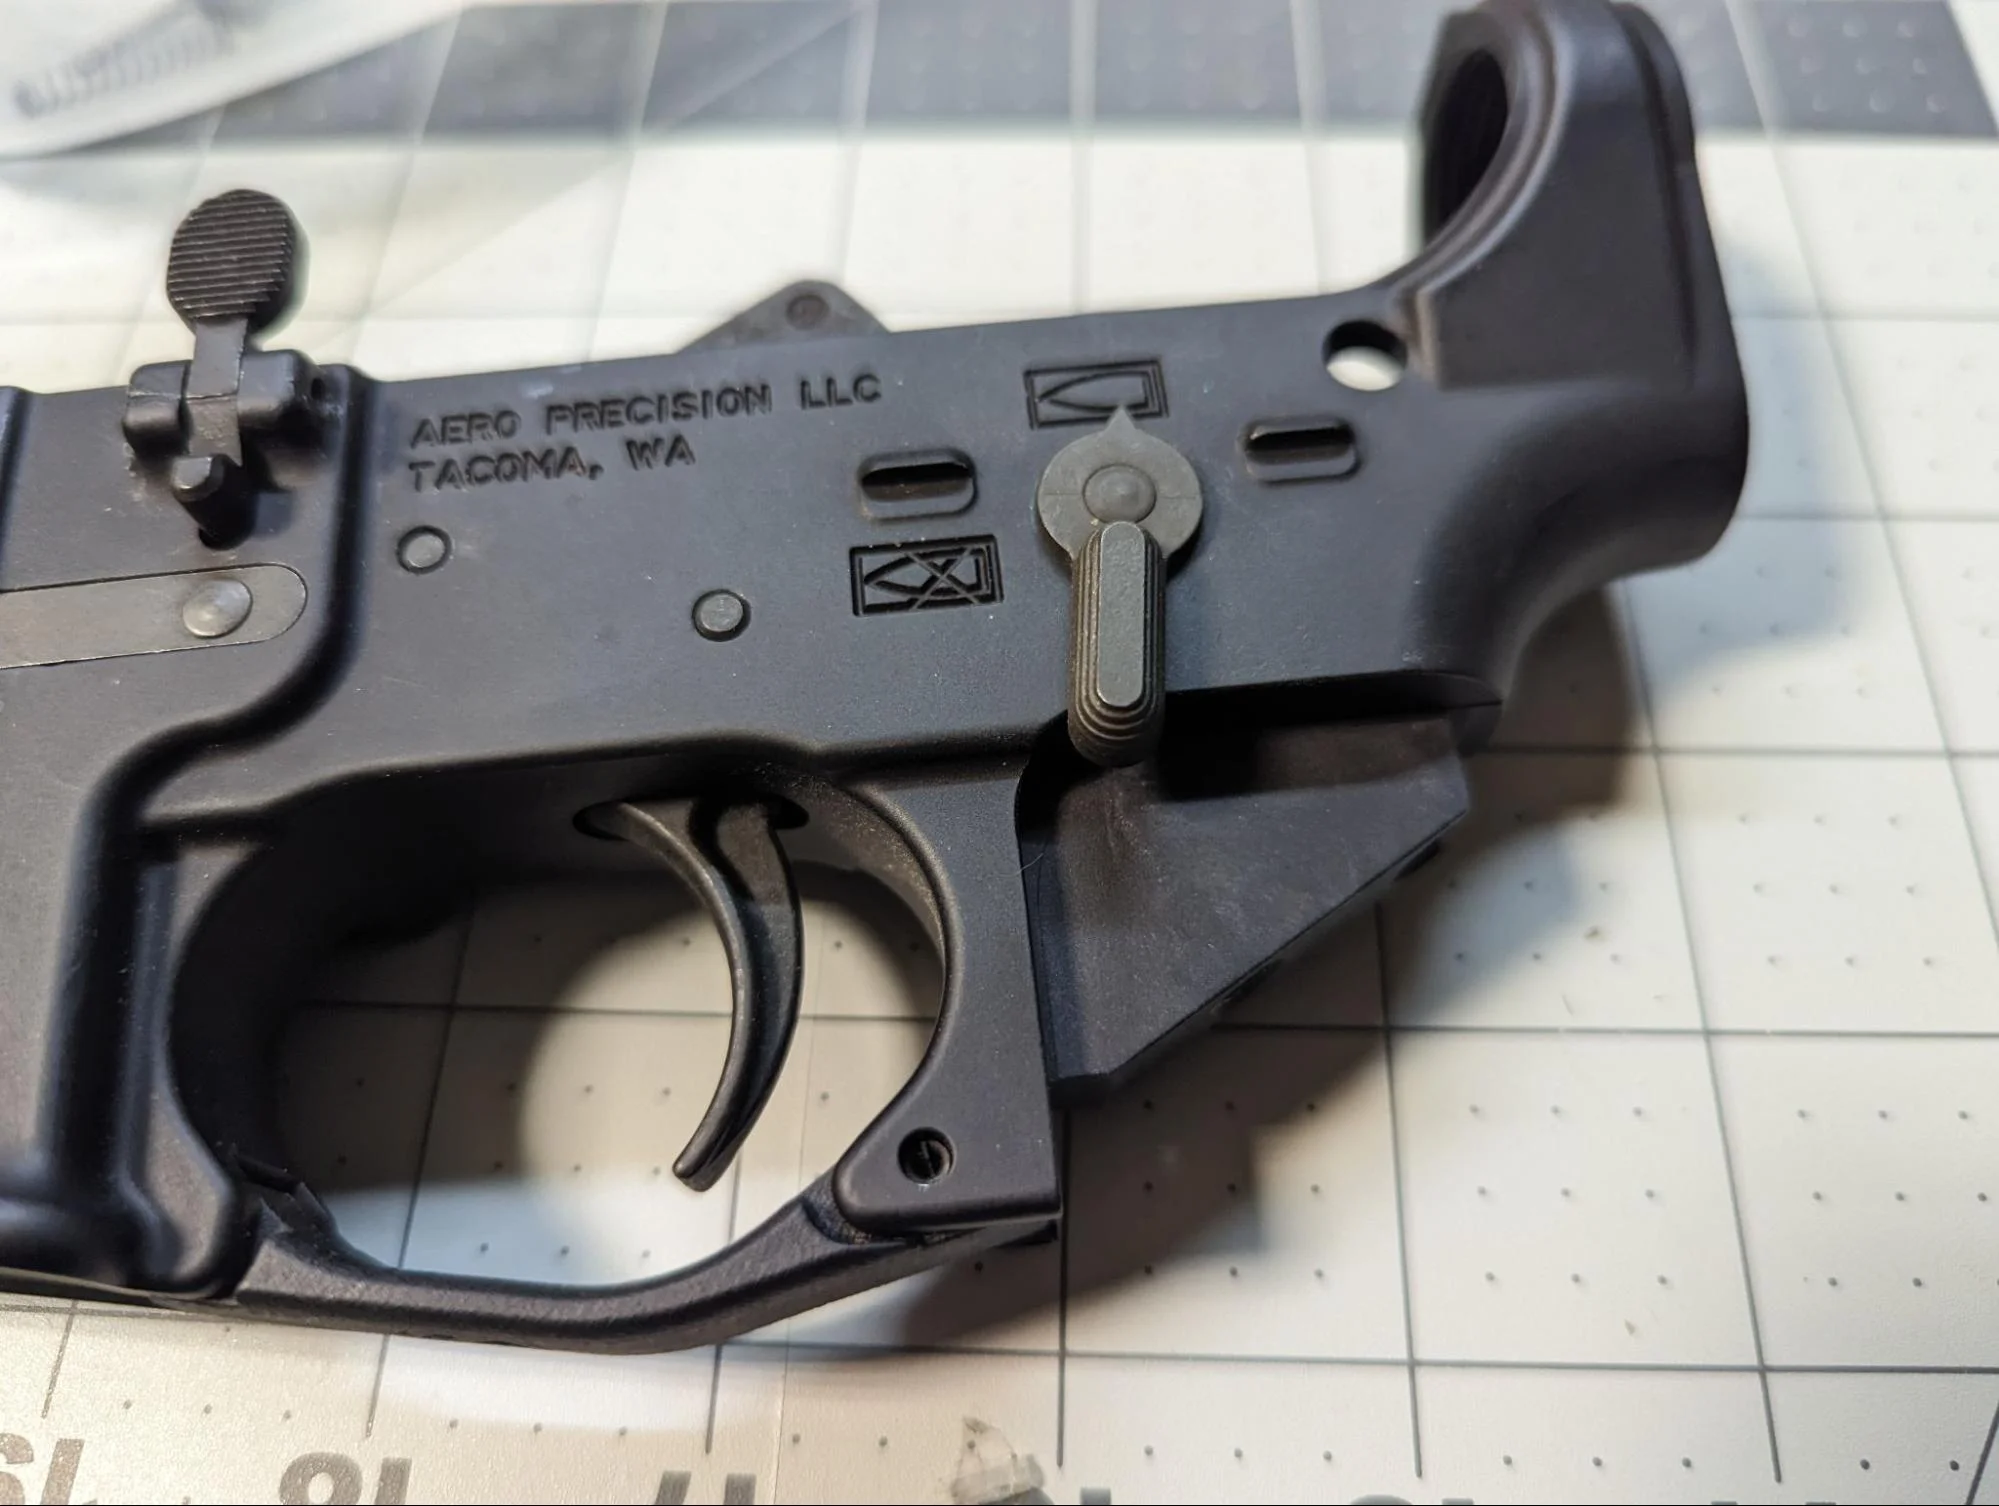
Drop the detent into the corresponding hole on the left side of the receiver. Insert the detent spring into the hole behind the pistol grip.
Align the grip with the hole in the lower receiver. Insert the grip screw through the bottom of the grip and tighten securely using an appropriate screwdriver or Allen wrench.
Tighten the castle nut onto the buffer tube using an armorer’s wrench. Make sure it’s snug, but avoid over-tightening.
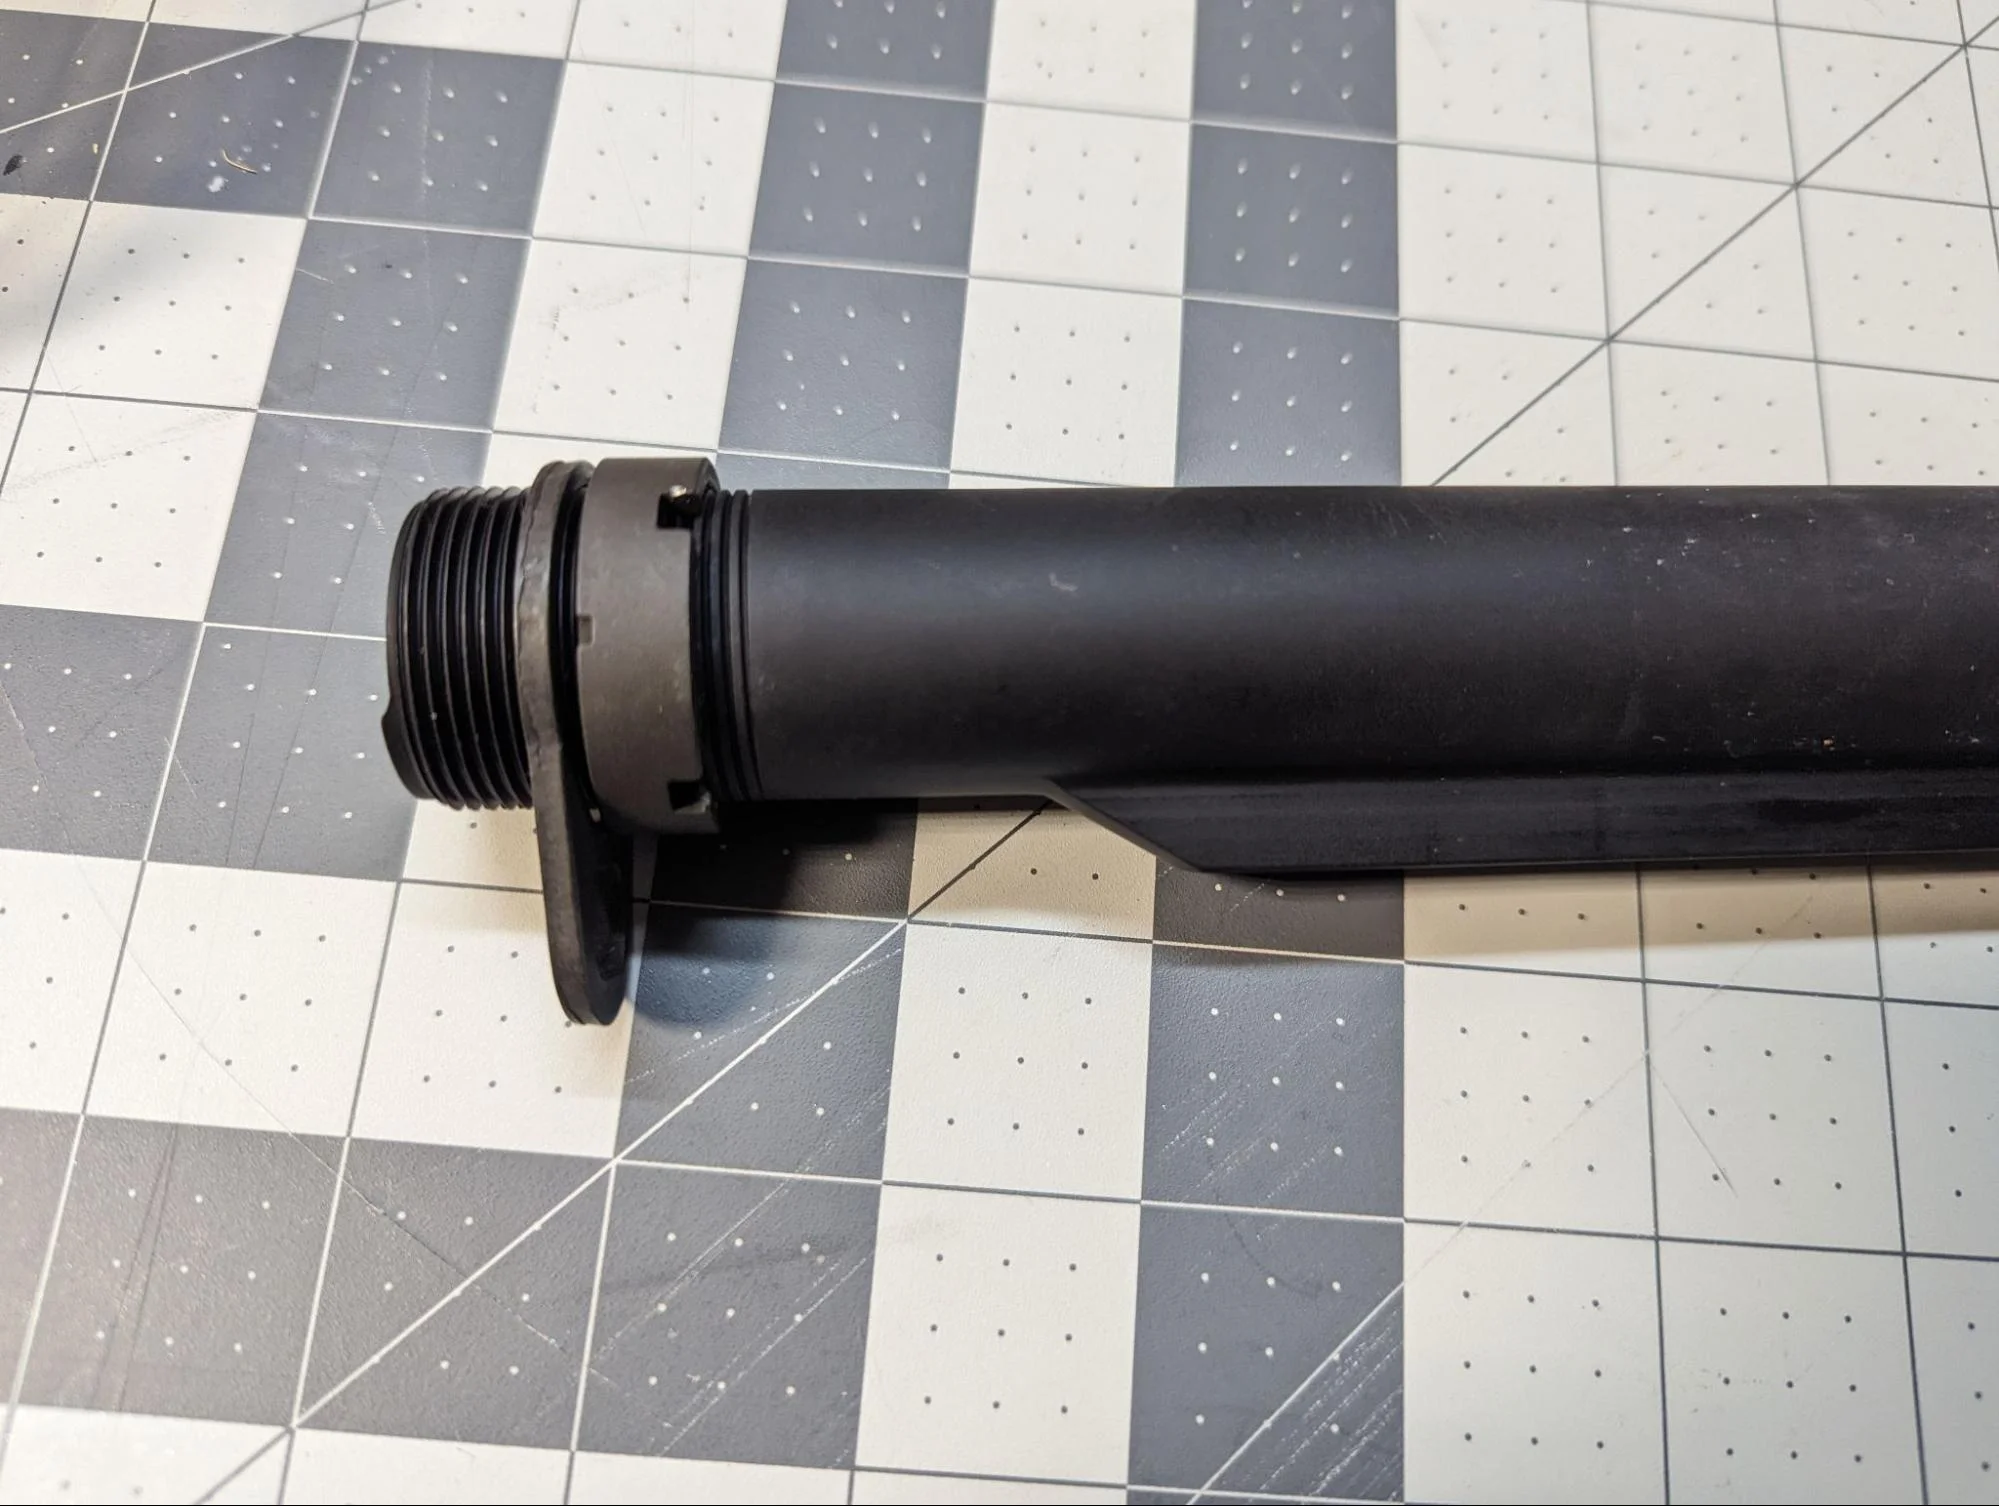
Insert the end plate onto the buffer tube and tighten the castle nut against it.
Now, slide the stock onto the buffer tube until it locks into place. Secure it with the adjustment lever or screw, depending on your stock type.
Position the front takedown pin in the hole at the front of the lower receiver. Push it through until it clicks into place.
Position the rear takedown pin in the hole at the rear of the lower receiver. Push it through until it clicks into place.
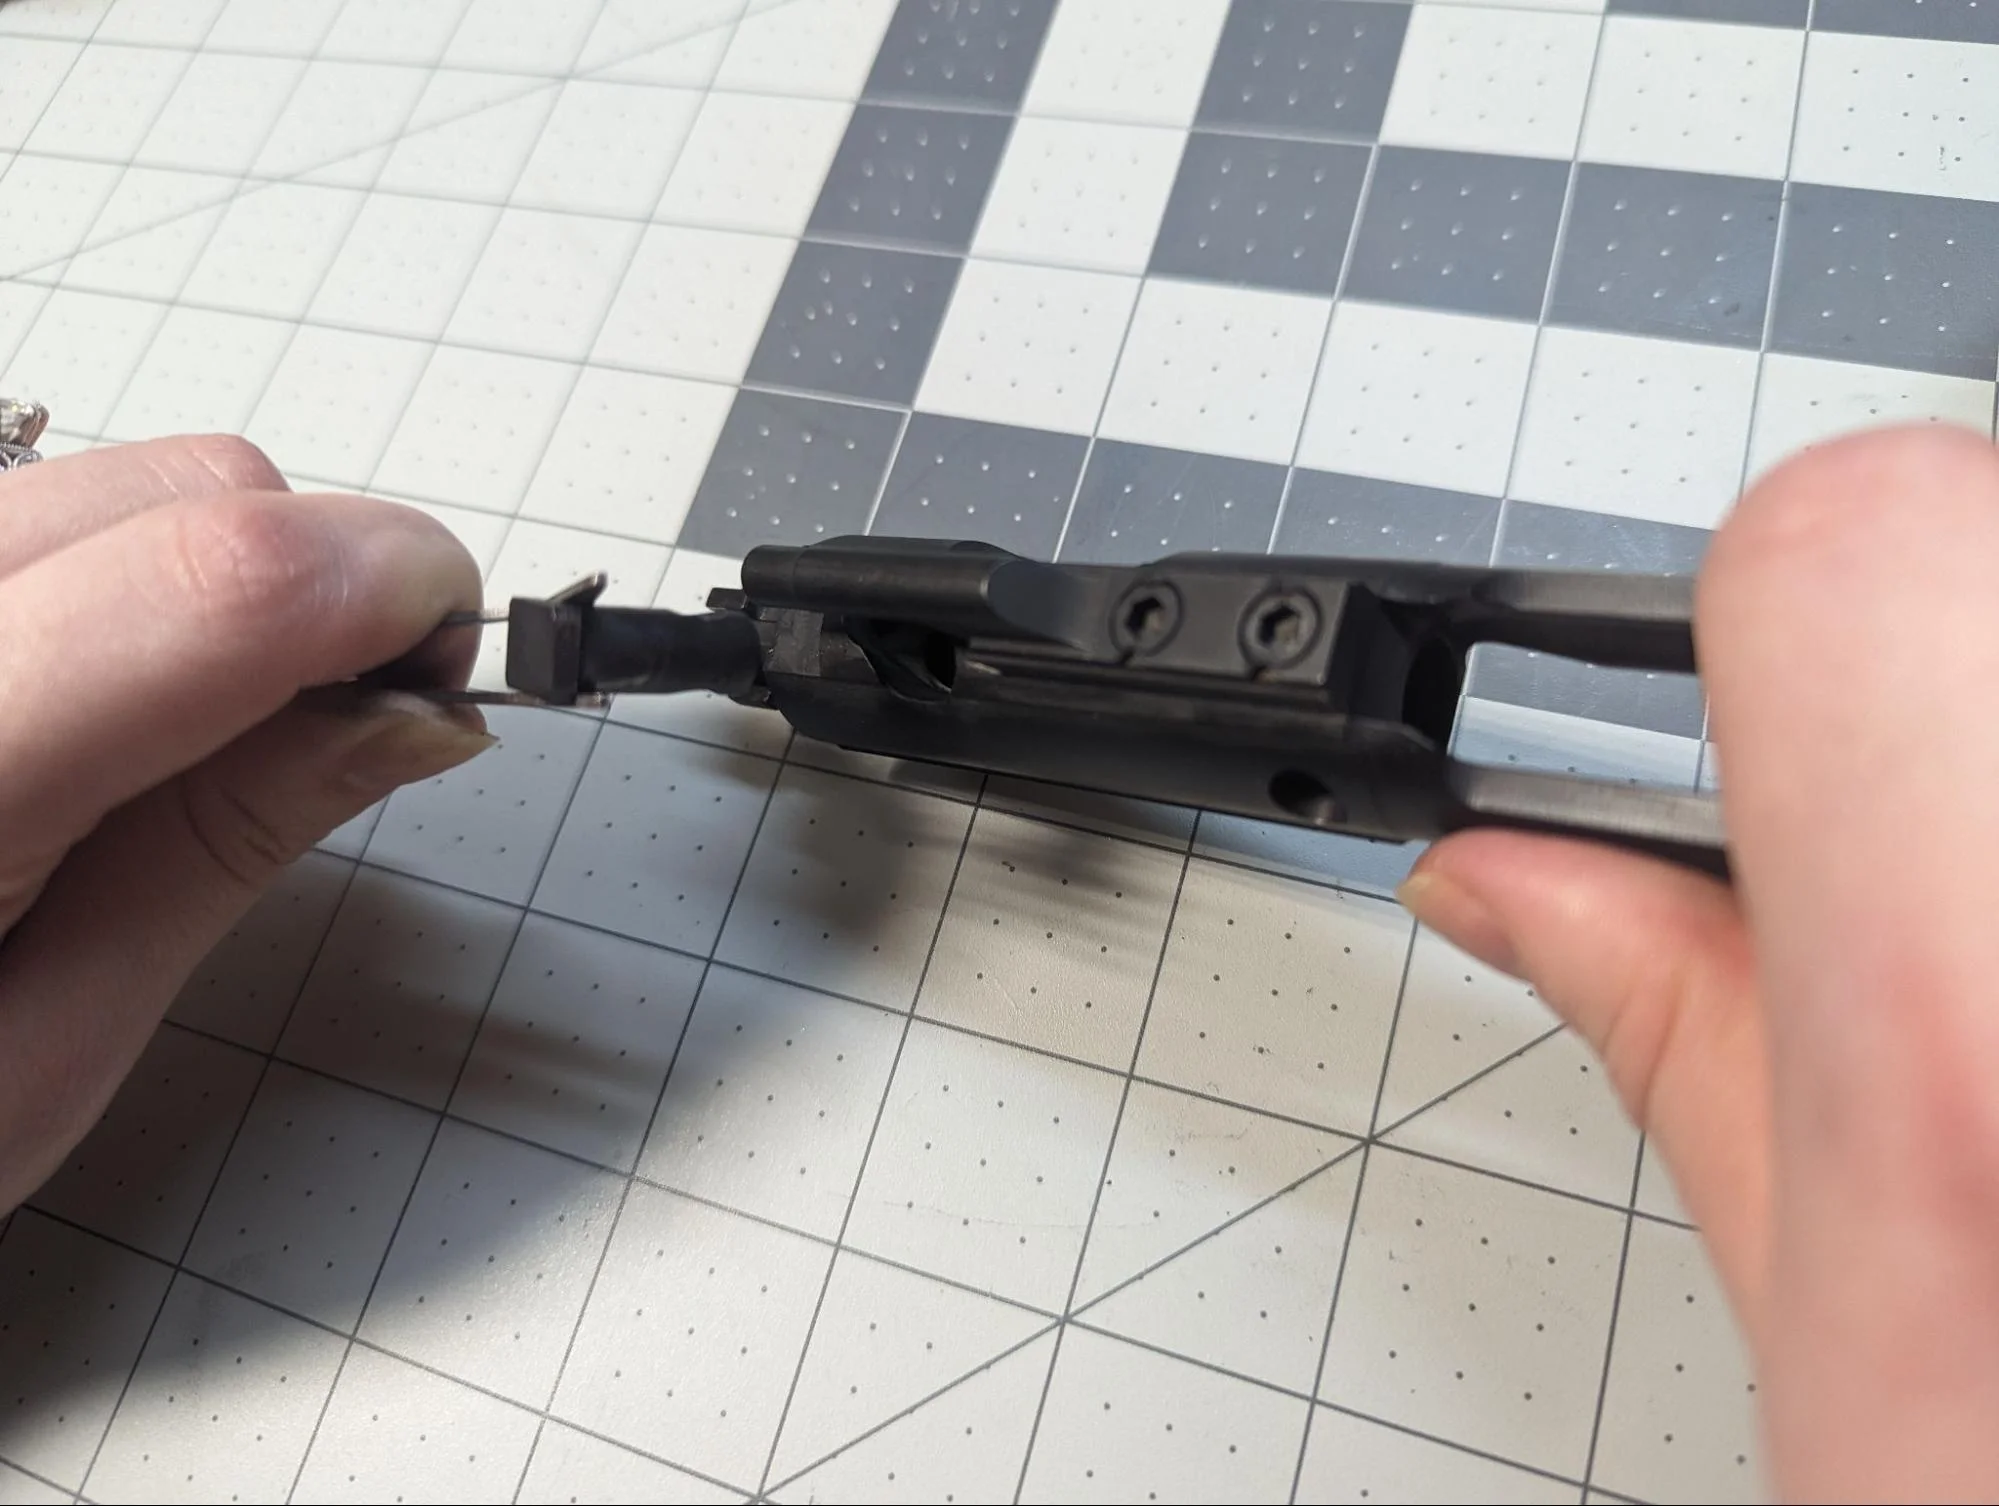
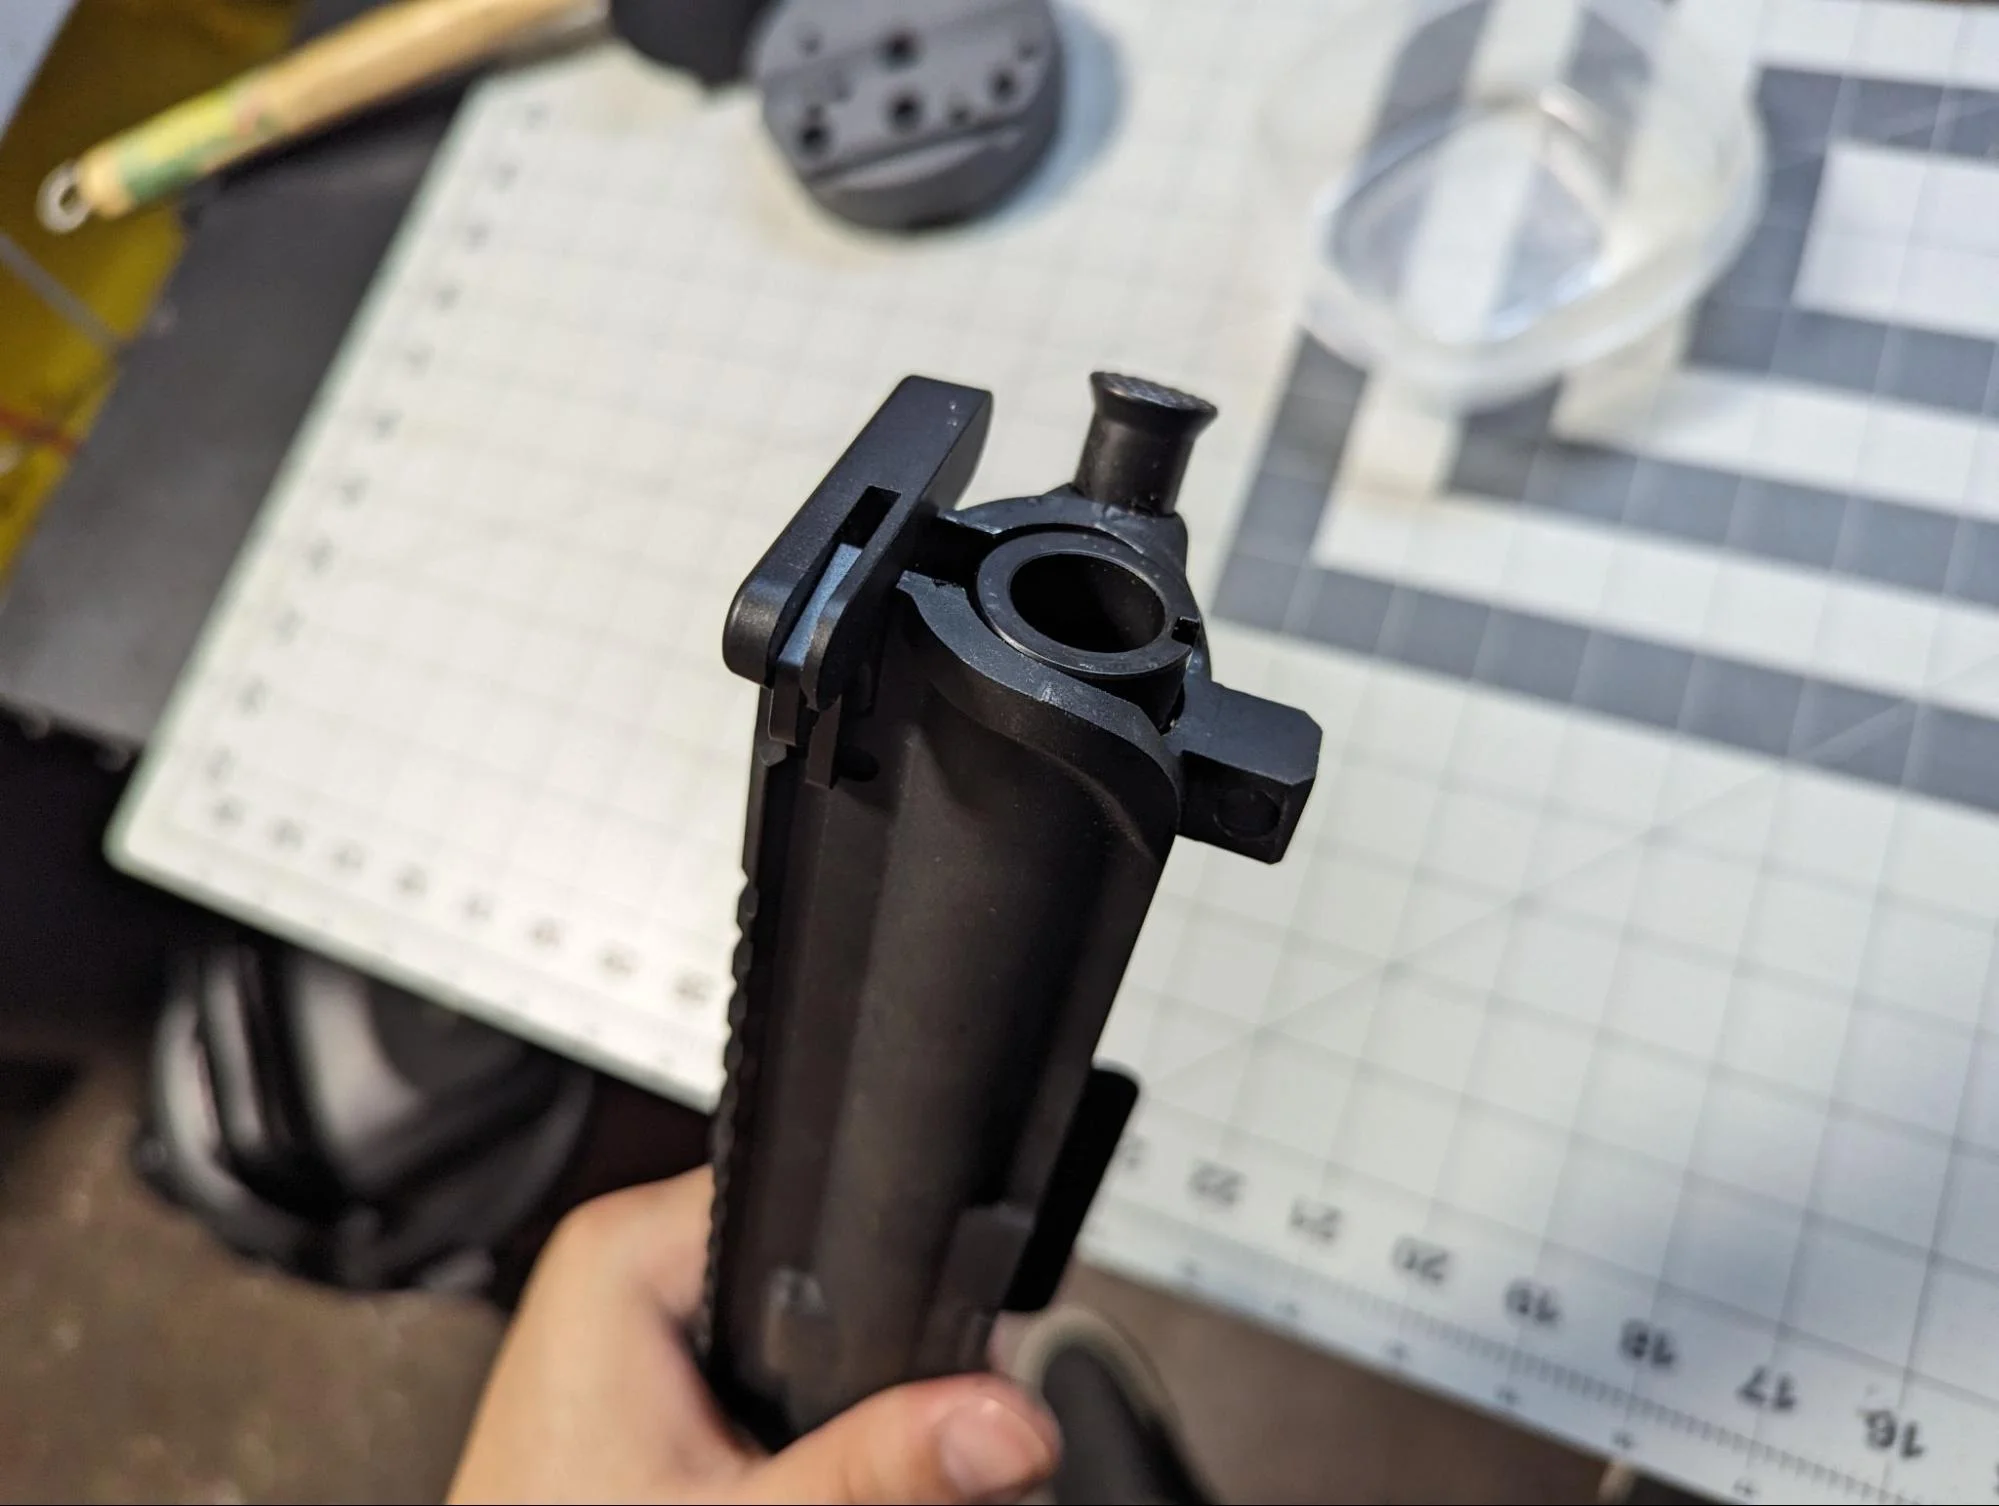
Assemble the Bolt Carrier Assembly
Slide the bolt into the front of the bolt carrier, ensuring the extractor is facing outwards. Rotate the bolt until the lugs align with the channels in the bolt carrier.
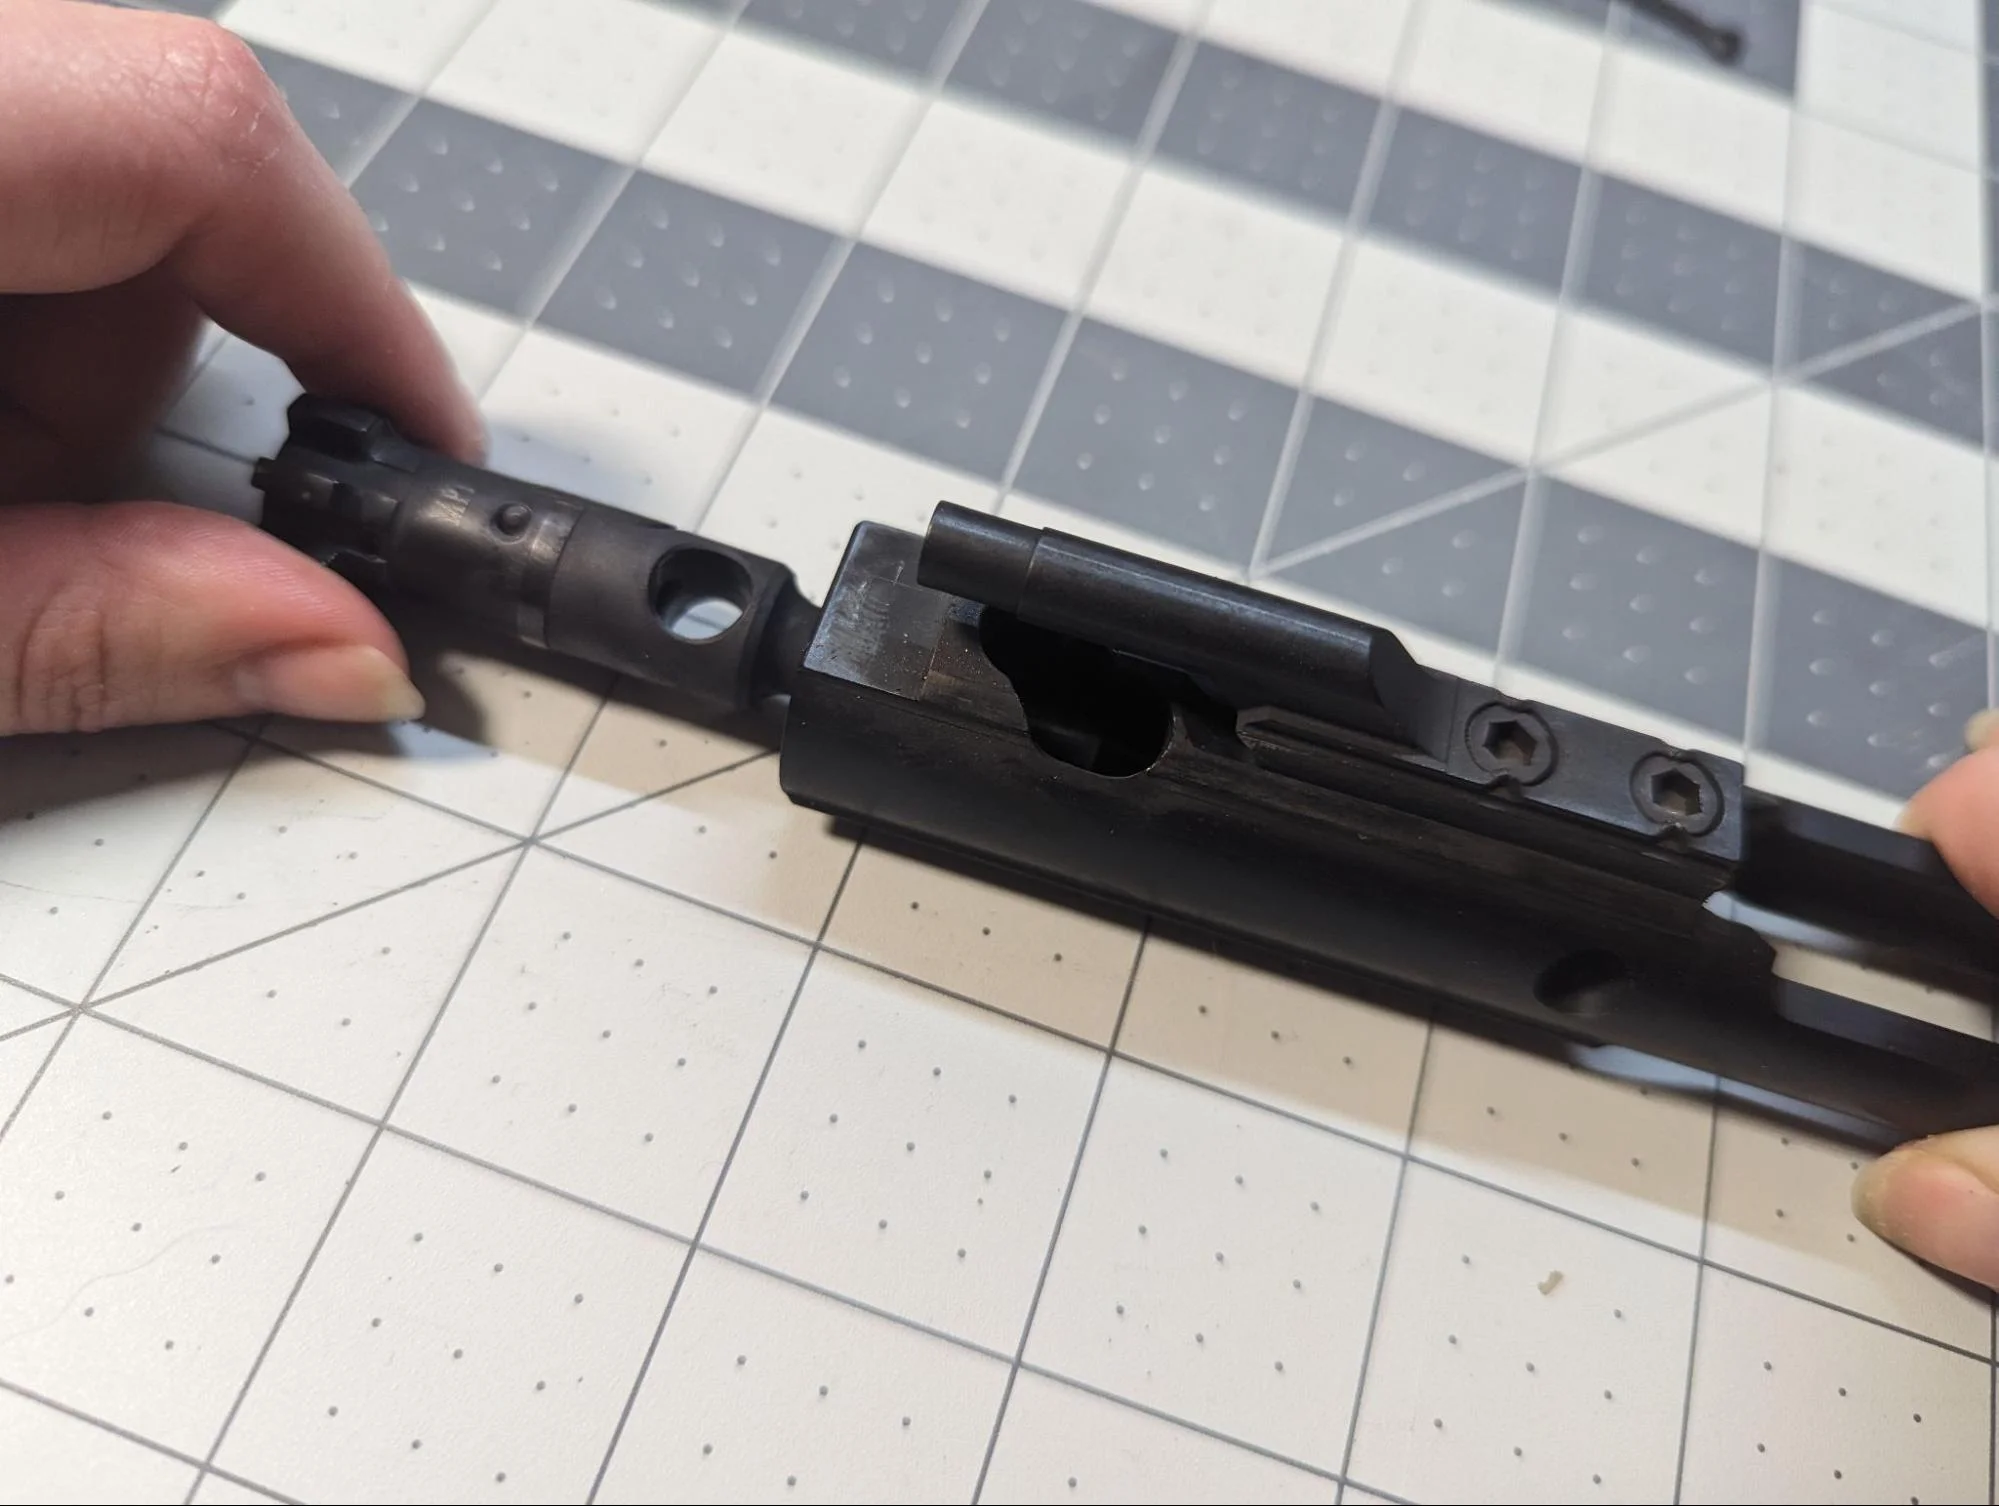
Insert the cam pin through the hole in the bolt carrier, ensuring it passes through the bolt and engages with the cam slot. Rotate the cam pin 90 degrees to secure it in place.
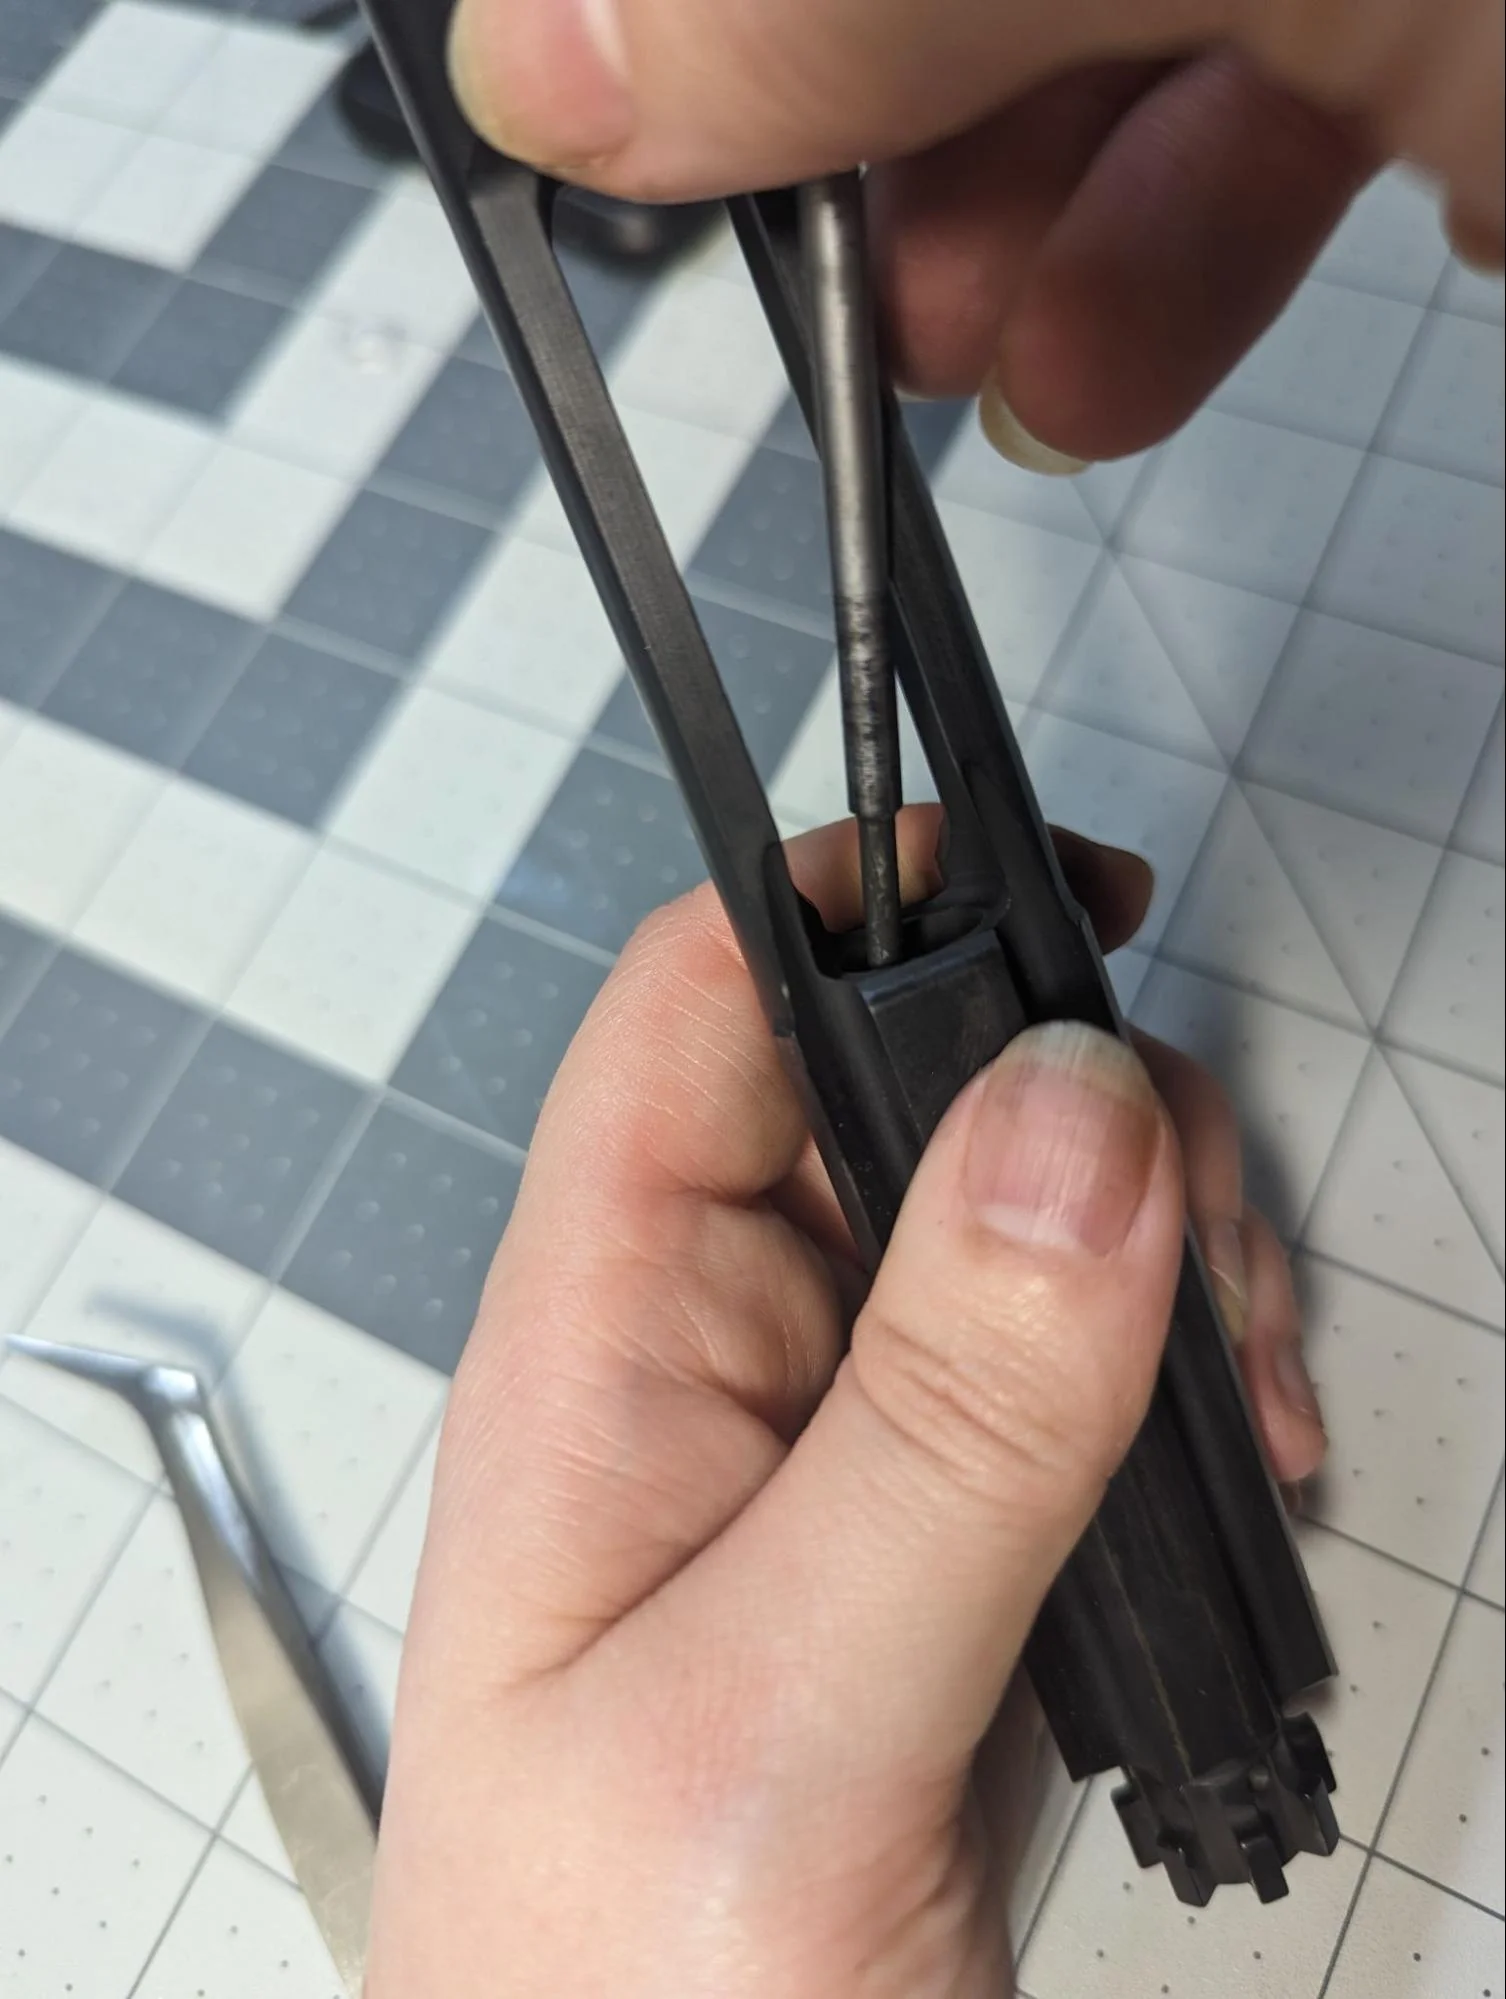
Slide the firing pin into the hole at the rear of the bolt carrier, ensuring it protrudes through the front. Insert the firing pin retaining pin through the hole in the side of the bolt carrier, securing the firing pin in place. Ensure the retaining pin is flush on both sides.
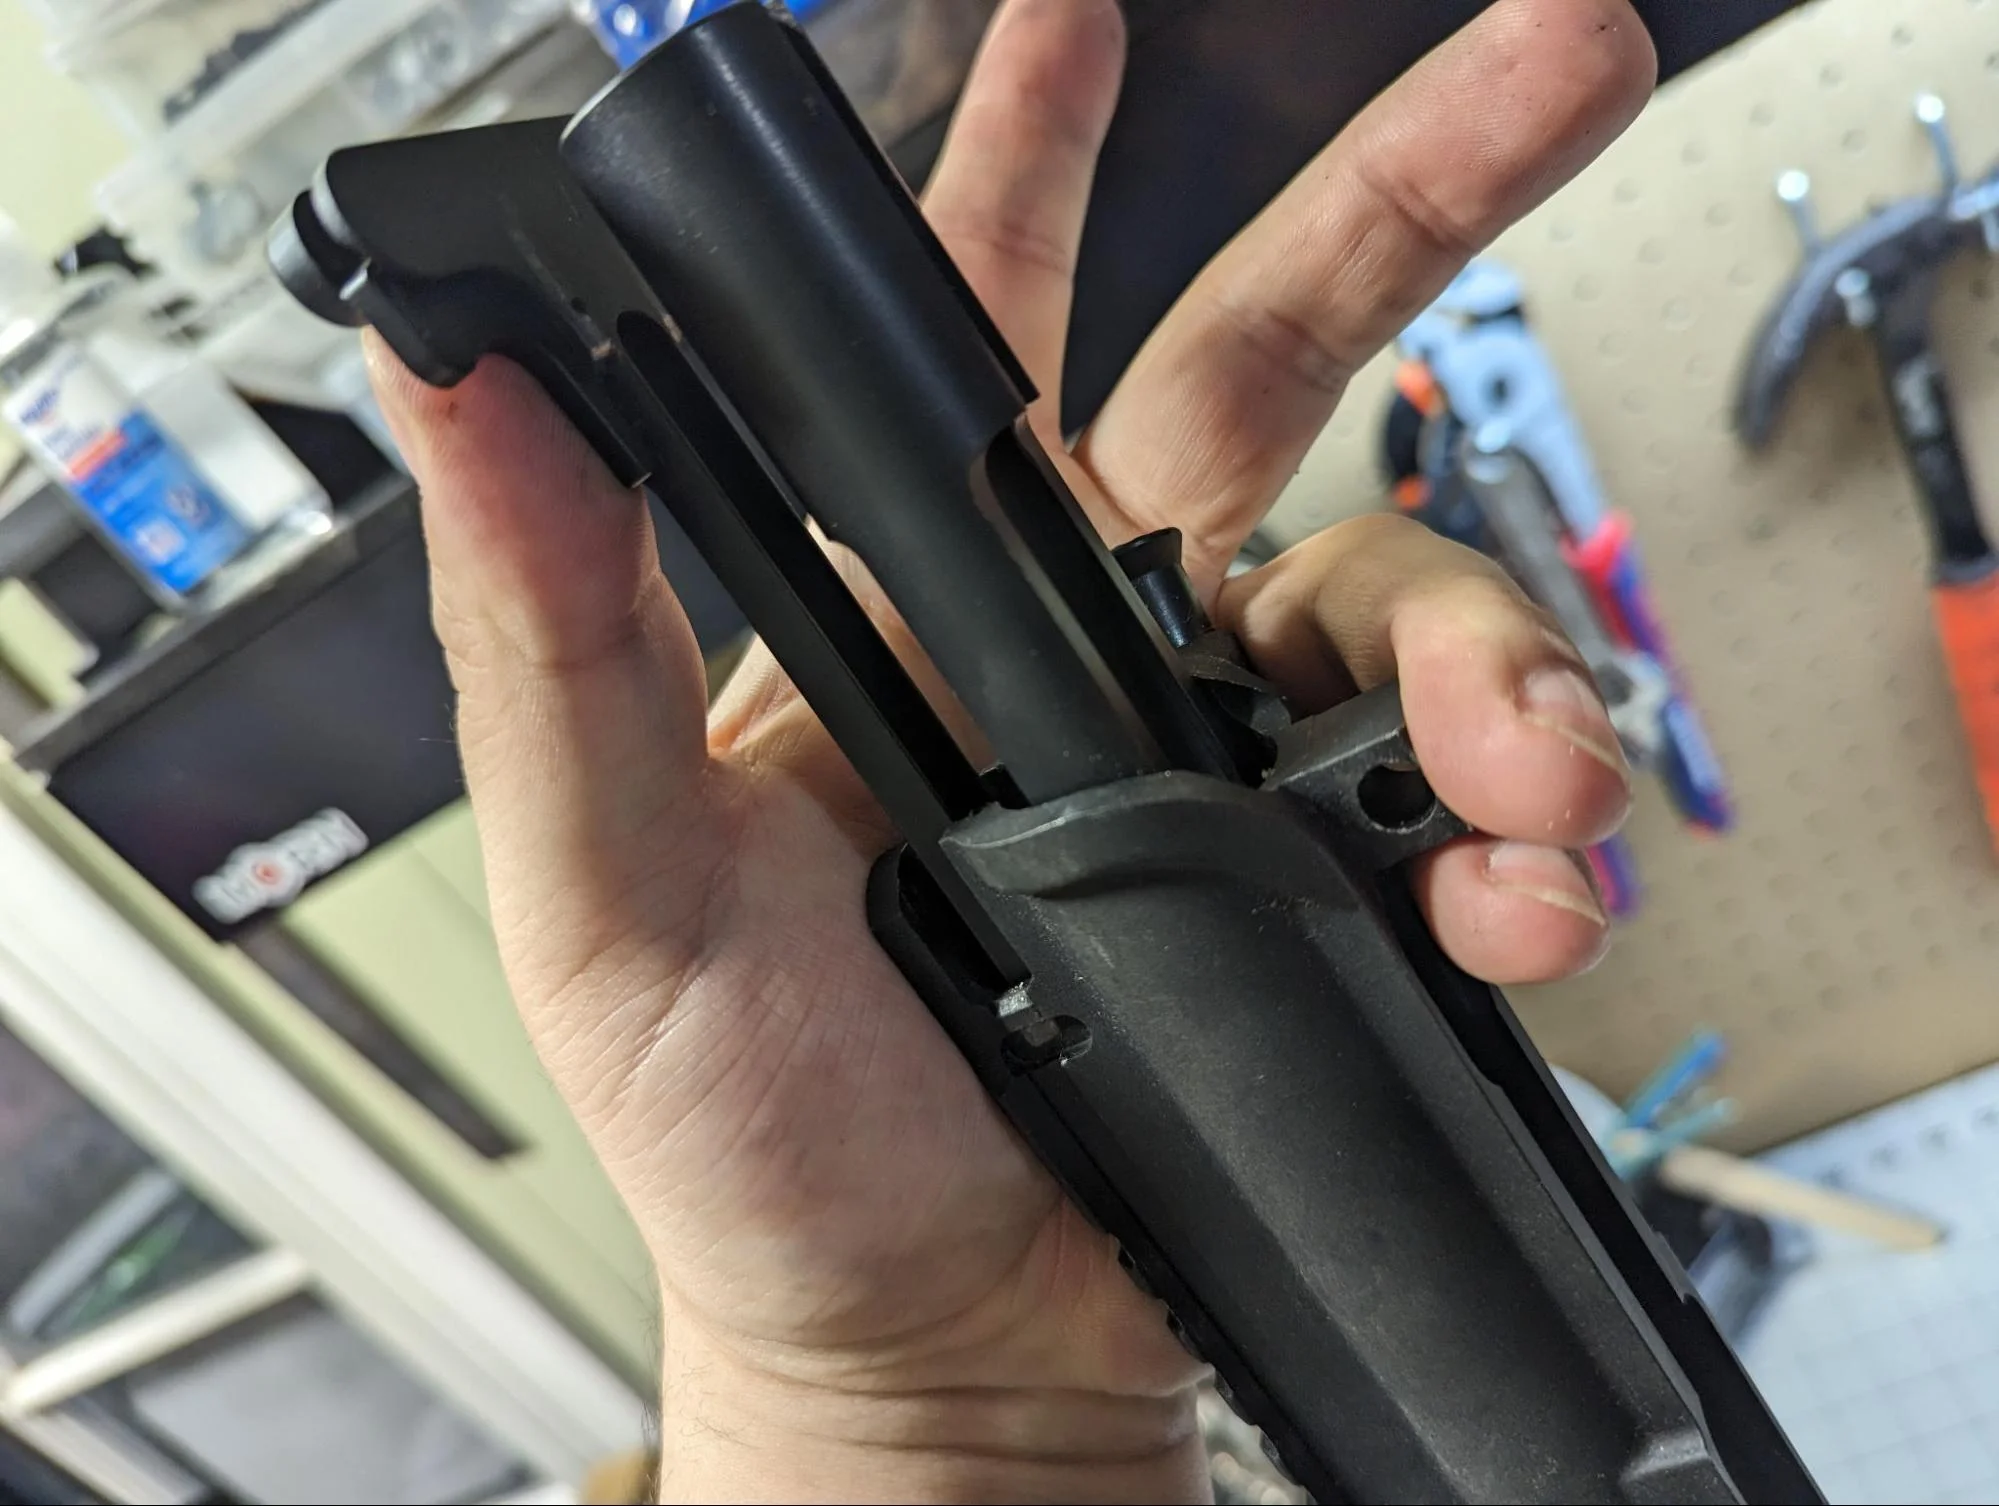
Slide the assembled bolt carrier group into the upper receiver, ensuring the gas key aligns with the gas tube. If your bolt carrier has a removable bolt carrier key, tighten the screws using an appropriate screwdriver or Allen wrench. Ensure they are snug but not overtightened.
Assemble and Install the Charging Handle
Slide the charging handle into the upper receiver’s rear channel, ensuring the groove on the bottom of the charging handle aligns with the channel. Position the charging handle latch on the right side, aligning it with the groove on the charging handle. Ensure the charging handle latch is aligned with the notch in the upper receiver.
Press down on the latch while holding the charging handle in place to compress the spring. Keeping pressure on the latch, slide it into the groove on the charging handle. The latch should engage with the notch in the upper receiver, holding the charging handle in place.
Slide the charging handle into the notch on the rear of the bolt carrier group.
Install the Barrel, Gas Tube, Gas Block, and Handguard
Place the upper receiver in a vise block or upper receiver vise clamp to secure it during assembly.
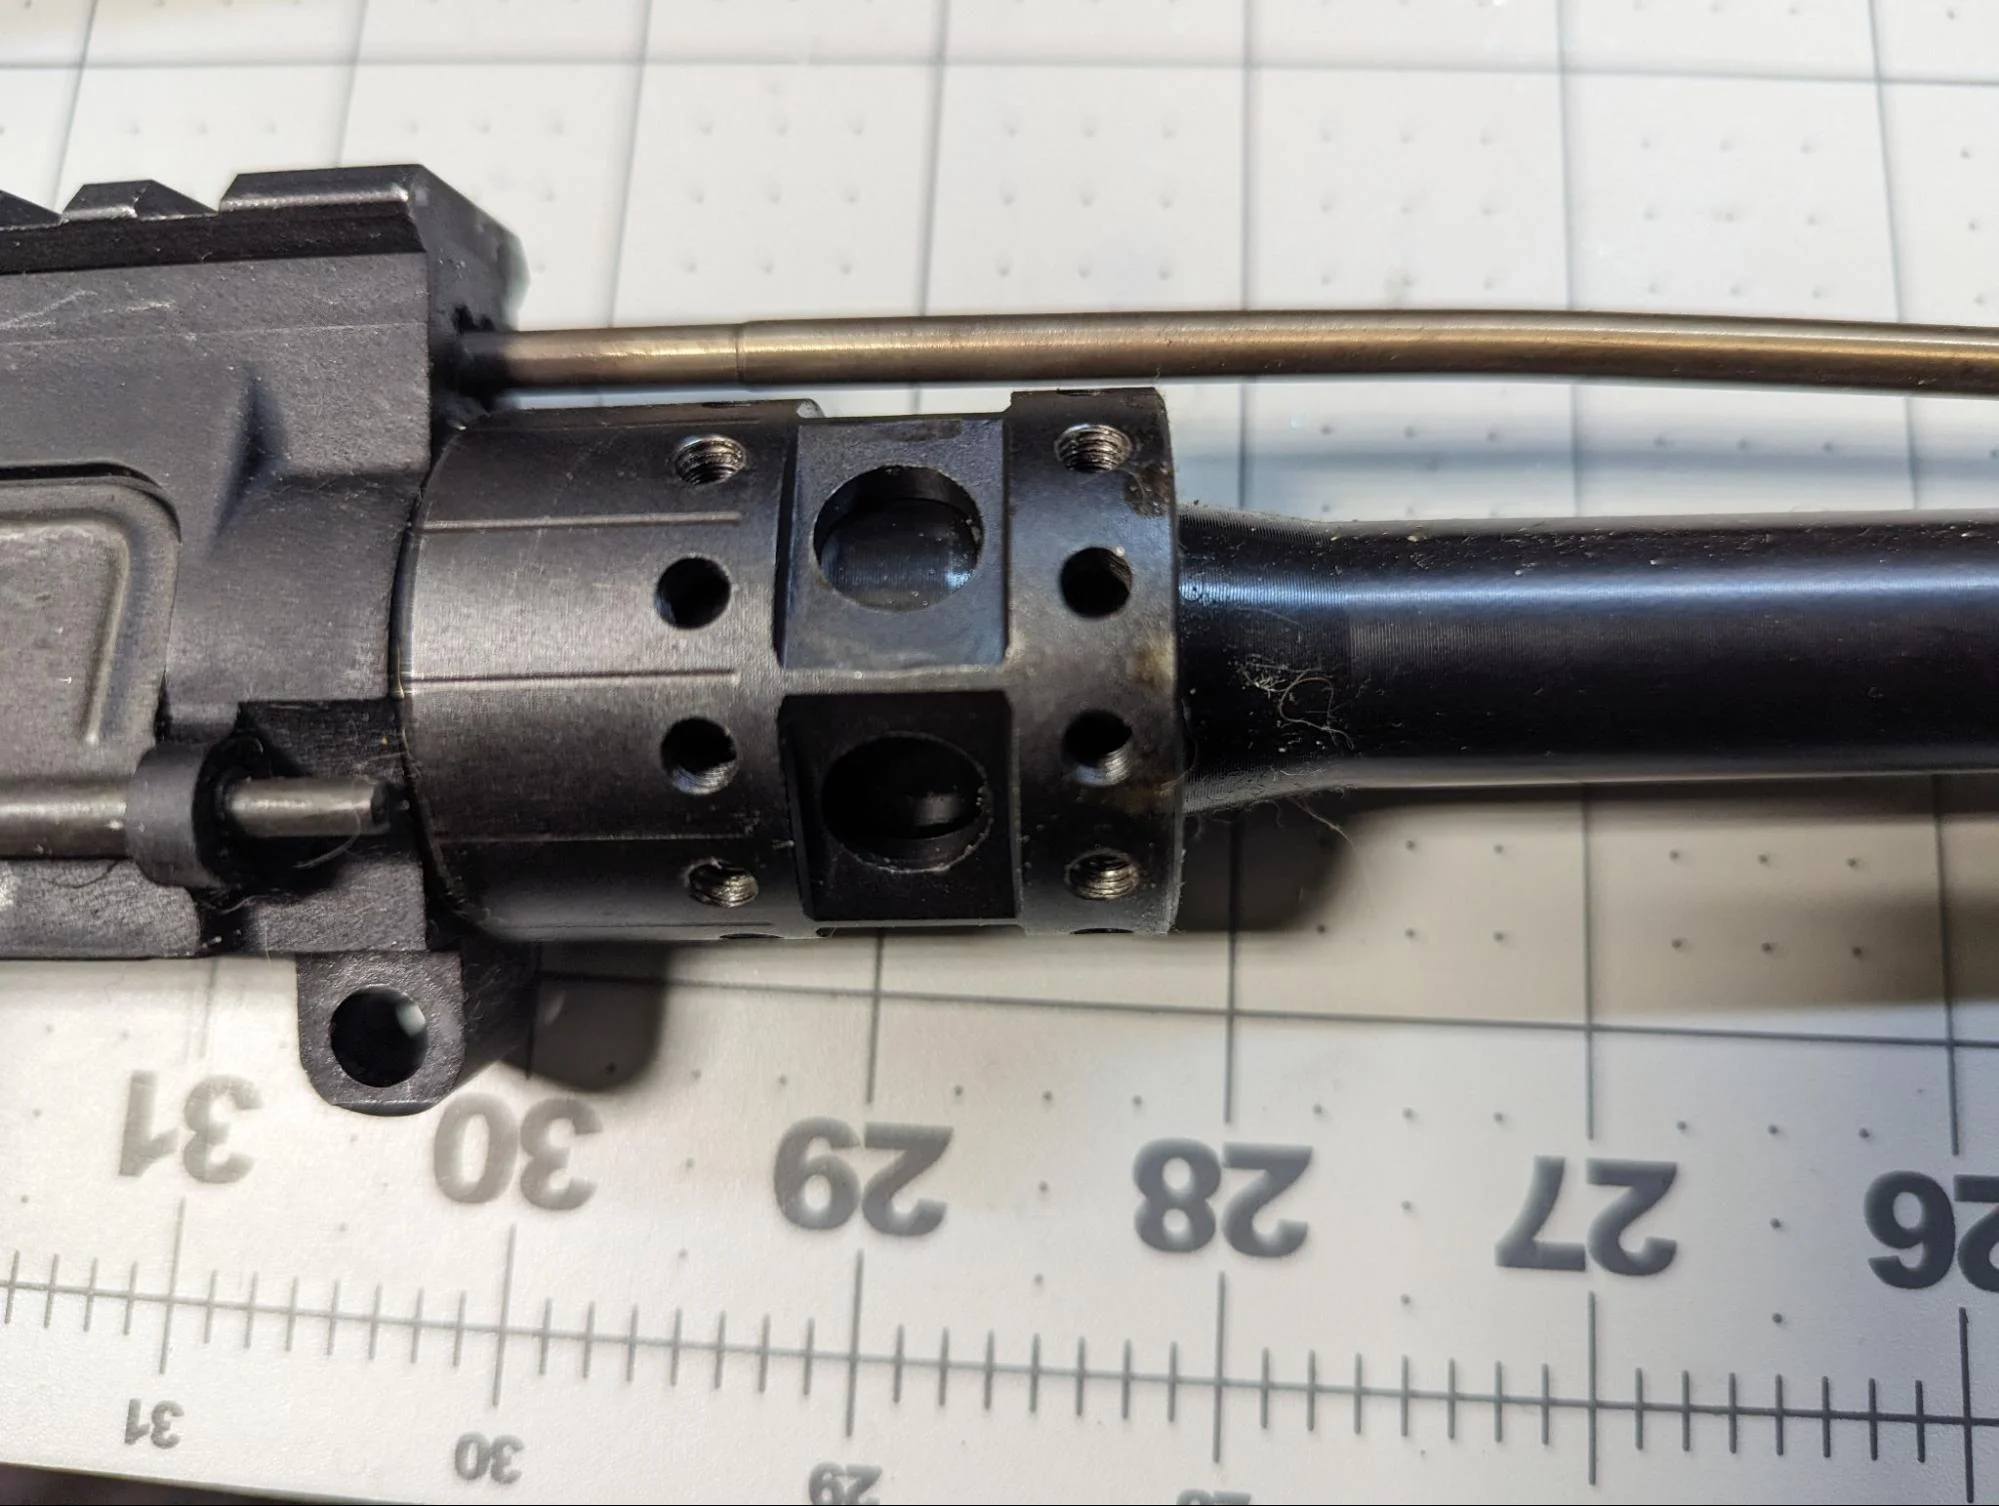
Slide the barrel into the upper receiver, ensuring the barrel extension mates with the corresponding slot in the upper receiver.
Thread the barrel nut onto the upper receiver and use an armorer’s wrench and torque wrench to tighten it to the manufacturer’s specifications. This typically requires a specific amount of torque, so refer to your barrel or receiver instructions.
Insert the gas tube through the gas port in the barrel and into the gas key on the bolt carrier group. Ensure the gas tube is aligned correctly.
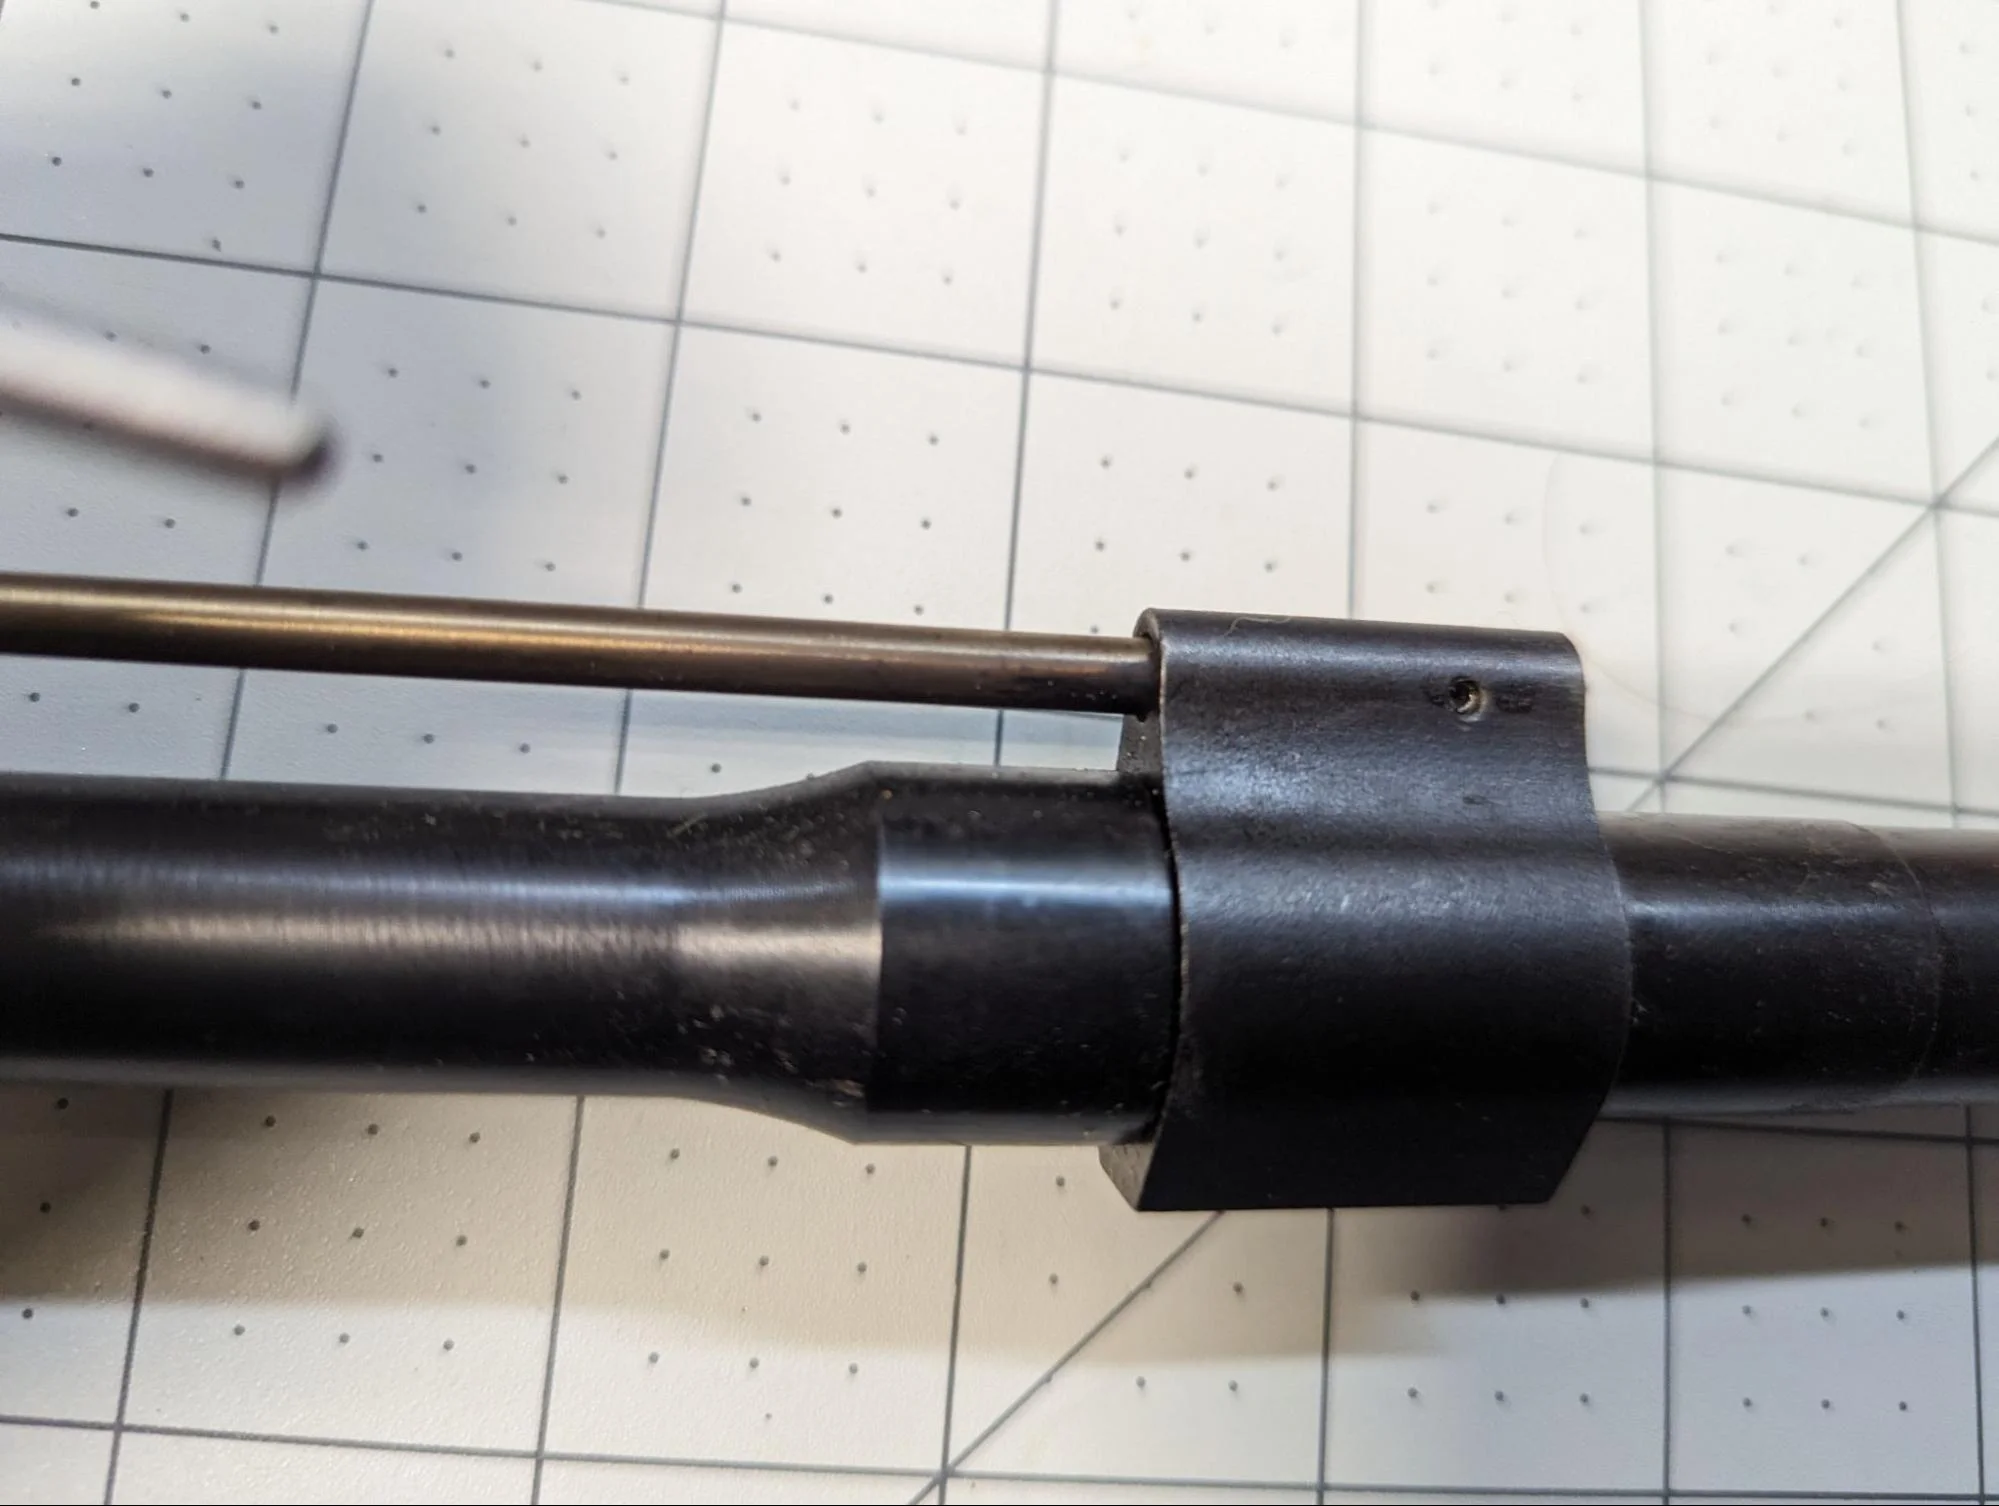
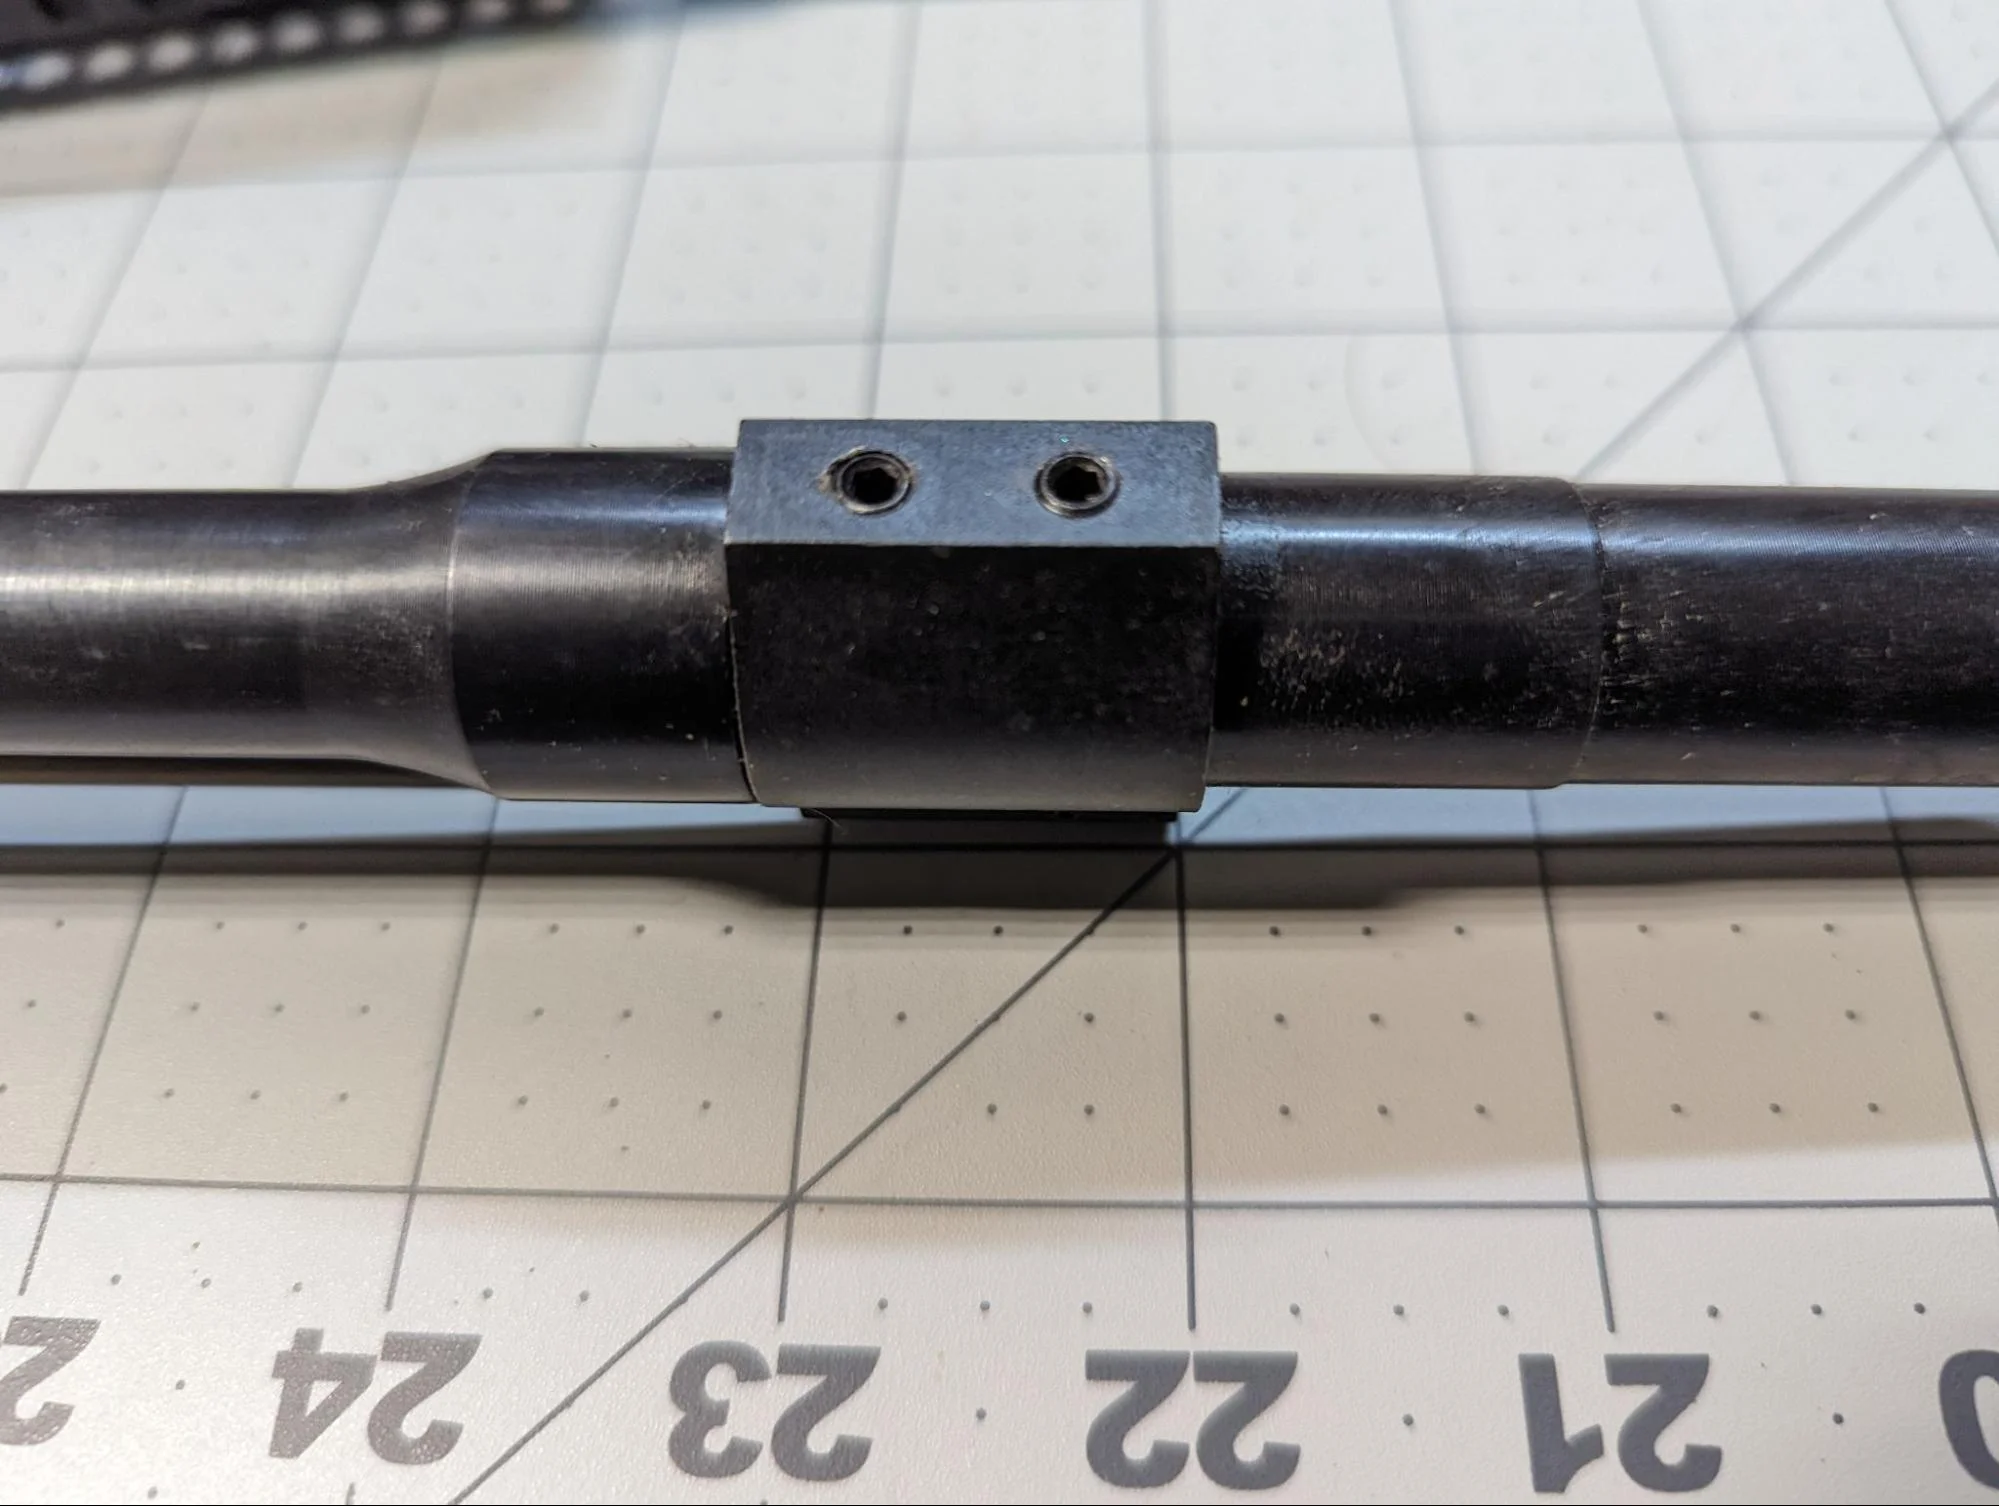
Slide the gas block onto the barrel, ensuring it aligns with the gas port. Secure the gas block in place using screws or pins, tightening them with a screwdriver or roll pin punch. Some gas blocks may require set screws to secure them.
If your gas block uses set screws, tighten them to secure the gas block in place. Be cautious not to overtighten, as it may cause damage.
If your handguard has a separate barrel nut, attach it to the upper receiver using the provided screws or mounting hardware. Slide the handguard over the barrel and onto the barrel nut or the handguard attachment system.
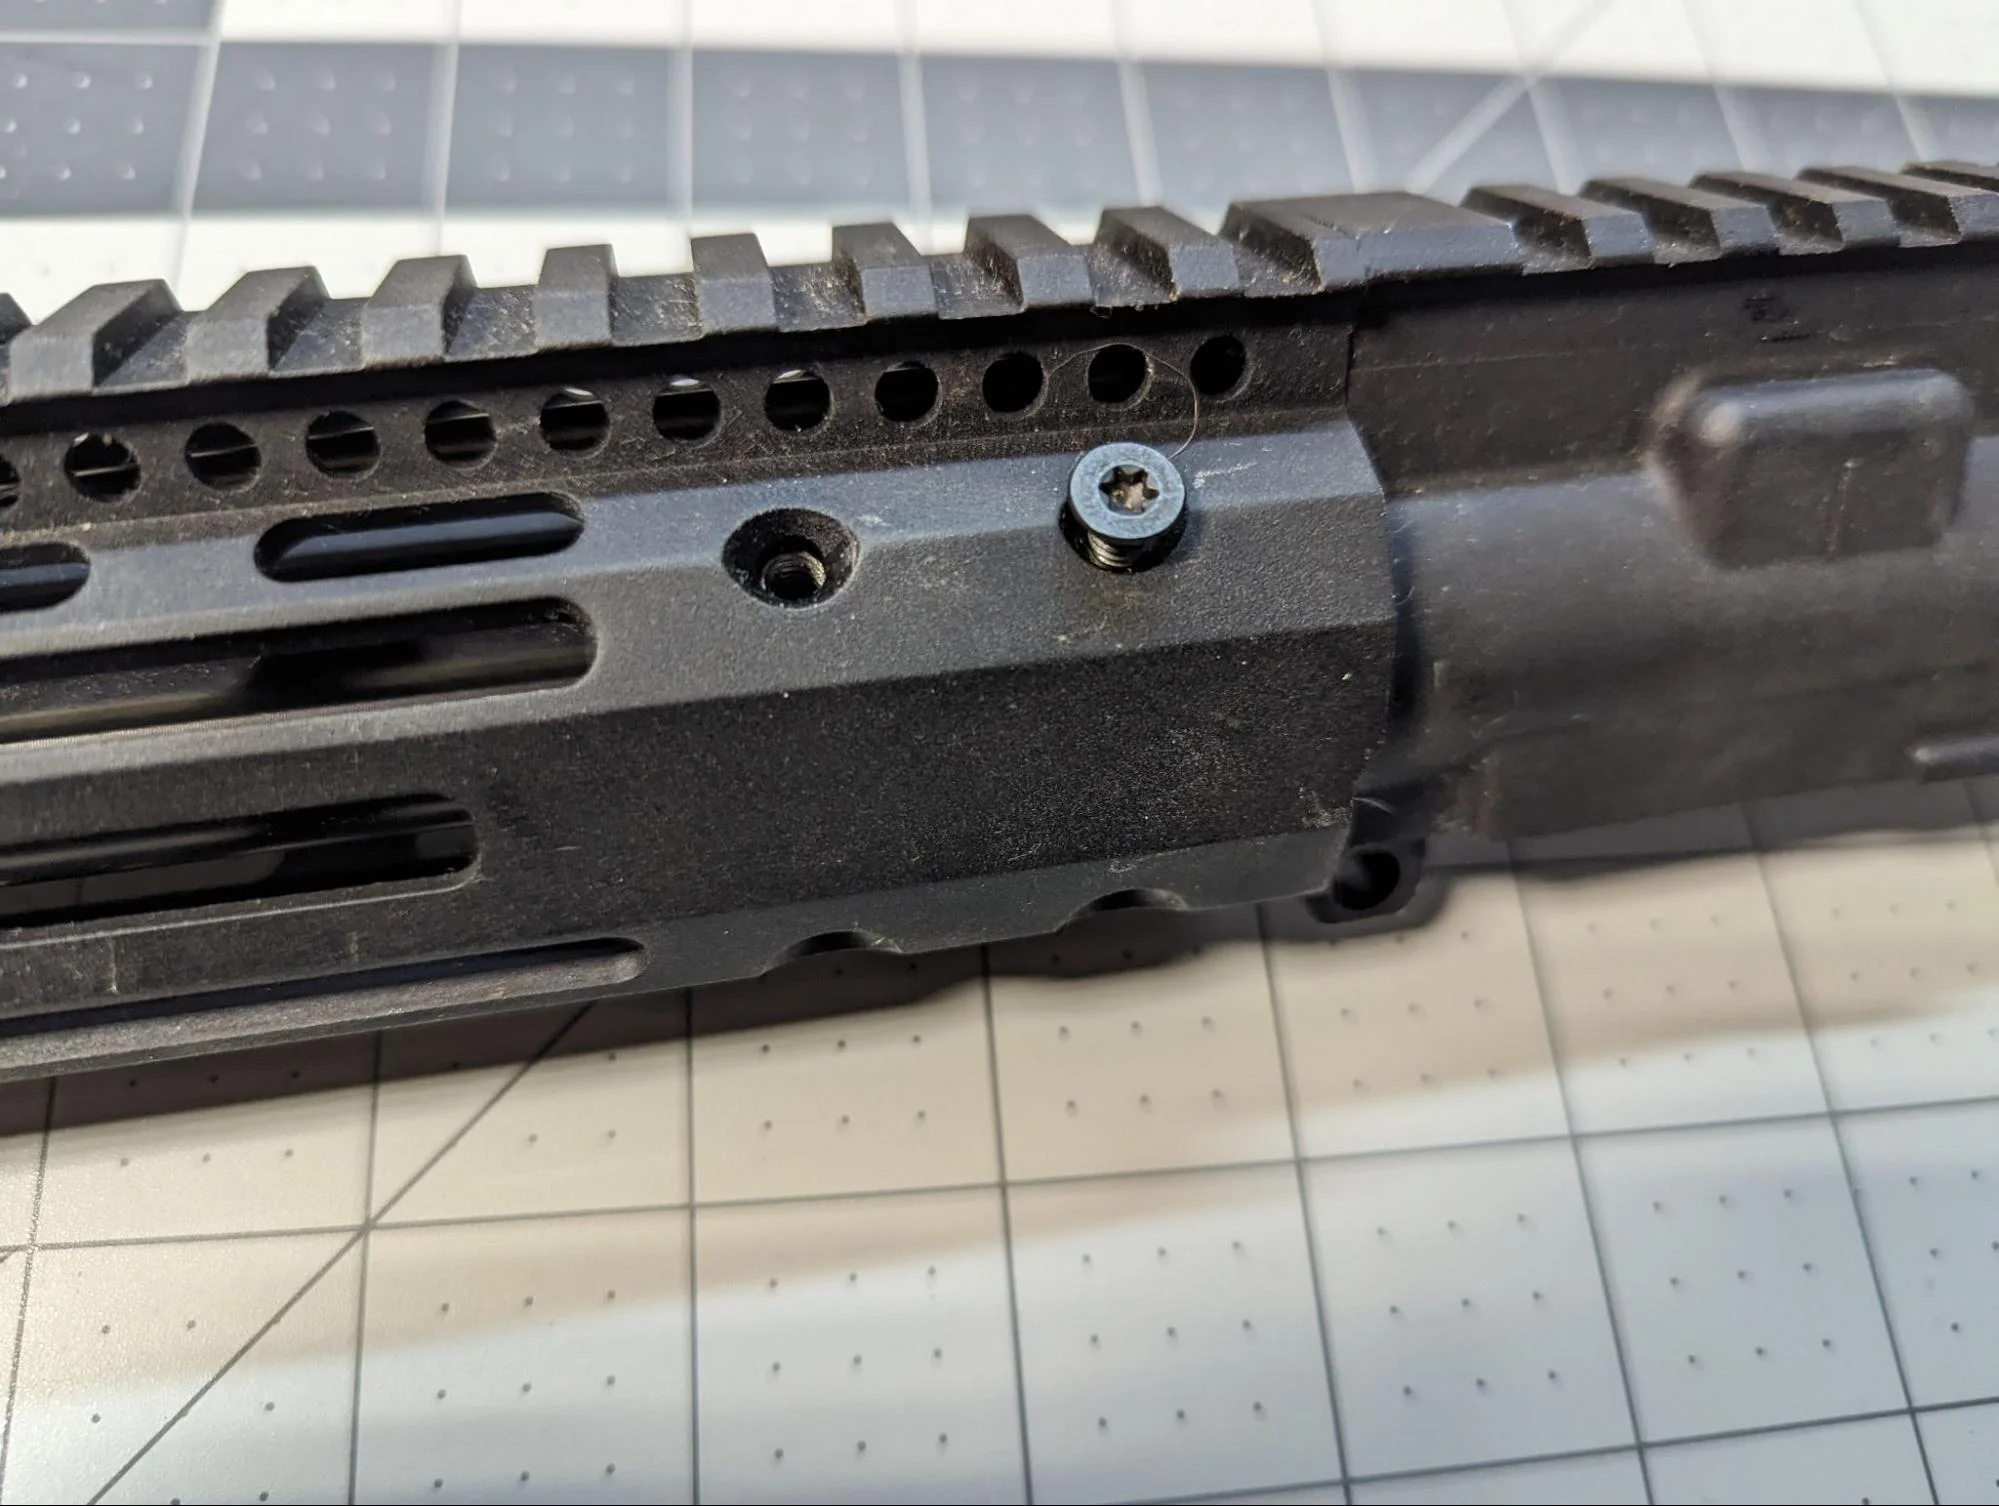
Use the provided screws or mounting hardware to secure the handguard in place. Tighten them according to the manufacturer’s specifications.
Assemble and Install the Rest of the Upper Receiver
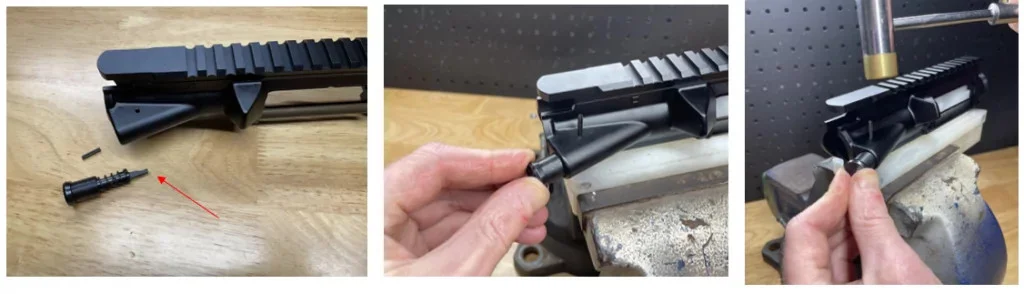
Insert the forward assist into its recess on the right side of the upper receiver, ensuring the splines on the forward assist align with the grooves in the receiver.
On the left side of the receiver, insert the forward assist roll pin using a roll pin punch and a hammer. Ensure the roll pin is flush on both sides.
Place the ejection port cover onto the ejection port. Ensure the hinge pin aligns with the holes in the receiver.
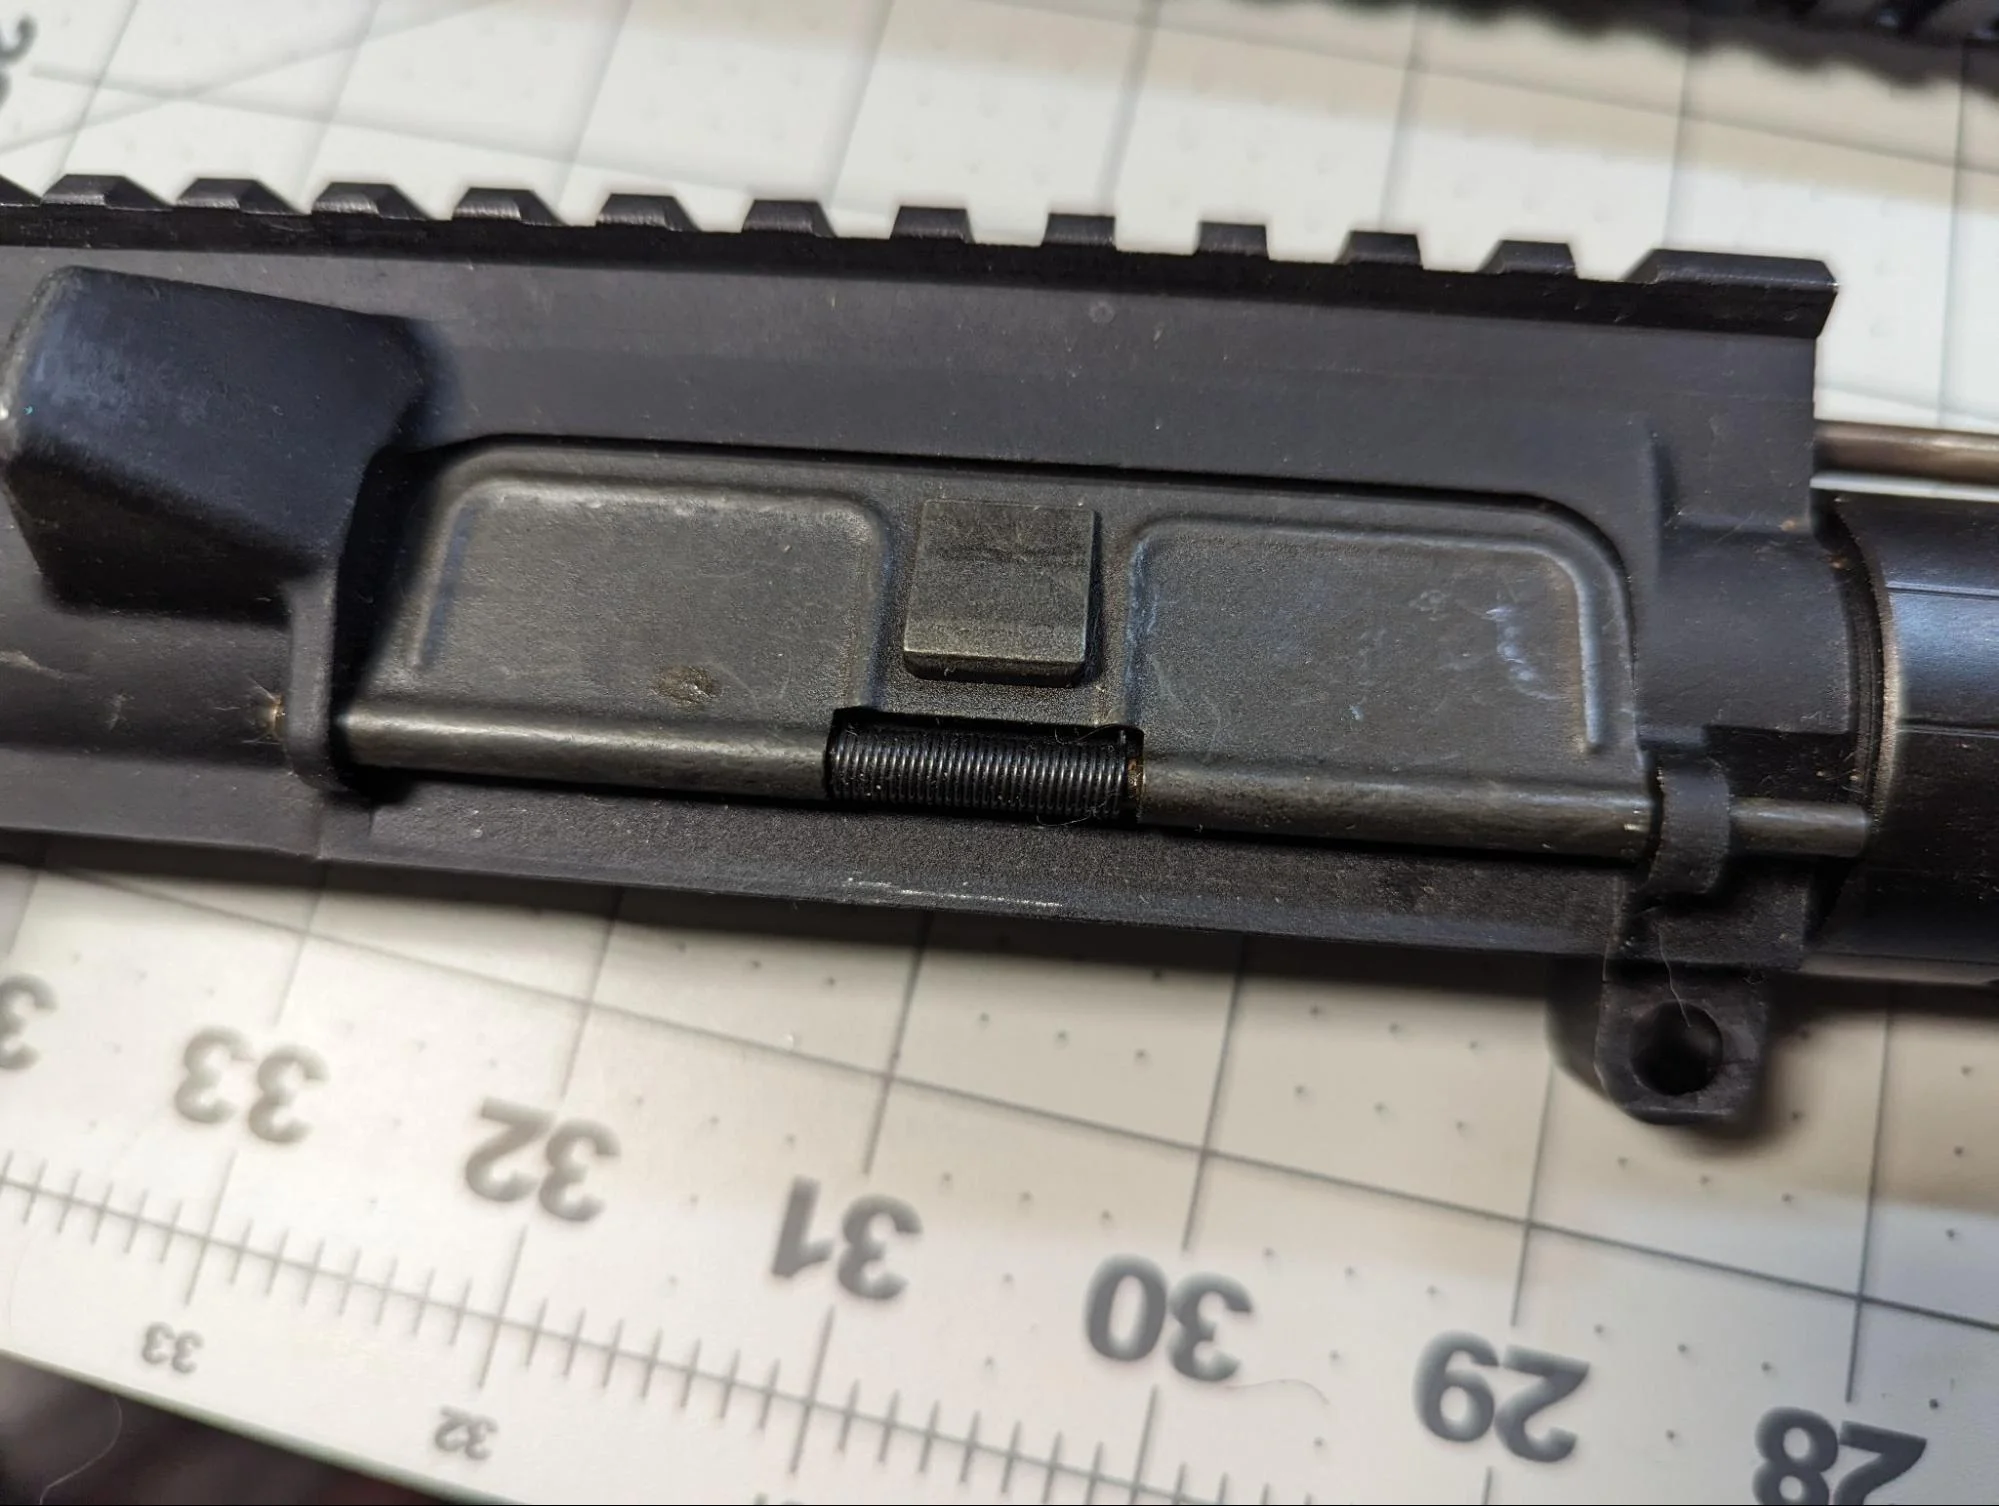
Insert the ejection port cover pin through the holes in the ejection port cover and the receiver. Use a roll pin punch and hammer to secure the pin in place. Ensure it is flush on both sides.
Double-check the tightness of the barrel nut, gas block screws, and handguard screws. Ensure all components are securely fastened.
Other Upgrades To Consider
After assembling your AR-15, the journey doesn’t end there. Upgrading your firearm is the next exciting step, allowing you to enhance its performance, ergonomics, and appearance.
Whether you’re looking to improve accuracy, reduce recoil, or customize the look, a myriad of options await. Here are some considerations to guide your upgrade path:
- Triggers: Elevate shooting precision with top-rated options known for their smooth, light pull and crisp break, essential for enhancing accuracy and speed.
- Stocks: Discover high-quality stocks offering superior ergonomics and stability, crucial for enhanced control and comfort during extended use.
- Charging Handles: Choose top charging handles for easy manipulation and rapid action, improving the overall shooting experience.
- Suppressors: Reduce noise, muzzle blast, and recoil with premier suppressors, making shooting more enjoyable and discreet.
- Lasers: Achieve precise targeting and improved accuracy in low-light conditions, a tactical advantage for any AR-15 setup.
- Magazines: Depend on durable magazines for reliable feeding under any conditions, ensuring peak performance when it matters most.
- LPVOs (Low Power Variable Optics): Opt for LPVOs to gain versatility and clarity, perfect for both close-range engagements and distance targeting with your AR-15.
- Red Dots: Enhance target acquisition speed and accuracy with top red dot sights, ideal for quick, responsive shooting scenarios.
Each upgrade can tailor your AR-15 to better suit your shooting style, preferences, and needs. However, it’s essential to research and select components that complement each other and contribute to your firearm’s intended use, whether for competition, hunting, defense, or recreational shooting.
For a more detailed exploration of each upgrade option, including specific product recommendations and installation tips, check out our comprehensive list of upgrade articles. These guides will help you make informed decisions, ensuring you choose the best possible options for your custom AR-15 build.
FAQs
Is it worth building your own AR-15?
Yes, building your own AR-15 is worth it. It offers a personalized firearm tailored to your preferences, fosters a deeper understanding of its mechanics, and can be cost-effective. The experience is rewarding, providing a sense of accomplishment and a unique connection to your firearm.
What is the average price of an AR-15 build?
The average price of an AR-15 build can vary widely, ranging from $500 to $2,000 or more. It depends on factors like the quality of components, chosen accessories, and whether you’re aiming for a budget-friendly build or a high-end, customized rifle.
How long does it take to build an AR-15 from scratch?
Building an AR-15 typically takes a few hours to a full day. The timeframe depends on your familiarity with the process, the complexity of the build, and the number of customizations. Beginners might take longer, while experienced builders can complete it quicker.
Is it cheaper to build an AR-15 from scratch?
Building an AR-15 from scratch can be cheaper than buying pre-assembled, offering cost savings through tailored component selection and the opportunity to capitalize on deals. However, savings depend on your choice of parts, market conditions, and whether you already possess the necessary tools and skills.
Conclusion
Building your own AR-15 is a rewarding and empowering experience, allowing you to tailor the firearm to your preferences and needs.
We’ve covered the step-by-step process from choosing the type of AR-15 to assembling the lower and upper receivers, installing critical components, and adding personal accessories.
As you embark on this DIY adventure, remember that each step requires careful attention and precision. Whether you’re a seasoned enthusiast or a first-time builder, the satisfaction of assembling your custom AR-15 is unparalleled.
Now, share your thoughts, experiences, and any tips you may have in the comments below!